Aller au contenu principal
Disassembling Rival 16131 Toaster Shell

Disassembling Rival 16131 Toaster Shell

Naomi Willis

Naomi Willis et 13 autres contributeurs

Dernière mise à jour le April 25, 2024

5 minutes
Facile
Nécessite plus d'images

Toasters are categorized as heating appliances. Their function is to develop sufficient heat to heat and toast a slice of bread. Breakfast certainly wouldn't be the same without the toasters.

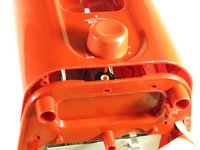
To inspect, repair or replace any internal parts, including the heating elements, you will need to disassemble the toaster.

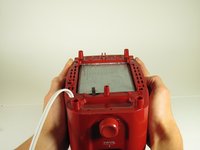
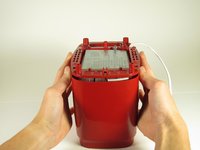
Here is a complete guide with a detailed description, steps and pictures to facilitate you on how to disassemble the Rival 16131 Toaster Shell.

Ce dont vous avez besoin

iFixit touche une commission lorsque vous achetez par l'intermédiaire de ces liens.
  1. Disassembling Rival 16131 Toaster Shell, Shell: étape 1, image 1 de 2 Disassembling Rival 16131 Toaster Shell, Shell: étape 1, image 2 de 2
    • Make sure the toaster is unplugged before dissembling.

    • Turn the toaster over and remove the rubber bumper feet.

  2. Disassembling Rival 16131 Toaster Shell: étape 2, image 1 de 2 Disassembling Rival 16131 Toaster Shell: étape 2, image 2 de 2
    • Use a Phillips #2 screwdriver to remove four 12 mm screws at the base of the toaster shell.

  3. Disassembling Rival 16131 Toaster Shell: étape 3, image 1 de 3 Disassembling Rival 16131 Toaster Shell: étape 3, image 2 de 3 Disassembling Rival 16131 Toaster Shell: étape 3, image 3 de 3
    • With the dial facing you, push the toaster base up and away until the base is just over the lip of the shell. This will disconnect the browning dial from the rest of the toaster.

    • When reassembling the toaster, make sure that the back of the dial lines up with the slot, both in position and orientation (the dial and slot are not perfect circles - they have a notch).

    • The only object holding the shell onto the toaster now is the grey part of the lever.

  4. Disassembling Rival 16131 Toaster Shell: étape 4, image 1 de 1
    • Reach into the shell and grab the back white part of the lever.

    • Hold the grey lever with both your index finger and middle finger. Next, pull it.

    • Pulling too hard will break the mechanism that holds the grey handle onto the white lever.

    • Remove the shell.

Conclusion

To reassemble your device, follow these instructions in reverse order.

9 autres ont terminé cette réparation.

Naomi Willis

Membre depuis le 09/26/12

80 Réputation

1 tutoriel rédigé

Équipe

Cal Poly, Team 2-8, Propen Fall 2012 Membre de l'équipe Cal Poly, Team 2-8, Propen Fall 2012

CPSU-PROPEN-F12S2G8

5 membres

6 tutoriels rédigés

0 commentaires de tutoriel

Ajouter un commentaire

Nombre de vues :

Dernières 24 heures : 0

7 derniers jours : 1

30 derniers jours : 14

Total : 3,998