
EVGA x17 Disassembly and Cleaning
35 minutes - 1 heure
Modérée
Nécessite plus d'images
Introduction
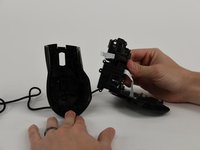
Passez à l'étape 1This guide contains steps to clean and disassemble the EVGA x17 gaming mouse. To ensure easy and simple repairs follow this guide to assist in disassembling of the mouse and proper careful cleaning to eliminate troubleshooting caused by dirt and debris.
Ce dont vous avez besoin


Presque terminé !
To reassemble your device, follow these instructions in reverse order.
Conclusion
To reassemble your device, follow these instructions in reverse order.
Équipe

University of Colorado Denver, Team 1-4, Campeau Fall 2023 Membre de l'équipe University of Colorado Denver, Team 1-4, Campeau Fall 2023
UCDENVER-CAMPEAU-F23S1G4
7 membres
6 tutoriels rédigés