
GoPro Hero3+ Black Edition LCD Display Replacement
Introduction
Passez à l'étape 1Is your LCD cracked or not working properly? Use this guide to help replace it, and return your GoPro to tip top shape!
Ce dont vous avez besoin
Pièces


Outils


Afficher plus…
-
-
Pull the tab on the back of the device to release the back cover. It should come right off.
-
-
-
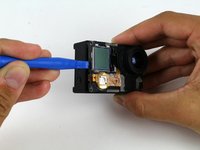
Using a plastic opening tool, pry the gray, front face plate until it can be removed from the housing.
-
-
-
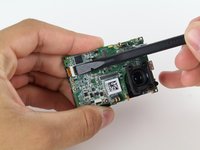
Using your screwdriver, remove the four 8.1mm PH00 screws securing the motherboard to the black housing unit and set them aside.
-
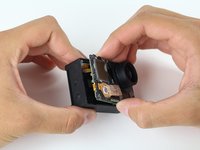
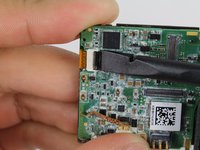
Use the plastic opening tool to help pry the motherboard/midframe up from the main housing. Once you can get a hold of the edge, simply pull the internal components up and out!
-
-
-
-
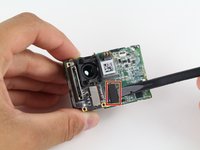
Using your screwdriver, remove the three 4mm PH00 screws that hold down the metal plate.
-
-
-
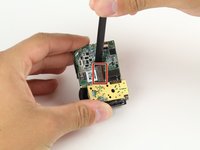
Using your trusty screwdriver, remove the single 3.2mm PH00 screw connecting the motherboard to the midframe.
-
-
-
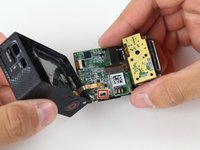
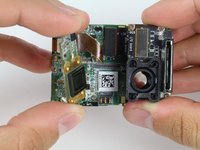
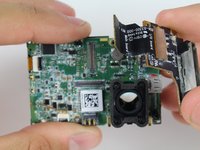
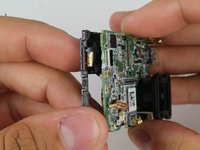
Now that you have removed the plastic midframe from the motherboard, nothing is standing in the way of the LCD!
-
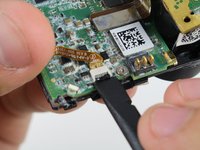
Carefully remove the ribbon cable from the midframe. It is attached with glue, so a spudger tool (or a heat gun if it's stubborn) will be needed.
-


To reassemble your device, follow these instructions in reverse order.
To reassemble your device, follow these instructions in reverse order.
Annulation : je n'ai pas terminé ce tutoriel.
5 autres ont terminé cette réparation.
Équipe

Cal Poly, Team 6-15, Maness Spring 2015 Membre de l'équipe Cal Poly, Team 6-15, Maness Spring 2015
CPSU-MANESS-S15S6G15
4 membres
13 tutoriels rédigés
7 commentaires
Where did you buy the replacement from?
I got my one from AliExpress (https://www.aliexpress.com/store/product...).
Merci beaucoup, trés utile pour les pilotes de drones fpv!
Thanks a lot, very helpfull for drone racers!
Thanks for this! I will just add that there is no need to take off the image sensor and the microSD board. You can simply skip from Step 6 to Step 13 without removing the motherboard. I wasted a lot of effort and almost broke my GoPro doing Steps 6-13.