Aller au contenu principal

HP Compaq nc6400 RAM Replacement

Ce dont vous avez besoin

  1. HP Compaq nc6400 RAM Replacement, Battery: étape 1, image 1 de 1
    • Turn off and unplug laptop.

  2. HP Compaq nc6400 RAM Replacement: étape 2, image 1 de 1
    • Locate the battery lock below the battery labeled one.

    • Slide the lock all the way to the left to release the left lock of the battery.

  3. HP Compaq nc6400 RAM Replacement: étape 3, image 1 de 1
    • Locate the lock labeled two at the bottom right corner below the battery.

    • Slide and hold the lock to the left.

  4. HP Compaq nc6400 RAM Replacement: étape 4, image 1 de 1
    • Once both the battery locks are unlocked, slide the battery out to remove.

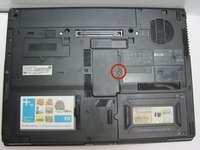
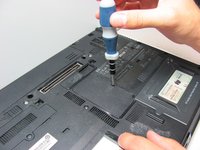
  5. HP Compaq nc6400 RAM Replacement, RAM: étape 5, image 1 de 2 HP Compaq nc6400 RAM Replacement, RAM: étape 5, image 2 de 2
    • Remove the 1.2 Philips #1 screw holding down the RAM cover to the body.

  6. HP Compaq nc6400 RAM Replacement: étape 6, image 1 de 1
    • Once the screw is removed, use a spudger to pry open the case covering the RAM chip.

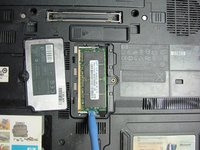
  7. HP Compaq nc6400 RAM Replacement: étape 7, image 1 de 2 HP Compaq nc6400 RAM Replacement: étape 7, image 2 de 2
    • Use a plastic opening tool to pull back the white clip holding the RAM chip in place.

    • Once the plastic opening tool has disengaged the clip from the RAM chip, keep the plastic opening tool locked into place.

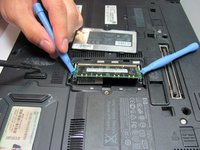
  8. HP Compaq nc6400 RAM Replacement: étape 8, image 1 de 1
    • With a second plastic opening tool,repeat the above process

    • After both plastic opening tools have been locked in place, the RAM chip should pop out about 1/4 of a inch.

  9. HP Compaq nc6400 RAM Replacement: étape 9, image 1 de 2 HP Compaq nc6400 RAM Replacement: étape 9, image 2 de 2
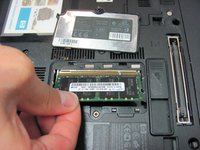
    • The RAM chip is susceptible to static electricity. Before grabbing the RAM chip, make sure you have discharged the electricity from your hands by touching a metal surface other than your computer.

    • Grab the RAM chip with your thumb and index finger

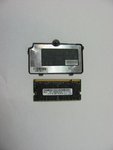
    • Carefully pull the RAM chip out

Conclusion

To reassemble your device, follow these instructions in reverse order.

5 autres ont terminé cette réparation.

Luis Vazquez

Membre depuis le 09/24/13

401 Réputation

2 tutoriels rédigés

Équipe

Cal Poly, Team 14-6, Forte Fall 2013 Membre de l'équipe Cal Poly, Team 14-6, Forte Fall 2013

CPSU-FORTE-F13S14G6

5 membres

5 tutoriels rédigés

0 commentaires

Ajouter un commentaire

Nombre de vues :

Dernières 24 heures : 1

7 derniers jours : 5

30 derniers jours : 13

Total : 4,240