Aller au contenu principal
HP ProBook 450 G4 Disk Drive Replacement

HP ProBook 450 G4 Disk Drive Replacement

Sebastian Dow

Sebastian Dow et 2 autres contributeurs

Dernière mise à jour le April 8, 2023

5 - 10 minutes
Modérée

If your HP ProBook 450 G4 is no longer able to play audio or video from a disk or if the video quality is poor, this indicates that there is a problem with your disk drive. This issue becomes more prevalent as your laptop ages and depending on how often you use your disk drive. We recommend replacing the disk drive to solve these issues. This guide is designed to help you safely and properly remove your laptop’s disk drive in an easy to follow way. Before beginning, make sure to power off your laptop and disconnect it from all power sources.

Ce dont vous avez besoin

Outils

  • Phillips #0 Screwdriver
    Phillips #0 Screwdriver
  • Spudger
    Spudger

Afficher plus…

  1. HP ProBook 450 G4 Disk Drive Replacement, Disk Drive: étape 1, image 1 de 2 HP ProBook 450 G4 Disk Drive Replacement, Disk Drive: étape 1, image 2 de 2
    • Power your laptop off.

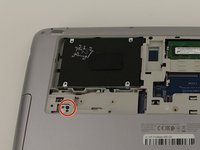
    • Flip the laptop over.

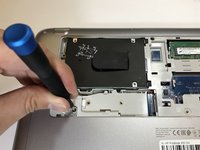
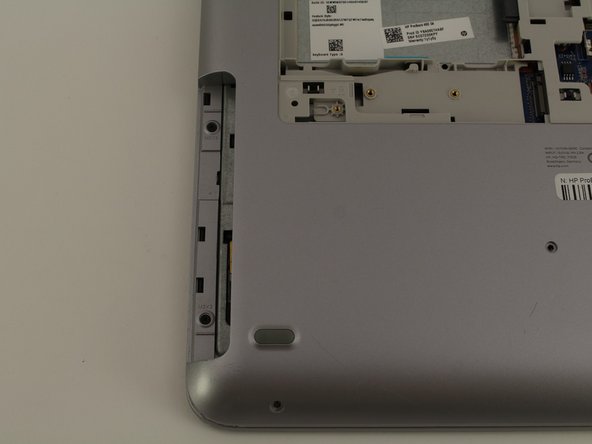
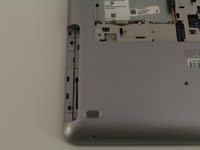
    • Orient the laptop so the two vents on the bottom face upward and are further away from you.

  2. HP ProBook 450 G4 Disk Drive Replacement: étape 2, image 1 de 3 HP ProBook 450 G4 Disk Drive Replacement: étape 2, image 2 de 3 HP ProBook 450 G4 Disk Drive Replacement: étape 2, image 3 de 3
    • Use the Phillips #0 screwdriver to remove the 6.8 mm screw that secures the vent panel to the laptop.

    • Use the spudger to separate the vent panel from the laptop.

    • Slide the vent panel off the backside of the laptop.

  3. HP ProBook 450 G4 Disk Drive Replacement: étape 3, image 1 de 2 HP ProBook 450 G4 Disk Drive Replacement: étape 3, image 2 de 2
    • Use the Phillips #0 screwdriver to remove the black 3.2mm screw that secures the disk drive to the left side of the laptop.

  4. HP ProBook 450 G4 Disk Drive Replacement: étape 4, image 1 de 2 HP ProBook 450 G4 Disk Drive Replacement: étape 4, image 2 de 2
    • Use the spudger to push the disk drive out of the laptop.

Conclusion

To reassemble your device, follow these instructions in reverse order.

Sebastian Dow

Membre depuis le 01/23/20

1 043 Réputation

6 tutoriels rédigés

Équipe

Cal Poly, Team S1-G3, White Winter 2020 Membre de l'équipe Cal Poly, Team S1-G3, White Winter 2020

CPSU-WHITE-W20S1G3

4 membres

18 tutoriels rédigés

0 commentaires de tutoriel

Ajouter un commentaire

Nombre de vues :

Dernières 24 heures : 0

7 derniers jours : 2

30 derniers jours : 23

Total : 640