
HTC Vive Controller Daughterboard Replacement
Introduction
Passez à l'étape 1The HTC Vive controller trackpad may be faulty from extended or rough use and not detecting your fingers properly. The daughterboard interprets trackpad input and is solely dedicated to the trackpad's function. Minimize surface contact with the daughterboard's circuits. This guide will show you how to replace the trackpad daughterboard.
Ce dont vous avez besoin


-
-
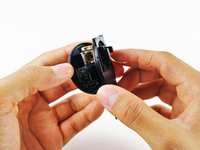
Turn over the Vive controller so that the bottom saucer is facing up.
-
Use the T5 Torx screwdriver to remove three black 21mm screws from the bottom saucer.
-
-
-
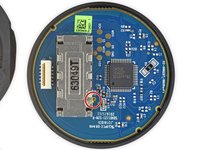
Use the T5 Torx screwdriver to remove the two black 5.2mm screws on the back gray panel.
-
-
-
-
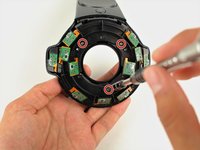
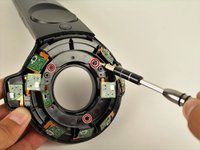
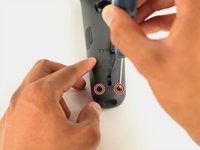
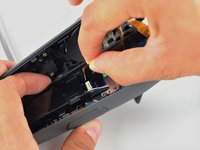
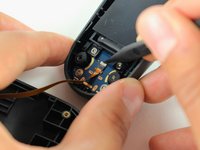
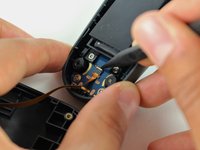
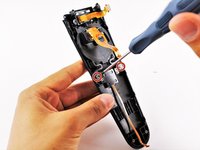
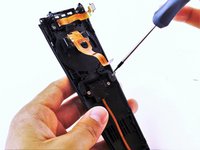
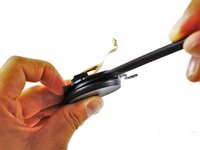
Use the T5 Torx head screwdriver to remove the two silver 4.2mm screws from the rear portion of the trackpad.
-
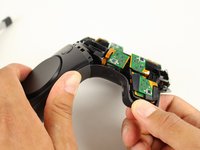
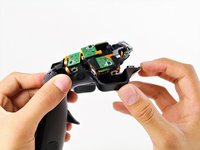
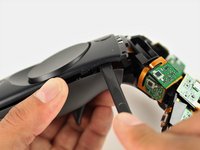
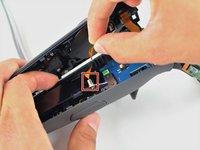
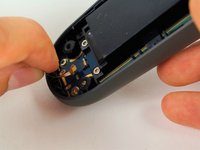
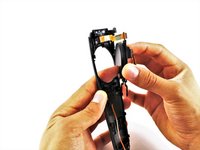
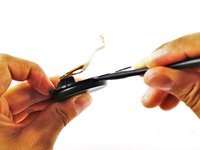
Lift the trackpad up and out of the panel using your hand.
-


To reassemble your device, follow these instructions in reverse order.
To reassemble your device, follow these instructions in reverse order.
Annulation : je n'ai pas terminé ce tutoriel.
14 autres ont terminé cette réparation.
Équipe

Cal Poly, Team S15-G5, Livingston Fall 2017 Membre de l'équipe Cal Poly, Team S15-G5, Livingston Fall 2017
CPSU-LIVINGSTON-F17S15G5
4 membres
51 tutoriels rédigés
4 commentaires
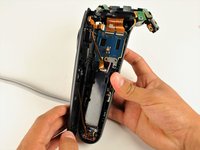
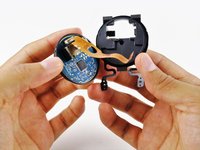
Hey, I just noticed this, but was the ribbon cable going to the haptic motor ripped? If you look at picture 1 of the step 11, there’s a small broken ribbon cable coming out of the haptic motor. You can see it again poking out in both pictures of Step 13. I just want to know if the haptic motor still works on this particular controller.
thanks for the clear detailed disassembly steps, as a tip maybe highlight the haptic motor/speaker, had to replace the broken ribon-cable on 1 of my controllers, i used an old 80 pin ide cable a it is small enough that it can be routed trough the side of the shielding