
Harman Kardon Invoke Microphone on/off Button Replacement
Introduction
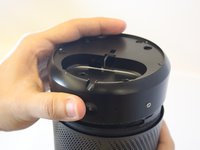
Passez à l'étape 1This repair guide will help you replace the on/off button for the microphone on your Harmon Kardon Invoke. By replacing the microphone on/off button, this may resolve Cortana not responding when spoken to and ensure that the microphone is enabled at the appropriate time. For this repair, make sure you have a steady hand to prevent harming the internal hardware. While replacing the base screws, be sure to not strip them, otherwise, any future repair will be difficult.
Ce dont vous avez besoin


-
-
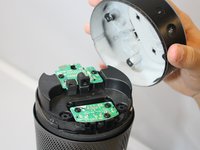
Use a Torx #10 screwdriver to remove the four 14.0 mm screws.
-
-
-
-
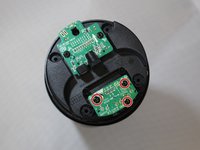
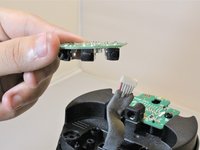
Use a Torx #10 screwdriver to remove three 10.0 mm screws from the highlighted board attached to microphone button.
-
-
-
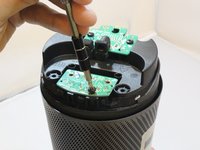
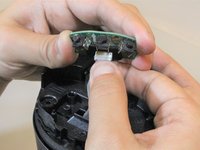
Pull the cable lightly to disconnect the button board from device.
-


To reassemble your device, follow these instructions in reverse order.
To reassemble your device, follow these instructions in reverse order.
Équipe

Eastern Washington University, Team S2-G2, Munoz Fall 2018 Membre de l'équipe Eastern Washington University, Team S2-G2, Munoz Fall 2018
EWU-MUNOZ-F18S2G2
3 membres
5 tutoriels rédigés