Aller au contenu principal
Installing OpenCore on Mac Guide #3

Installing OpenCore on Mac Guide #3

Jadon Lyon

Jadon Lyon et 3 autres contributeurs

Dernière mise à jour le November 10, 2024

3 - 10 minutes
Très facile
Tutoriel réalisé par la communauté

In this guide, we will install OpenCore onto your Mac's internal Hard Drive or Solid State drive.

Ce dont vous avez besoin

  1. Installing OpenCore on Mac Guide #3, Installing OpenCore on Mac Guide #3: étape 1, image 1 de 1
    • Now we get to install OpenCore on your Mac's Hard Drive or Solid State Drive!

    • PLEASE make sure you are familiar with Guide #2 before continuing.

  2. Installing OpenCore on Mac Guide #3: étape 2, image 1 de 3 Installing OpenCore on Mac Guide #3: étape 2, image 2 de 3 Installing OpenCore on Mac Guide #3: étape 2, image 3 de 3
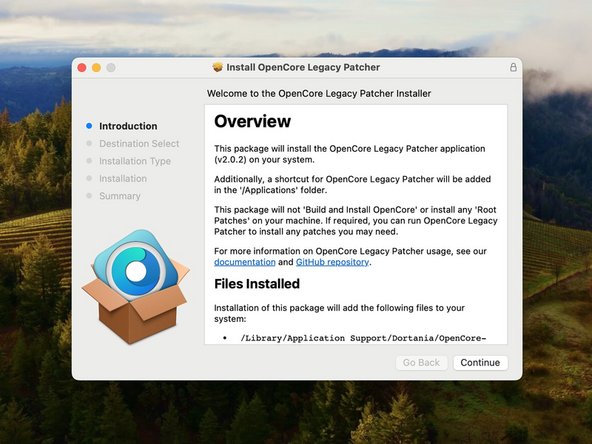
    • First, we need to download the latest version of OpenCore.

    • Go to OpenCore's website: https://github.com/dortania/OpenCore-Leg...

    • Scroll past the information until you get to "Assets"

    • Click the link "OpenCore-Patcher.pkg"

    • The package is the new way to install the OpenCore Application. This does not install the custom EFI as mentioned in Guide #1, nor does it apply root patches. This package only installs the application, nothing else.

  3. Installing OpenCore on Mac Guide #3: étape 3, image 1 de 2 Installing OpenCore on Mac Guide #3: étape 3, image 2 de 2
    • Download the package.

    • You may have to manually extract the ZIP file with Extractor.

    • If Finder does not let you open the app, Right-Click it and choose "Open"

    • Install the application using the installer.

    • The application will be inside of your Applications folder once the installation is complete.

  4. Installing OpenCore on Mac Guide #3: étape 4, image 1 de 1
    • Here's what OpenCore's windows looks like when you first open the app.

    • Depending on the environment where OpenCore is running (Mac model and macOS Version), the window may vary slightly.

    • To get familiar with the app, let's look at some of the buttons:

  5. Installing OpenCore on Mac Guide #3: étape 5, image 1 de 2 Installing OpenCore on Mac Guide #3: étape 5, image 2 de 2
    • First we have "Build and Install OpenCore"

    • This option is currently unavailable in the picture simply OpenCore is running on a MacBook Pro 2022. When Apple still supports a Mac model, OpenCore cannot be installed natively.

    • "Build and Install OpenCore" is what we'll use when we install the custom EFI onto the Mac that we mentioned in Guide #1. You'll understand more in a minute.

  6. Installing OpenCore on Mac Guide #3: étape 6, image 1 de 1
    • Next we have "Post-Install Root Patch"

    • When we finish updating macOS in Guide #4, Root Patching is what will install the custom kexts that lets macOS use you Mac's hardware correctly. But, that has no purpose for us right now.

  7. Installing OpenCore on Mac Guide #3: étape 7, image 1 de 1
    • Next, we have "Create macOS Installer"

    • This is basically the same command for making a macOS installer on a USB drive. Créer une clé USB bootable

    • As of now, we may or may not be using this later. Please check Guide #4 for more information.

  8. Installing OpenCore on Mac Guide #3: étape 8, image 1 de 1
    • Last but not least, we have "Support."

    • This is simply if you wish to contact the company. I have actually never used this.

    • GitHub is very, very difficult to contact. There is no easy way to post a bug issue or request a solution to a problem. If you do have issues, ask a question here at iFixit or drop a comment in one of these guides.

  9. Installing OpenCore on Mac Guide #3: étape 9, image 1 de 1
    • And this little guy, "Settings"

    • We will be working here in "Settings" so go ahead and click this button.

  10. Installing OpenCore on Mac Guide #3: étape 10, image 1 de 3 Installing OpenCore on Mac Guide #3: étape 10, image 2 de 3 Installing OpenCore on Mac Guide #3: étape 10, image 3 de 3
    • Before we get anywhere, select your Mac in the panel.

    • If you are unsure which Mac model you have, OpenCore will show your Mac model in the main window. If you are installing OpenCore directly on your Mac (instead of on a USB Drive for another Mac), you can choose "Host Model" in settings instead.

  11. Installing OpenCore on Mac Guide #3: étape 11, image 1 de 1
    • Okay, now let's get OpenCore ready. Before you install it on your Mac, you need to build the correct custom EFI, or else your Mac could crash at startup.

    • Don't panic... this is definitely not as hard as it sounds.

    • You probably won't need to fix anything in this first panel, so you can jump to "Extras"

    • I will release a guide later on going into more detail on what these extra buttons do, and how they affect booting. For now, OpenCore selects what your Mac needs natively, and therefore you do not need to change anything.

  12. Installing OpenCore on Mac Guide #3: étape 12, image 1 de 2 Installing OpenCore on Mac Guide #3: étape 12, image 2 de 2
    • By default, OpenCore normally knows what's best for your Mac. These settings are probably already set correctly, but we want to skim over them to double check.

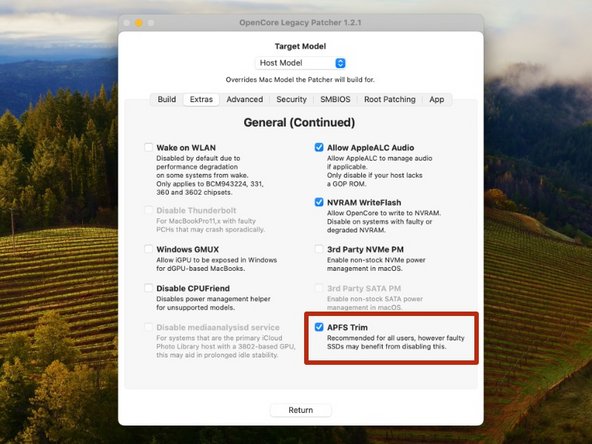
    • In extras, you'll see a bunch of NVRAM options. You'll probably leave most of this untouched.

    • Now, you will see "APFS Trim." If you are running a Mac that supports macOS High Sierra natively, your Mac will run APFS with or without this checked. If you are installing an older version of macOS (another guide for this will come out soon), and you do not want to use APFS, uncheck this.

    • In the end, I have always kept this checked, as I have never had an issue with it checked. If you have a faulty Solid State drive, then you should definitely uncheck this.

    • If you're left confused... just leave it be.

  13. Installing OpenCore on Mac Guide #3: étape 13, image 1 de 2 Installing OpenCore on Mac Guide #3: étape 13, image 2 de 2
    • Head over to "Advanced" on the panels.

    • The only thing you should change here is "FeatureUnlock." This fancy thing allows some of the newer things that old Macs can't do (Like AirPlay to Mac, Universal Control, Sidecar, etc.)

    • If it is set to "Partial" by default, that means you will get Night Shift, but nothing else. Your Mac must support Continuity in order for "Enabled" to actually give you these functions. If your Mac does support Continuity, but you have RAM issues later on, set this back to partial.

    • The two other features here: "Disable Firmware Throttling" and "Hibernation Work-around" are handy features if something is wrong with your Mac. For example, check "Disable Firmware Throttling" if your Mac gives you an SMC error in Apple Diagnostics. And, check "Hibernation Work-around" if your Mac crashes while sleeping.

  14. Installing OpenCore on Mac Guide #3: étape 14, image 1 de 1
    • Now head to "Security" in the panel.

    • Security deals with SIP (System Integrity Protection) on your Mac. In order the run this EFI, and Root Patches later on, you must have SIP disabled slightly, but not entirely (yes, that is possible).

    • OpenCore always has these three items checked. I would recommend not touching this unless you have issues later on. If that happens, check all of the items.

    • As you check items, SIP gets lower. If nothing is checked, SIP is completely enabled. If everything is checked, SIP is disabled. By keeping the three items checked, you can use your Mac with SIP mostly enabled.

    • DO NOT TOUCH KERNEL SECURITY! Kernel Security deals with making sure no malware gets deep into the Mac's files. But, Root Patching needs to get deep into the files for Root Patching to work. So, keep the two items on the left checked. If for some reason they are not checked, check them now, or Root Patching will not work.

    • If you want to use the features of OpenCore without actually updating your macOS Version, you can check Secure Boot Model. THIS WILL NOT ALLOW YOU TO UPDATE macOS!

  15. Installing OpenCore on Mac Guide #3: étape 15, image 1 de 1
    • You could skip "SMBIOS," but we'll cover what this is real quick:

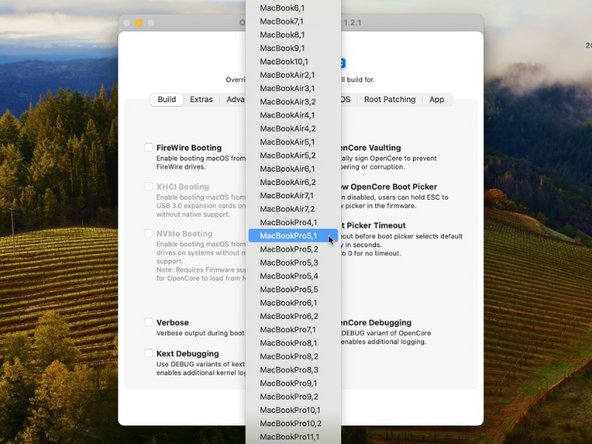
    • SMBIOS is the serial number and Board ID information about your Mac's Logic Board. If something terrible happens, OpenCore has a way to overwrite the Serial Number and Board ID. This does not change the Serial Number or Board ID on the logic board, but it makes macOS look at the custom EFI and force it to take that custom Serial Number.

    • The only time you would need to change the Mac's serial number is if you are running macOS on a VERY old Mac. Or if you plug in the macOS USB drive and you get a prohibitory sign, then you should use SMBIOS. We will cover this in detail later on.

  16. Installing OpenCore on Mac Guide #3: étape 16, image 1 de 1
    • Just completely skip "Root Patching" for now. We will use this after we get OpenCore installed.

  17. Installing OpenCore on Mac Guide #3: étape 17, image 1 de 2 Installing OpenCore on Mac Guide #3: étape 17, image 2 de 2
    • And we are at "App."

    • This simply changes how OpenCore works as an app, and not the custom EFI.

    • The only thing you should change is "Disable Reporting." This will prevent OpenCore from sending any information to the company. And, this will make you Mac faster.

  18. Installing OpenCore on Mac Guide #3: étape 18, image 1 de 1
    • We're almost done, click "Return" on the bottom of the window.

  19. Installing OpenCore on Mac Guide #3: étape 19, image 1 de 3 Installing OpenCore on Mac Guide #3: étape 19, image 2 de 3 Installing OpenCore on Mac Guide #3: étape 19, image 3 de 3
    • Now, let's get this custom EFI on the Mac.

    • Click "Build and Install OpenCore" in the main window.

    • Choose "Install to disk"

    • Choose your Mac's Hard Drive or Solid State Drive in the list.

    • All disks are different. You may have a Toshiba, Samsung, Western Digital, Seagate, or even an Apple disk in your Mac.

  20. Installing OpenCore on Mac Guide #3: étape 20, image 1 de 1
    • Four quick troubleshooting tips:

    • If you get a window that looks like this, there is a good chance that Apple still supports your Mac. Double check to make sure of this.

    • Try giving OpenCore special permissions: go to System Preferences > Security > Full Disk Access > and allow OpenCore to have full disk access.

    • You may have to upgrade macOS before you can install OpenCore on the Hard Drive itself. In this case, install OpenCore (using the same settings) on an external USB drive.

    • Since OpenCore creates a new partition on the drive for the custom EFI (the partition is called EFI, just so you know, and it's hidden by default), you do not need to format the drive in order to install OpenCore. Now, if you are going to use the USB drive to install macOS, you'll need to format it at that point.

  21. Installing OpenCore on Mac Guide #3: étape 21, image 1 de 3 Installing OpenCore on Mac Guide #3: étape 21, image 2 de 3 Installing OpenCore on Mac Guide #3: étape 21, image 3 de 3
    • Choose the EFI option in the list.

    • Enter your password.

    • All done! Click "OK" in the window that appears.

    • You may or may not get the option to reboot your Mac right there. In this case, I would recommend rebooting later on, since you have not yet updated macOS.

  22. Installing OpenCore on Mac Guide #3: étape 22, image 1 de 2 Installing OpenCore on Mac Guide #3: étape 22, image 2 de 2
    • Real quick, let's take a look at how to use OpenCore.

    • Reboot your Mac, and hold the Option (alt) key while starting up.

    • Your startup manager may look something like this:

    • Choose the "EFI Boot" option. Click the arrow pointing up to continue.

    • When OpenCore boots, you will be greeted to a new boot manager looking thing. Here, choose the drive you wish to start your Mac.

    • If you have a 2012 or older, your boot manager will be a grey instead of black. Unfortunately, OpenCore by default loads in this dark boot. So, you'll see the light grey screen, the dark boot manager, and then a dark screen with the white Apple logo. Yes, there is a way to fix this, but it will require some text editing, which we'll cover later.

    • If you have a 2013 or newer, the Mac will always boot in this dark mode.

    • I will be making a guide to where you can customize the OpenCore boot picker screen, add custom icons, and so much more later on. This guide will actually become available soon.

  23. Installing OpenCore on Mac Guide #3: étape 23, image 1 de 1
    • Mac will continue to boot normally, and you'll be able to log in again, and everything will feel quite normal.

    • Later on, we'll change OpenCore to where it doesn't take us through the boot picker, and it immediately loads macOS. We'll work on that later on though.

    • As for now, you have installed OpenCore, and you are ready to update macOS.

    • On newer Mac models, you may get a notification asking if you want to upgrade macOS.

Conclusion

All done! You have successfully installed OpenCore! Now you can move to Guide #4 to update macOS.

12 autres ont terminé cette réparation.

Jadon Lyon

Membre depuis le 09/05/23

3 808 Réputation

8 tutoriels rédigés

4 commentaires

Diese Anleitung ist sehr schlecht und ungenau

Ralf - Réponse

@ralf41182 iFixit ist ein Wiki: Du kannst einfach Verbesserungen eintragen, am Besten gleich im englischen Original. Was würdest du ändern?

VauWeh -

Hello guys we installed a Monterrey version on a1278 - mid 2012. And the app Photos doesnt show on big screen or videos correctly

Ben - Réponse

Hey there. These models should run Big Sur just fine without Root Patching. Monterey may have some issues. Try running root patching again. If issue persists, ask a new question in the iFixit forum, and post a screenshot of the issue.

Jadon Lyon -

Ajouter un commentaire

Nombre de vues :

Dernières 24 heures : 72

7 derniers jours : 555

30 derniers jours : 1,922

Total : 14,255