Aller au contenu principal
JBL Pulse 4 Outside Casing Replacement

JBL Pulse 4 Outside Casing Replacement

Hank McDonough

Hank McDonough et 4 autres contributeurs

Dernière mise à jour le October 1, 2024

20 minutes
Modérée

Before diving into the repair process, let's take a moment to understand why you might need to fix your Pulse 4. Perhaps you've noticed a decrease in sound quality, a malfunctioning LED light show, or even a complete loss of power. Whatever the case, fear not! With the right tools, a bit of patience, and this comprehensive guide, you'll be well-equipped to tackle any issues head-on.

Repairing your JBL Pulse 4 may require careful handling and attention to detail. As with any electronic repair, there are inherent risks involved, such as damaging delicate components or encountering electrical hazards. It's crucial to work in a well-lit and organized workspace, free from distractions. Additionally, be sure to power off the device and disconnect it from any power sources before proceeding with the repair.

Throughout this guide, we'll provide step-by-step instructions, accompanied by detailed images, to walk you through each stage of the repair process. Whether you're replacing a faulty speaker driver, troubleshooting LED issues, or addressing battery concerns, we've got you covered.

Remember, patience is key. Take your time, and follow each step carefully. Together, let's breathe new life into your JBL Pulse 4 speaker and get the music flowing once again!

Ce dont vous avez besoin

Outils

  • Spudger
    Spudger
  • iFixit Opening Tool
    iFixit Opening Tool
  • Phillips #1 Screwdriver
    Phillips #1 Screwdriver

Afficher plus…

  1. JBL Pulse 4 Outside Casing Replacement, Casing Replacement: étape 1, image 1 de 1
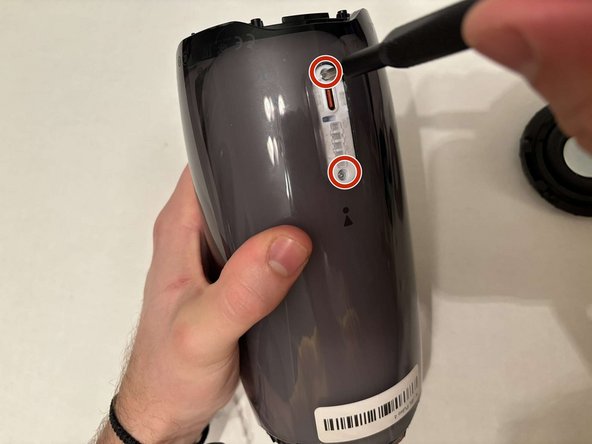
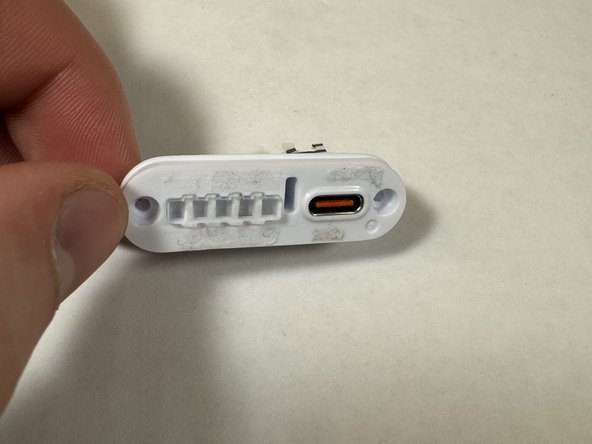
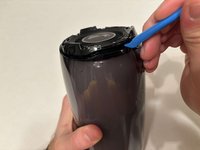
    • Power off the device before doing any repairs.

    • Hold the power button for 3+ seconds to power down the device.

  2. JBL Pulse 4 Outside Casing Replacement: étape 2, image 1 de 3 JBL Pulse 4 Outside Casing Replacement: étape 2, image 2 de 3 JBL Pulse 4 Outside Casing Replacement: étape 2, image 3 de 3
    • Remove each rubber end cap using a plastic pry tool.

    • Go around each end of the speaker slowly popping up a small section of the rubber cap until there is a gap on all sides.

    • Remove the top by hand.

  3. JBL Pulse 4 Outside Casing Replacement: étape 3, image 1 de 3 JBL Pulse 4 Outside Casing Replacement: étape 3, image 2 de 3 JBL Pulse 4 Outside Casing Replacement: étape 3, image 3 de 3
    • Remove the charging port cover using a plastic pry tool.

    • Remove the two 12.7 mm Phillips #1 screws.

    • Remove the charging port housing from the casing.

  4. JBL Pulse 4 Outside Casing Replacement: étape 4, image 1 de 3 JBL Pulse 4 Outside Casing Replacement: étape 4, image 2 de 3 JBL Pulse 4 Outside Casing Replacement: étape 4, image 3 de 3
    • Disconnect the charging port connector by pulling the connector away from the port.

    • Disconnect the battery level indicator light by pulling the wire away from the lights.

  5. JBL Pulse 4 Outside Casing Replacement: étape 5, image 1 de 2 JBL Pulse 4 Outside Casing Replacement: étape 5, image 2 de 2
    • Remove the six 8 mm Phillips #1 screws from the end of the speaker with the grill that says "JBL."

    • Remove the plastic piece where the 6 screws came out of.

  6. JBL Pulse 4 Outside Casing Replacement: étape 6, image 1 de 1
    • Remove the six 9.5 mm screws using a Phillips #1 screwdriver.

  7. JBL Pulse 4 Outside Casing Replacement: étape 7, image 1 de 3 JBL Pulse 4 Outside Casing Replacement: étape 7, image 2 de 3 JBL Pulse 4 Outside Casing Replacement: étape 7, image 3 de 3
    • Flip the speaker to the other end.

    • Use a pry tool to pry between the casing of the speaker and the internals.

    • Go around the entirety of this end of the speaker slowly prying apart the two pieces.

  8. JBL Pulse 4 Outside Casing Replacement: étape 8, image 1 de 1
    • The casing is now fully detached from the internal components.

    • You can now replace the outer casing of the speaker.

Conclusion

To reassemble your device, follow these instructions in reverse order.

Hank McDonough

Membre depuis le 03/18/24

377 Réputation

2 tutoriels rédigés

Équipe

UMass Dartmouth, Team 2-2, Konn Spring 2024 Membre de l'équipe UMass Dartmouth, Team 2-2, Konn Spring 2024

UMASSD-KONN-S24S2G2

4 membres

2 tutoriels rédigés

0 commentaires de tutoriel

Ajouter un commentaire

Nombre de vues :

Dernières 24 heures : 1

7 derniers jours : 11

30 derniers jours : 69

Total : 431