Kindle Paperwhite 1st Generation Motherboard Replacement
Introduction
Passez à l'étape 1Replace your Kindle's old motherboard with a new one.
Ce dont vous avez besoin
Outils
Afficher plus…
-
-
Using a spudger or plastic opening tool, gently pry the bezel from the screen. It is easier to start in the corners and work your way around the bezel.
-
-
-
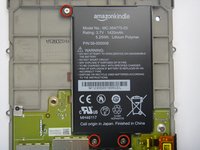
Turn over the midframe to locate the battery.
-
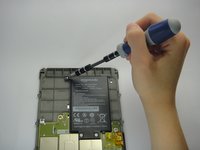
Remove the three Phillips 3.0 mm screws securing the battery to the midframe.
-
-
-
-
Use a spudger to lift up the white locking cable tensioner and slide the flex cable out.
-
Proceed counterclockwise to the next cable and repeat. Small flex cable on the bottom won't need cable tensioner lifted, just carefully pull out.
-
To reassemble your device, follow these instructions in reverse order.
To reassemble your device, follow these instructions in reverse order.
Annulation : je n'ai pas terminé ce tutoriel.
6 autres ont terminé cette réparation.
2 commentaires de tutoriel
Not sure if this is an error, but on the 3G paperwhite, we needed to use a #0 Phillips, not a #2. Great guide otherwise!


