
LG 47LN5400 LED Replacement

Introduction
Passez à l'étape 1LEDs were supposed to last forever, right? Well, maybe not.
When one or more backlight LEDs fail in an LCD/LED flat screen television, none of them might turn on.
In the case of the LG 47LN5400, the symptom is a brief flash of the LEDs when first turned on, then a dark screen. Sound is fine.
Apparently, the LED power supply shuts down for the failure of one or more LEDs, leading one to the incorrect conclusion that the power supply has failed.
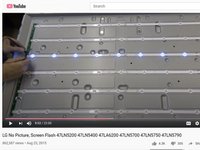
This video, “LG No Picture, Screen Flash 47LN5200 47LN5400 47LA6200 47LN5700 47LN5750 47LN5790,” provides excellent troubleshooting and repair steps.
('''NorCal715''' on YouTube has quite a few excellent repair videos. Check them out! And consider a PayPal donation - see his About page.)
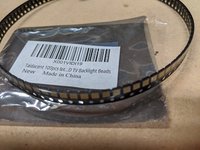
The easiest way repair is to purchase a complete set of LED strips (12) and replace them all. No soldering. In fact, if one LED has failed, more may fail in the near future.
But, it’s a $45 fix.
The individual surface-mount LEDs are about $0.11 each, but you need to buy 100 or so to get this price.
The LED strips have a copper plate, so one needs to use a hot air gun to heat the copper completely, A surface mount hot-air station probably won’t be able to get the copper plate hot enough to melt the solder.
Ce dont vous avez besoin
Pièces
Outils


Afficher plus…
-
-
Set up a table large enough to hold the TV face down.
-
Place a soft cloth or towel on the table to protect the LCD display.
-
Remove the screws holding the stand.
-
Remove all the screws hold the back cover and remove the cover.
-
Remove the speakers and the small circuit board in the bottom center (behind the LG logo.)
-
Remove the rectangular plate at the bottom center and carefully remove the 2 ribbon cables connected to the LCD display. Flip up the black retaining clip and gently pull out the cables using the clear plastic tab.
-
-
-
Flip the TV over, LCD side up.
-
Carefully remove the plastic bezel, gently bending the tabs that hold it the frame.
-
Remove the LCD panel. Caution!' The LCD panel is fragile and breaks easily. Slide a large cardboard sheet under the display and carefully support the panel's weight without any bending. (If it cracks, well, you now have a much more expensive repair problem.)
-
Be sure you have a stable surface large enough to hold the LCD panel.
-
-
-
-
Remove the small screws from the four metal frames around the outside of the TV. Be sure to remember each part's location and orientation.
-
Remove the plastic LCD support frame.
-
Remove the diffuser panels, taking care to remember their orientations. You can use a Sharpie pen to mark the lower left corner off all of the panels.
-
Flip the TV on the other side. Remove the LCD panel white plastic standoffs. Pinch the clips together and push the standoff out of the chassis.
-
-
-
Follow the excellent troubleshooting instructions in the YouTube video:LG No Picture, Screen Flash 47LN5200 47LN5400 47LA6200 47LN5700 47LN5750 47LN5790
-
Take care to unplug the LED power connecter before you test with the power supply!
-
Once you have determined where the failed LEDs are, you have a choice:
-
Purchase the replacement LED strips needed; be sure to order the correct part number. Note there are several part numbers for the various strips.
-
Replace all of the LED strips.
-
Replace the individual LEDs, using the heat gun method shown in the video. This isn't as hard as it looks. But you'll need a steady hand and good vision to properly place the new LED(s).
-
Be sure to remove the two-sided tape from the LED strip before heating!
-
And, replace the removed tape with new double-sided tape.
-


To reassemble your device, follow these instructions in reverse order.
To reassemble your device, follow these instructions in reverse order.
Annulation : je n'ai pas terminé ce tutoriel.
2 autres ont terminé cette réparation.

Équipe
