Aller au contenu principal
Landis Universal Cylindrical Grinder (3U4D5D-17 ) Grindstone Replacement

Landis Universal Cylindrical Grinder (3U4D5D-17 ) Grindstone Replacement

Andrew Shotwell

Andrew Shotwell et 4 autres contributeurs

Dernière mise à jour le January 7, 2025

30 - 45 minutes
Modérée

Deterioration of the grindstone is one of the most common issues with the Landis Universal Cylindrical Grinder. Because these machines are so old, there is little maintenance or repair documentation available. This guide will show you how to replace the grindstone on the machine and avoid the costs of hiring an on-site specialist.

  1. Landis Universal Cylindrical Grinder (3U4D5D-17 ) Grindstone Replacement, Landis Universal Cylindrical Grinder (3U4D5D-17 ) Grindstone: étape 1, image 1 de 2 Landis Universal Cylindrical Grinder (3U4D5D-17 ) Grindstone Replacement, Landis Universal Cylindrical Grinder (3U4D5D-17 ) Grindstone: étape 1, image 2 de 2
    • Switch off the grinder's breaker box before performing any maintenance on the machine.

  2. Landis Universal Cylindrical Grinder (3U4D5D-17 ) Grindstone Replacement: étape 2, image 1 de 2 Landis Universal Cylindrical Grinder (3U4D5D-17 ) Grindstone Replacement: étape 2, image 2 de 2
    • Lift the yellow guard up to unlock the grindstone access panel.

  3. Landis Universal Cylindrical Grinder (3U4D5D-17 ) Grindstone Replacement: étape 3, image 1 de 2 Landis Universal Cylindrical Grinder (3U4D5D-17 ) Grindstone Replacement: étape 3, image 2 de 2
    • Pull the access panel outward to expose the grindstone.

  4. Landis Universal Cylindrical Grinder (3U4D5D-17 ) Grindstone Replacement: étape 4, image 1 de 2 Landis Universal Cylindrical Grinder (3U4D5D-17 ) Grindstone Replacement: étape 4, image 2 de 2
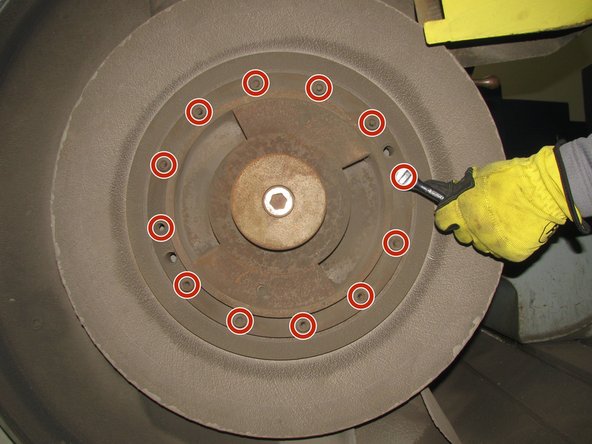
    • Remove the twelve bolts securing the grindstone using a ratchet with a 5/16 Hex bit.

  5. Landis Universal Cylindrical Grinder (3U4D5D-17 ) Grindstone Replacement: étape 5, image 1 de 2 Landis Universal Cylindrical Grinder (3U4D5D-17 ) Grindstone Replacement: étape 5, image 2 de 2
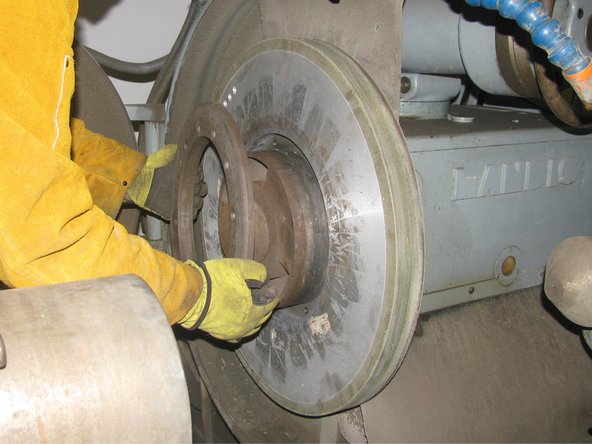
    • Gently remove the steel hub from the grindstone spindle.

  6. Landis Universal Cylindrical Grinder (3U4D5D-17 ) Grindstone Replacement: étape 6, image 1 de 2 Landis Universal Cylindrical Grinder (3U4D5D-17 ) Grindstone Replacement: étape 6, image 2 de 2
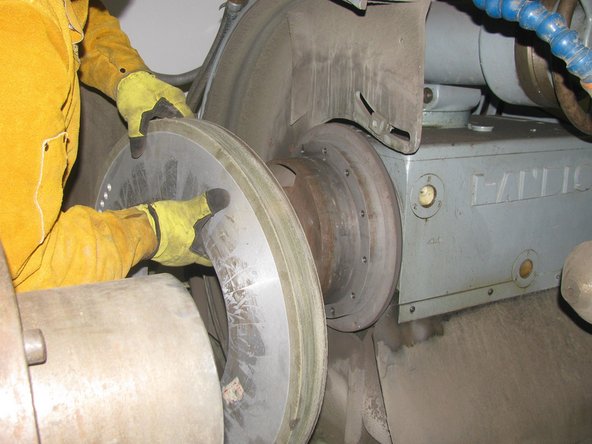
    • Carefully remove the grindstone itself from the spindle, making sure to support it from the top and inner ring.

    • Mind your fingers! The grindstone is quite heavy and can cause injury if it is mishandled or dropped.

  7. Landis Universal Cylindrical Grinder (3U4D5D-17 ) Grindstone Replacement: étape 7, image 1 de 2 Landis Universal Cylindrical Grinder (3U4D5D-17 ) Grindstone Replacement: étape 7, image 2 de 2
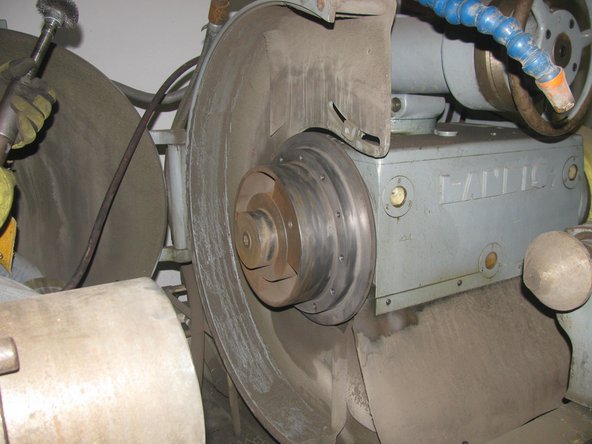
    • Softly sand the hub with 600-grit sandpaper or a wire brush to remove any surface rust.

  8. Landis Universal Cylindrical Grinder (3U4D5D-17 ) Grindstone Replacement: étape 8, image 1 de 1
    • Although not mandatory, now would be a good time to scrape out any debris that has built up on the inside of the guard.

Conclusion

To reassemble your device, follow these instructions in reverse order starting from step 6.

3 autres ont terminé cette réparation.

Andrew Shotwell

Membre depuis le 02/23/16

136 Réputation

1 tutoriel rédigé

Équipe

Texas Tech, Team 22-3, Rauch Spring 2016 Membre de l'équipe Texas Tech, Team 22-3, Rauch Spring 2016

TTU-RAUCH-S16S22G3

3 membres

2 tutoriels rédigés

0Commentaires sur le guide

Ajouter un commentaire

Nombre de vues :

Dernières 24 heures : 1

7 derniers jours : 7

30 derniers jours : 45

Total : 1,176