Aller au contenu principal
Lenovo ThinkPad Edge E520 CD Disk Drive Replacement

Lenovo ThinkPad Edge E520 CD Disk Drive Replacement

Andrew Martin

Andrew Martin et 3 autres contributeurs

Dernière mise à jour le May 24, 2018

25 minutes
Modérée
Étudiant en action
Problème de balise
Nécessite plus d'images

This guide will help to replace the CD disk drive from the Lenovo Thinkpad Edge E520 CD Disk Drive.

Ce dont vous avez besoin

Outils

  • Phillips #0 Screwdriver
    Phillips #0 Screwdriver
  • Spudger
    Spudger
  1. Lenovo ThinkPad Edge E520 CD Disk Drive Replacement, Battery: étape 1, image 1 de 1
    • Power off and unplug the computer before the start of these steps.

    • Close the laptop lid.

  2. Lenovo ThinkPad Edge E520 CD Disk Drive Replacement: étape 2, image 1 de 2 Lenovo ThinkPad Edge E520 CD Disk Drive Replacement: étape 2, image 2 de 2
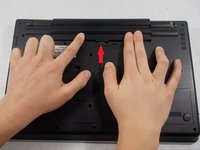
    • Flip the computer so that the back is facing upwards.

    • Locate the switch used to release the battery.

    • The switch should be located towards the hinge of the laptop near the battery pack and have a lock icon associated with it.

  3. Lenovo ThinkPad Edge E520 CD Disk Drive Replacement: étape 3, image 1 de 2 Lenovo ThinkPad Edge E520 CD Disk Drive Replacement: étape 3, image 2 de 2
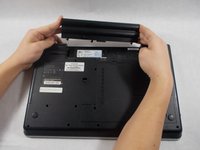
    • Slide the switch towards the unlocked lock icon.

    • While holding it in the unlocked position, slide the battery towards the hinge.

    • Fully separate the battery pack from the back of the laptop.

  4. Lenovo ThinkPad Edge E520 CD Disk Drive Replacement, Back Plate: étape 4, image 1 de 2 Lenovo ThinkPad Edge E520 CD Disk Drive Replacement, Back Plate: étape 4, image 2 de 2
    • Flip over the laptop and position it with the battery being furthest away from you.

    • Remove the four screws on the edges of the T-Shaped plate with a Phillips #0 screwdriver.

    • Remove the T-Shaped plate from the back of the computer. It should come off easily if all four aforementioned screws are removed.

    • Screw length 6.35 mm, head 3.175 mm

  5. Lenovo ThinkPad Edge E520 CD Disk Drive Replacement, Keyboard: étape 5, image 1 de 1
    • Remove the battery from the back of the device

    • Unscrew the two 3.175 mm diameter and 6.35 mm length screws with keyboard symbols pointing at them using a Phillips head screwdriver.

  6. Lenovo ThinkPad Edge E520 CD Disk Drive Replacement: étape 6, image 1 de 3 Lenovo ThinkPad Edge E520 CD Disk Drive Replacement: étape 6, image 2 de 3 Lenovo ThinkPad Edge E520 CD Disk Drive Replacement: étape 6, image 3 de 3
    • Turn the laptop back over so that the keyboard is facing you.

    • Use your hands to separate the keyboard from the laptop

  7. Lenovo ThinkPad Edge E520 CD Disk Drive Replacement, Front Compartment Case: étape 7, image 1 de 1
    • Remove all remaining screws on the back of the device.

    • Screw length 6.35 mm, head 3.175 mm Screws behind battery length 3.175 mm, head 3.175 mm

  8. Lenovo ThinkPad Edge E520 CD Disk Drive Replacement: étape 8, image 1 de 3 Lenovo ThinkPad Edge E520 CD Disk Drive Replacement: étape 8, image 2 de 3 Lenovo ThinkPad Edge E520 CD Disk Drive Replacement: étape 8, image 3 de 3
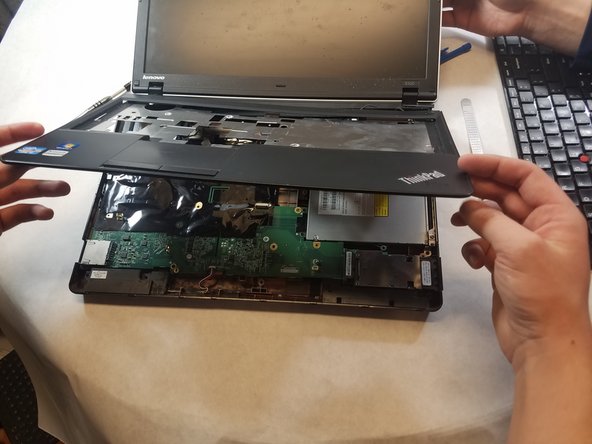
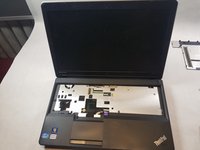
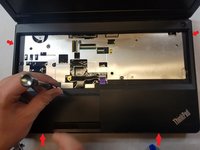
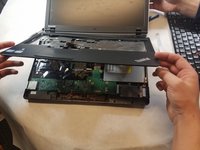
    • Flip device back over and open the screen.

    • Insert the prying tool on one edge of the case and follow along all four edges until the case frees up.

    • Remove the case.

  9. Lenovo ThinkPad Edge E520 CD Disk Drive Replacement, CD Disk Drive: étape 9, image 1 de 2 Lenovo ThinkPad Edge E520 CD Disk Drive Replacement, CD Disk Drive: étape 9, image 2 de 2
    • The silver block contains two screws.

    • Unscrew the two screws to remove the clamp that holds the disk drive in place.

    • Screw length 6.35 mm, head 3.175 mm

    • Remove the screws holding the disk drive in place and then slide outwards to remove

    • Screw length 6.35 mm, head 3.175 mm

Conclusion

To reassemble your device, follow these instructions in reverse order.

Une autre personne a terminé cette réparation.

Andrew Martin

Membre depuis le 03/01/18

244 Réputation

2 tutoriels rédigés

Équipe

UMass Dartmouth, Team S1-G2, Simcock Spring 2018 Membre de l'équipe UMass Dartmouth, Team S1-G2, Simcock Spring 2018

UMASSD-SIMCOCK-S18S1G2

4 membres

12 tutoriels rédigés

0 commentaires

Ajouter un commentaire

Nombre de vues :

Dernières 24 heures : 0

7 derniers jours : 0

30 derniers jours : 1

Total : 403