
Lenovo ThinkPad X280 CMOS Battery Replacement

Introduction
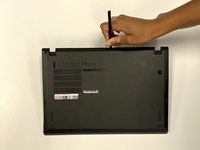
Passez à l'étape 1This will take approximately 50 minutes to complete from beginning to end.
Ce dont vous avez besoin


-
-
-
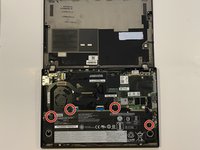
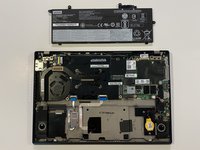
Using the Phillips #1 screwdriver, remove the four 5 mm screws that are holding the battery down.
-
Remove the battery.
-
-
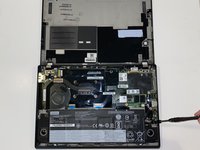
Outil utilisé dans cette étape :Tweezers$4.99
-
Use tweezers to gently unplug the CMOS Battery from the port on the right side.
-


To reassemble your device, follow these instructions in reverse order.
To reassemble your device, follow these instructions in reverse order.
Annulation : je n'ai pas terminé ce tutoriel.
3 autres ont terminé cette réparation.
Équipe

The Citadel Military College of South Carolina, Team 5-1, Eggleston Fall 2022 Membre de l'équipe The Citadel Military College of South Carolina, Team 5-1, Eggleston Fall 2022
CMCSC-EGGLESTON-F22S5G1
3 membres
3 tutoriels rédigés