
Lenovo Thinkpad X240 Touchpad Replacement
Introduction
Passez à l'étape 1This guide will show you how to add a new touchpad to the X240, perhaps to replace one damaged or to upgrade to the superior X250 one, which has separate mouse keys and better response.
Ce dont vous avez besoin


-
-
Ensure that any internal batteries are powered down in the BIOS.
-
Remove external battery using the two finger clips on the underside.
-
Loosen all eight (8) screws on the underside of the laptop. These screws have retention clips so should not be removed completely from the back plate.
-
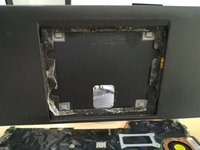
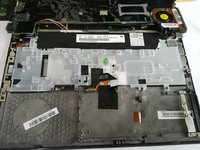
Remove back plate of laptop and set aside.
-
-
-
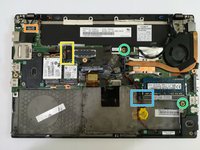
Identify and remove the internal battery.
-
The internal battery is held in by up to three screws, circled in red in the photo.
-
If there is no internal battery then remove the spacer shown in the second photo. This is held in by one screw.
-
Remove the internal HDD or SDD.
-
This is held in a carrier tray which is attached to the frame by a single screw circled in orange.
-
The data connection to the motherboard has a silver shield which is held in place by a single screw, circled in yellow in the photo.
-
Set the HDD and internal battery aside.
-
-
-
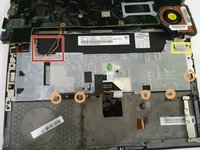
Remove right speaker by taking out the screws marked in red.
-
Remove tape holding BIOS battery marked in orange.
-
-
-
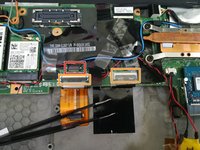
Remove connectors
-
Start with the large connector in the middle at the bottom of the motherboard. Here it is marked in red.
-
Then ease up the two connectors, one underneath the large connector just removed. These are done by raising the black tab on the connector to vertical then pulling gently on the ribbon cable. These are marked in orange in the photo.
-
Also lift the connector on the upper left of the keyboard, marked in orange. Just unplug it by lifting it up with your nails or with a small screw driver
-
Ease the antenna cables for the wifi and 3G out of their black holder, and pull the holder off the motherboard towards the top side of the laptop. This is marked in yellow.
-
Underneath you will find one screw, which you should remove.
-
Another two motherboard screws are marked in green, these should be removed.
-
Remove the motherboard by easing it to the right from under a tab marked in blue near the BIOS battery, and gently placing it back towards the top of the laptop.
-
-
-
-
Remove keyboard tray, starting by moving the antenna wires out of their clips, shown in red on the photo.
-
Then remove the 5 screws holding the keyboard tray to the frame. These are marked in orange.
-
Finally ease the tray away by pulling it downwards and from under the top tab, marked in yellow.
-
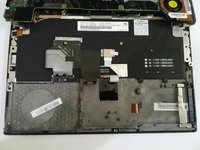
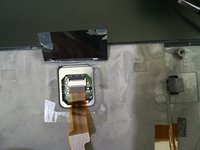
The keyboard and touchpad connectors should be visible.
-
-
-
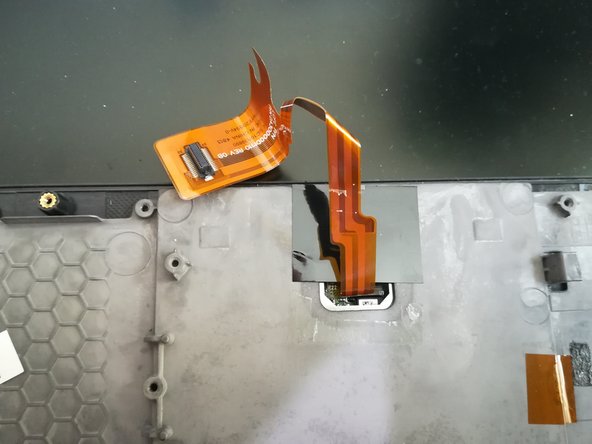
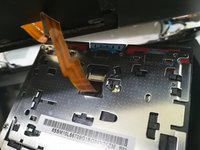
Remove backing from under the touchpad connector.
-
Once removed, there is a *second* backing underneath. This should be pulled up and away from the connections but not completely removed.
-
The connection to the touchpad will be revealed.
-
-
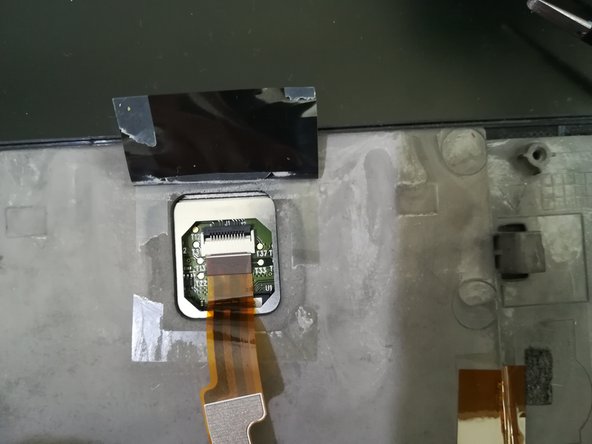
Outil utilisé dans cette étape :Tweezers$4.99
-
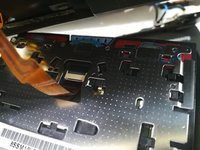
Remove connector to touchpad by easing the black tab on the white connector upwards, and using tweezers pull the connector downwards away from the connection.
-
-
-
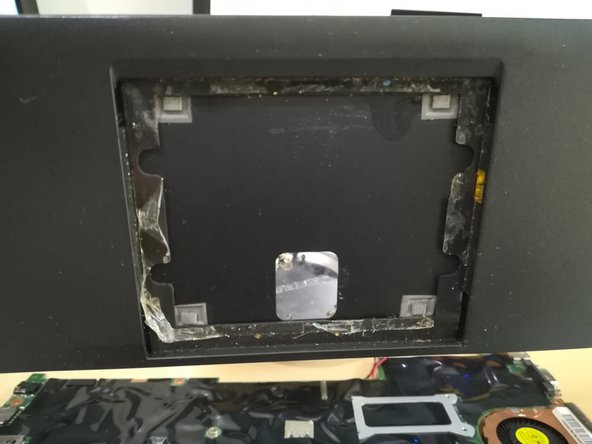
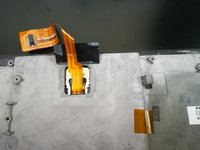
You can remove the top part of the old touchpad by using a spudger or plastic tool to take it off the hinges.
-
Using a spudger between the frame and the touchpad get underneath and separate from the glue strip.
-
Once removed, you can see the old glue strip by raising the keyboard frame.
-
-
-
As with other connectors, the black tab has to be raised vertical, ribbon cable inserted in, and then the black tab returned to the horizontal position to lock the cable in.
-
-
-
The new touchpad should have the black tape reapplied in the same order as removal. There was the top piece to bend under the connector, then the larger black piece of tape over the top.
-
The connector should be folded and bent the correct way along with the other keyboard connectors and reattached to the motherboard.
-


As the touchpad is held in place only by glue strips, it would be wise to save some of the old ones and use them under the new touchpad.
As the touchpad is held in place only by glue strips, it would be wise to save some of the old ones and use them under the new touchpad.
Annulation : je n'ai pas terminé ce tutoriel.
4 autres ont terminé cette réparation.
7 commentaires
This one worked for me, however you should always consult the system service parts manual for complete information.
Thanks for the detailed info.
All worked fine but I have some suggestions to simplify the procedure…
Ignore steps 3,4,5,6. Peel the black plastic back in the oposite direction from what is shown in step 7. The connector is exposed and, with the aid of a bent paperclip, the retaining bar can be lifted and the cable removed. On my machine, the clunkpad was only held in by two screws. Lift the screw side with a spudger and slide the pad across towards that side and it pops out - no glue! Fixing the cable to the new touchpad is a bit interesting but can be eased by using a strip of plastic cut from a credit card (or two thicknesses of milk bottle). The plastic can be pushed up against the connector as the cable is replaced - which directs the cable to the right spot and stops it getting caught on the bottom edge.
Simples!
Barnaby - June 2020.
Great manual. I also skipped steps 3,4,5,6 and was able to replace the touchpad on my x250 in around 20 minutes. I added a new double-sided tape square in place of the old glue pads.
HINT: if you’re wondering how to release the touchpad connector, have a look at the replacement touchpad on your desk. It helped me visualize how to release the touchpad tape.