
Lenovo Yoga 3 11 SSD Replacement

Aucune estimation
Modérée
Nécessite plus d'images
Photos d’action
Introduction
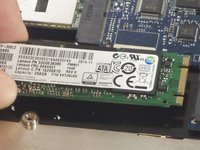
Passez à l'étape 1Use this guide to replace the SSD in your Lenovo Yoga 3 11.
Ce dont vous avez besoin


-
-
Remove the eleven 6 mm T5 Torx screws securing the lower case.
-
Gently lift the lower case up and away from the device.
-
-
-
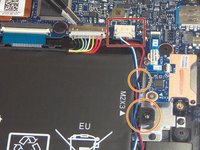
Outil utilisé dans cette étape :Tweezers$4.99
-
Use a pair of tweezers to disconnect the motherboard-size of the trackpad ribbon cable. Gently lift up the black tab, and the cable should come free from the ZIF connector.
-


Presque terminé !
To reassemble your device, follow these instructions in reverse order.
Conclusion
To reassemble your device, follow these instructions in reverse order.
Annulation : je n'ai pas terminé ce tutoriel.
Une autre personne a terminé cette réparation.
