
Levoit LV-H132 LED Replacement

Introduction
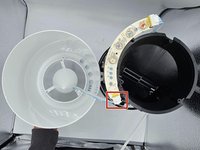
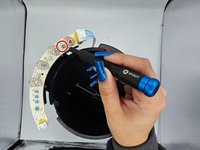
Passez à l'étape 1Are the LED lights on your Levoit LV-H132 not lighting up, flickering, or dimming? If so, use this guide to replace the LED lights. This repair is required to enable the user to determine the status of their device.
Ce dont vous avez besoin
Outils


Afficher plus…


To reassemble your device, follow these instructions in reverse order.
To reassemble your device, follow these instructions in reverse order.
Annulation : je n'ai pas terminé ce tutoriel.
Une autre personne a terminé cette réparation.

Équipe

University of North Texas, Team 2-3, Harold Fall 2023 Membre de l'équipe University of North Texas, Team 2-3, Harold Fall 2023
UNT-HAROLD-F23S2G3
4 membres
5 tutoriels rédigés