
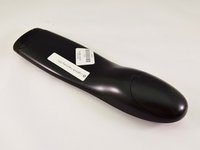
Logitech Harmony 650 Motherboard Replacement
Introduction
Passez à l'étape 1It is recommended that you have the iFIxit ProTech Repair kit and have already disassembled the case before working on this guide.
Ce dont vous avez besoin


-
-
Remove the battery cover by applying pressure to the indented area and pushing the cover toward the rear of the device.
-
-
-
Outil utilisé dans cette étape :Flathead 3/32" or 2.5 mm Screwdriver$5.49
-
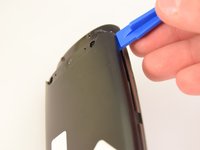
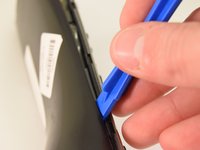
Remove the small plastic cover beneath the plastic LED housing by using a 3.0 flathead screwdriver and a spudger to pry it off. It is glued to the case. If you are having trouble removing it try applying some heat to loosen the glue.
-
-
-
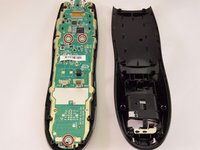
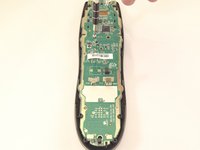
Using a J0 screwdriver remove the three 5mm screws holding the motherboard to the front face. Two are located just below the processor in the middle of the device and the third is located at the very bottom.
-


To reassemble your device, follow these instructions in reverse order.
To reassemble your device, follow these instructions in reverse order.
Annulation : je n'ai pas terminé ce tutoriel.
10 autres ont terminé cette réparation.
Équipe

Eastern Washington University, Team 1-2, Rowley Winter 2016 Membre de l'équipe Eastern Washington University, Team 1-2, Rowley Winter 2016
EWU-ROWLEY-W16S1G2
4 membres
5 tutoriels rédigés
5 commentaires de tutoriel
Thanks! Remote was dropped in water tonight & I used this to take it apart for a thorough drying out.
anyone know where I can purchase the motherboard for this model? Logitech does not sell them
I assume nobody sells the motherboard as a spare part? Pity, mine 650’s dead!
Thank you so much for the instructions. Some buttons of my Harmony 650 were not responding and I was able to open it and clean with alcohol the rubber pins and their peer circuit board conductor traces. After that all works as new !
Thank you for the very helpful information on how to disassemble the remote. I have been having problems with some of the buttons not working very well for a long time. I was able to clean all the button contact surfaces, and now all the buttons operate. Something that simple means a lot. Thank you again.