Aller au contenu principal
Logitech UE Boom 3 Passive Radiator Replacement

Logitech UE Boom 3 Passive Radiator Replacement

Ethan Donahue

Ethan Donahue et un autre contributeur

Dernière mise à jour le June 28, 2024

5 minutes
Facile

This guide is for the Logitech UE Boom 3 - model number: S-00171. Alternative model numbers could be S-00171-A, S-00171-B, S-00171-C.

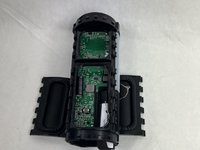
The primary objective of this guide is to provide step-by-step instructions for replacing the passive radiator of the Logitech UE BOOM 3. By following these instructions carefully, users can address issues such as poor bass performance.

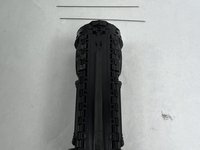
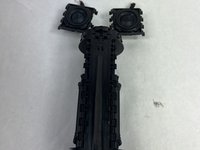
The passive radiator plays a pivotal role in enhancing its bass performance without compromising its compact design. By harnessing the air pressure generated by the active drivers, the passive radiator effectively amplifies low-frequency output, resulting in deeper, more resonant bass tones.

Ce dont vous avez besoin

Outils

Afficher plus…

  1. Logitech UE Boom 3 Passive Radiator Replacement, Lid: étape 1, image 1 de 2 Logitech UE Boom 3 Passive Radiator Replacement, Lid: étape 1, image 2 de 2
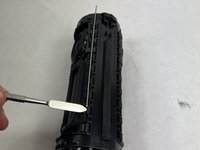
    • Insert a Jimmy into the space between the body and the lid.

    • Wiggle the Jimmy to loosen the lid. Continue around the lid until lid comes off.

    • This may require a lot of force to open.

  2. Logitech UE Boom 3 Passive Radiator Replacement, Speaker Driver: étape 2, image 1 de 3 Logitech UE Boom 3 Passive Radiator Replacement, Speaker Driver: étape 2, image 2 de 3 Logitech UE Boom 3 Passive Radiator Replacement, Speaker Driver: étape 2, image 3 de 3
    • Pull or push the body of the speaker out of the casing.

  3. Logitech UE Boom 3 Passive Radiator Replacement: étape 3, image 1 de 3 Logitech UE Boom 3 Passive Radiator Replacement: étape 3, image 2 de 3 Logitech UE Boom 3 Passive Radiator Replacement: étape 3, image 3 de 3
    • Remove the metal bars from the body of the speaker using the spudger.

    • Carefully pull out the speaker driver from the body of the speaker.

  4. Logitech UE Boom 3 Passive Radiator Replacement, Passive Radiator: étape 4, image 1 de 3 Logitech UE Boom 3 Passive Radiator Replacement, Passive Radiator: étape 4, image 2 de 3 Logitech UE Boom 3 Passive Radiator Replacement, Passive Radiator: étape 4, image 3 de 3
    • Use a spudger to pry open the passive radiators on both sides.

    • Prongs on side of passive radiator are fragile and can snap easily.

Conclusion

To reassemble your device, follow these instructions in reverse order.

Ethan Donahue

Membre depuis le 03/18/24

600 Réputation

6 tutoriels rédigés

Équipe

UMass Dartmouth, Team 1-4, Konn Spring 2024 Membre de l'équipe UMass Dartmouth, Team 1-4, Konn Spring 2024

UMASSD-KONN-S24S1G4

4 membres

6 tutoriels rédigés

0 commentaires

Ajouter un commentaire

Nombre de vues :

Dernières 24 heures : 1

7 derniers jours : 5

30 derniers jours : 10

Total : 94