Aller au contenu principal
Logitech UE MegaBoom 3 Speaker Driver Replacement

Logitech UE MegaBoom 3 Speaker Driver Replacement

Anthony Miles

Anthony Miles et 4 autres contributeurs

Dernière mise à jour le December 29, 2023

15 minutes
Modérée

If your speaker sound quality is not as good or as loud as it is supposed to be the speaker driver may need replacement. Pay careful attention and research the sound issues you are having with your device to find out if you need to replace the speaker driver or the passive radiator as both are responsible for different aspects of the sound output.

An electrodynamic speaker driver, often called simply a speaker driver when the type is implicit, is an individual transducer that converts an electrical audio signal to sound waves

Before starting this guide make sure you turn your speaker off and on and test the sound again just incase the sound issue was not a one time thing. If the sound is still off you will need to complete this guide.

This is a difficult guide to complete so be sure to read the entire guide thoroughly before starting.

Ce dont vous avez besoin

Outils

Afficher plus…

  1. Logitech UE MegaBoom 3 Speaker Driver Replacement, General Disassembly: étape 1, image 1 de 2 Logitech UE MegaBoom 3 Speaker Driver Replacement, General Disassembly: étape 1, image 2 de 2
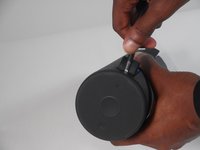
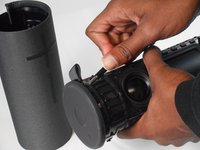
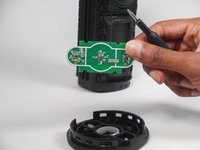
    • To access all internal components, first flip the speaker upwards to where you can see the base.

    • Place your blue iFixit opening picks inside the gap between the speaker and the base to act as a lever when opening the speaker.

  2. Logitech UE MegaBoom 3 Speaker Driver Replacement: étape 2, image 1 de 3 Logitech UE MegaBoom 3 Speaker Driver Replacement: étape 2, image 2 de 3 Logitech UE MegaBoom 3 Speaker Driver Replacement: étape 2, image 3 de 3
    • Using the flat head #4.5 screw driver, carefully lever and rotate the driver around the edge of the speaker to enlarge the gap further.

    • Here, it is ideal to use a spudger as opposed to the flathead screwdriver, however, the flathead makes it so much easier to pry off the cap.

    • Pry off the base of the speaker and remove the end cap.

  3. Logitech UE MegaBoom 3 Speaker Driver Replacement, Power Button Control Board: étape 3, image 1 de 3 Logitech UE MegaBoom 3 Speaker Driver Replacement, Power Button Control Board: étape 3, image 2 de 3 Logitech UE MegaBoom 3 Speaker Driver Replacement, Power Button Control Board: étape 3, image 3 de 3
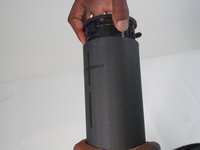
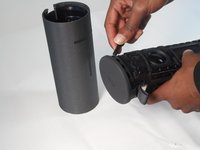
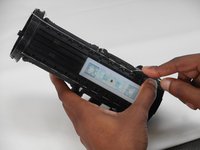
    • Take off the fiber cover by prying it from the top of the speaker using the flathead 4.5 mm screwdriver.

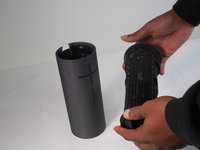
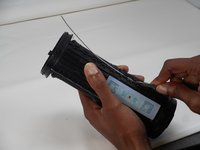
    • After the cover is loosened, the cap can finally be pulled off.

  4. Logitech UE MegaBoom 3 Speaker Driver Replacement: étape 4, image 1 de 3 Logitech UE MegaBoom 3 Speaker Driver Replacement: étape 4, image 2 de 3 Logitech UE MegaBoom 3 Speaker Driver Replacement: étape 4, image 3 de 3
    • Remove the top half of the speaker using the 4.5 mm flat head screwdriver.

    • Now remove the top of the speaker by prying and releasing the tab around the cap using the same screwdriver.

  5. Logitech UE MegaBoom 3 Speaker Driver Replacement: étape 5, image 1 de 3 Logitech UE MegaBoom 3 Speaker Driver Replacement: étape 5, image 2 de 3 Logitech UE MegaBoom 3 Speaker Driver Replacement: étape 5, image 3 de 3
    • With the cap removed, using Phillips #0 screwdriver remove all four 2.0 mm screws to take off the control board.

    • Now you can replace the power button control board.

  6. Logitech UE MegaBoom 3 Speaker Driver Replacement, Speaker Driver: étape 6, image 1 de 2 Logitech UE MegaBoom 3 Speaker Driver Replacement, Speaker Driver: étape 6, image 2 de 2
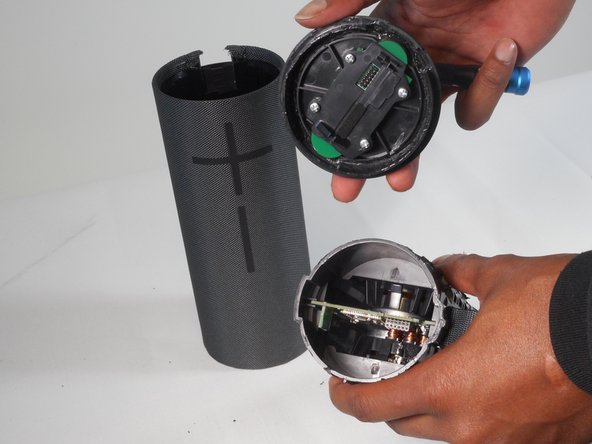
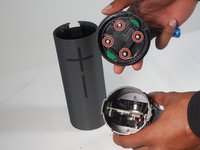
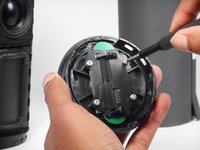
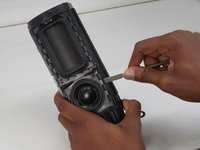
    • Take of the metal rods by gently prying them out using the metal spudger.

    • Be sure to slide them out as gently as possible to prevent the rods from becoming damaged.

  7. Logitech UE MegaBoom 3 Speaker Driver Replacement: étape 7, image 1 de 2 Logitech UE MegaBoom 3 Speaker Driver Replacement: étape 7, image 2 de 2
    • Once the rods are removed, you can pry it off and disconnect the speaker driver.

    • Repeat the same steps to disconnect the speaker driver on the other side of the speaker.

Conclusion

To reassemble your device, follow these instructions in reverse order.

3 autres ont terminé cette réparation.

Anthony Miles

Membre depuis le 09/04/23

1 021 Réputation

6 tutoriels rédigés

Équipe

University of Memphis, Team 1-2, Sneed Fall 2023 Membre de l'équipe University of Memphis, Team 1-2, Sneed Fall 2023

UM-SNEED-F23S1G2

4 membres

7 tutoriels rédigés

0 commentaires

Ajouter un commentaire

Nombre de vues :

Dernières 24 heures : 3

7 derniers jours : 10

30 derniers jours : 32

Total : 692