
MacBook Air 11" Mid 2011 I/O Board Replacement

Introduction
Passez à l'étape 1Use this guide to replace the I/O board to remedy a broken headphone jack, left USB port, or MagSafe DC-In socket.
Ce dont vous avez besoin


-
Outil utilisé dans cette étape :P5 Pentalobe Screwdriver Retina MacBook Pro and Air$5.99
-
Remove the following ten screws:
-
Two 8 mm 5-point Pentalobe screws
-
Eight 2.5 mm 5-point Pentalobe screws
-
-
-
Use the flat end of a spudger to pry both short sides of the battery connector upward to disconnect it from its socket on the logic board.
-
Bend the battery cable slightly away from the logic board so the connector will not accidentally contact its socket.
-
-
-
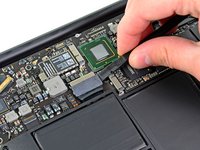
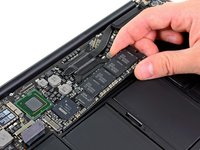
Remove the single 2.9 mm T5 Torx screw securing the SSD to the logic board.
-
-
-
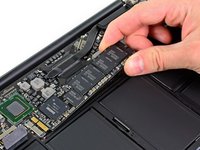
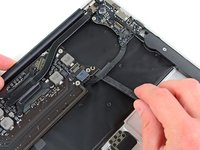
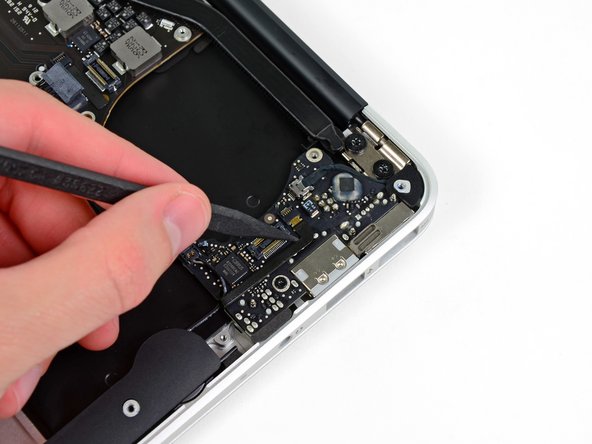
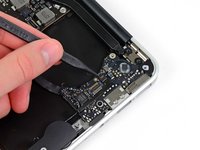
Use the flat end of a spudger to pry the I/O board cable up from its socket on the I/O board.
-
-
-
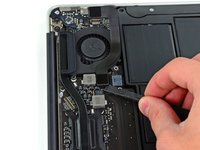
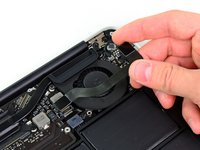
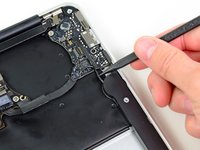
Use the tip of a spudger to carefully flip up the retaining flap on the fan cable ZIF socket.
-
-
-
Remove the following five screws securing the battery to the upper case:
-
Two 5.2 mm T5 Torx screws
-
One 6 mm T5 Torx screw
-
Two 2.6 mm T5 Torx screws
-
-
-
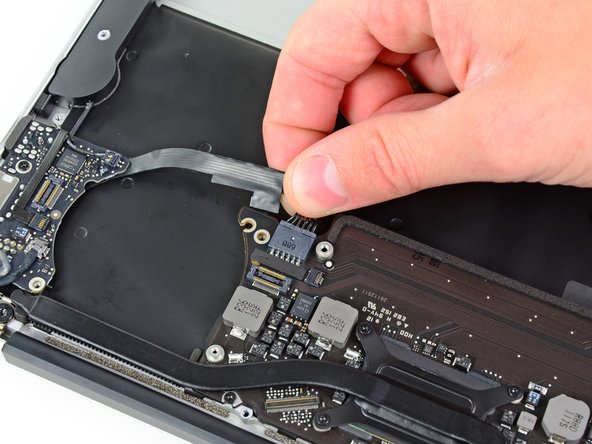
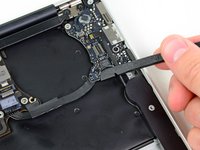
Disconnect the I/O board by pulling the power cable away from its socket on the logic board.
-


To reassemble your device, follow these instructions in reverse order.
To reassemble your device, follow these instructions in reverse order.
Annulation : je n'ai pas terminé ce tutoriel.
42 autres ont terminé cette réparation.

5 commentaires
Thanks. Great instructions!
Thank you so much. Just replaced my IO board and the whole process went without a hitch. I’m absolutely thrilled now that I can charge my Air without going through an extensive wriggling routine with the MagSafe connector every time.
Good day! As I can see it’s all the same with Air 2012 logic board…
I’m looking the board to replace my 2GB mid 2011, can I take 4GB mid 2012 with 1.7Ghz ..?
This was exactly what I needed!!! I replaced the I/O board and I/O board cable on a macbook 11” A1465 that was not charging or playing sound. It now works. Great explanations and details.
Thanks. Good instructions.