Aller au contenu principal
Marshall Uxbridge Power Relay Replacement

Marshall Uxbridge Power Relay Replacement

Angie Delgado

Angie Delgado et 3 autres contributeurs

Dernière mise à jour le January 3, 2025

45 minutes
Difficile

If you are still experiencing power issues with your Marshall Uxbridge speaker (model 1005605) after replacing the power cord Marshall Uxbridge Power Port Replacement, use this guide to replace the power relay.

A power relay transmits power inside the device. Sometimes a power surge can cause them to malfunction.

Before using this guide, inspect the device for debris. To clean dust or debris try following these steps

Before beginning make sure to power off the speaker completely and unplug from the power source.

Ce dont vous avez besoin

Outils

Afficher plus…

iFixit touche une commission lorsque vous achetez par l'intermédiaire de ces liens.
  1. Marshall Uxbridge Power Relay Replacement, Back Panel: étape 1, image 1 de 3 Marshall Uxbridge Power Relay Replacement, Back Panel: étape 1, image 2 de 3 Marshall Uxbridge Power Relay Replacement, Back Panel: étape 1, image 3 de 3
    • Orient your speaker so that the back is facing you.

    • Use a Phillips #2 screwdriver to remove the six 19mm screws from the back plate.

    • Use an iFixit opening pick to remove and lift the back plate to expose the connected wires.

  2. Marshall Uxbridge Power Relay Replacement: étape 2, image 1 de 2 Marshall Uxbridge Power Relay Replacement: étape 2, image 2 de 2
    • Detach the white connector from inside the bottom of the back panel.

    • Detach the small red and white connectors from the motherboard on the left side of the back panel.

  3. Marshall Uxbridge Power Relay Replacement: étape 3, image 1 de 1
    • Pull the blue ribbon cables from the motherboard.

    • Remove the back panel from the speaker base.

  4. Marshall Uxbridge Power Relay Replacement, Power Relay: étape 4, image 1 de 2 Marshall Uxbridge Power Relay Replacement, Power Relay: étape 4, image 2 de 2
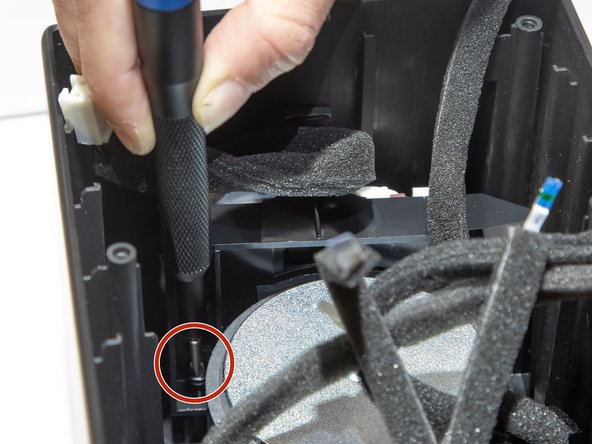
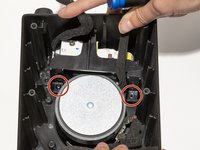
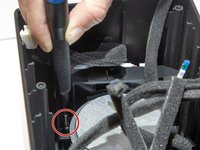
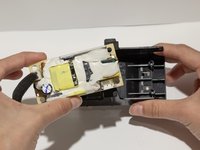
    • Orient the bottom of the speaker to face away from you.

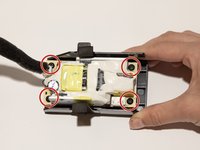
    • Use a Phillips #1 screwdriver to remove the two 12 mm screws holding the power relay in place.

  5. Marshall Uxbridge Power Relay Replacement: étape 5, image 1 de 1
    • Separate the power relay from the speaker.

    • Slide out the blue ribbon cable from the power relay.

  6. Marshall Uxbridge Power Relay Replacement: étape 6, image 1 de 2 Marshall Uxbridge Power Relay Replacement: étape 6, image 2 de 2
    • Turn the power relay over to the other side.

    • Use a Phillips #000 screwdriver to remove the four 6 mm screws from the power relay.

Conclusion

To reassemble your device, follow these instructions in reverse order.

Une autre personne a terminé cette réparation.

Angie Delgado

Membre depuis le 09/06/24

390 Réputation

3 tutoriels rédigés

Équipe

0 commentaires de tutoriel

Ajouter un commentaire

Nombre de vues :

Dernières 24 heures : 0

7 derniers jours : 0

30 derniers jours : 13

Total : 77