Aller au contenu principal
Mitsubishi Diamondpoint NXM76LCD Motherboard Replacement

Mitsubishi Diamondpoint NXM76LCD Motherboard Replacement

Padraic Hoselton

Padraic Hoselton et un autre contributeur

Dernière mise à jour le April 17, 2018

5 - 25 minutes
Modérée
Tutoriel réalisé par la communauté

Ce dont vous avez besoin

Outils

Afficher plus…

iFixit touche une commission lorsque vous achetez par l'intermédiaire de ces liens.
  1. Mitsubishi Diamondpoint NXM76LCD Motherboard Replacement, Removing the stand.: étape 1, image 1 de 3 Mitsubishi Diamondpoint NXM76LCD Motherboard Replacement, Removing the stand.: étape 1, image 2 de 3 Mitsubishi Diamondpoint NXM76LCD Motherboard Replacement, Removing the stand.: étape 1, image 3 de 3
    • Lift the black cover off.

    • Remove all 4 Phillips #2 screws.

  2. Mitsubishi Diamondpoint NXM76LCD Motherboard Replacement, Remove the 5 screws: étape 2, image 1 de 1
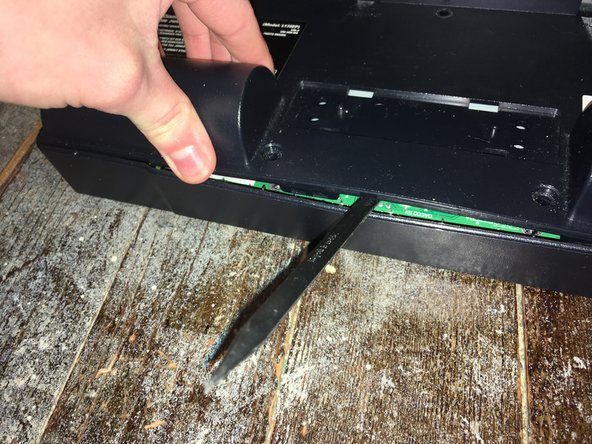
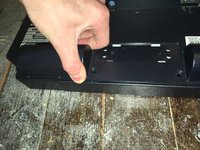
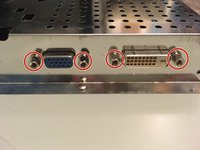
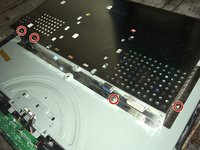
    • Remove the two 24mm Phillips #2 screws.

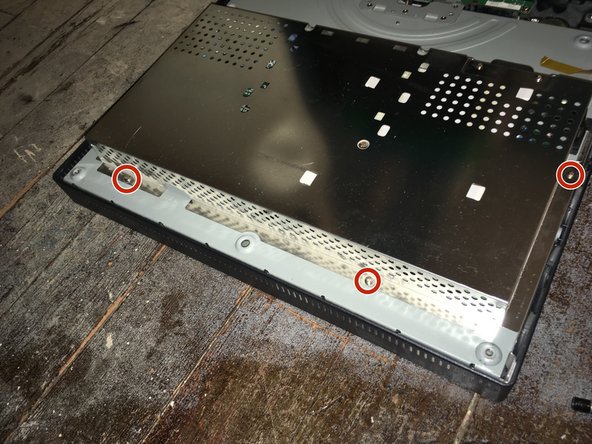
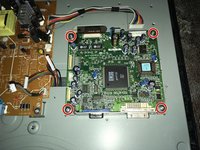
    • Remove the three 8mm Phillips #2 screws.
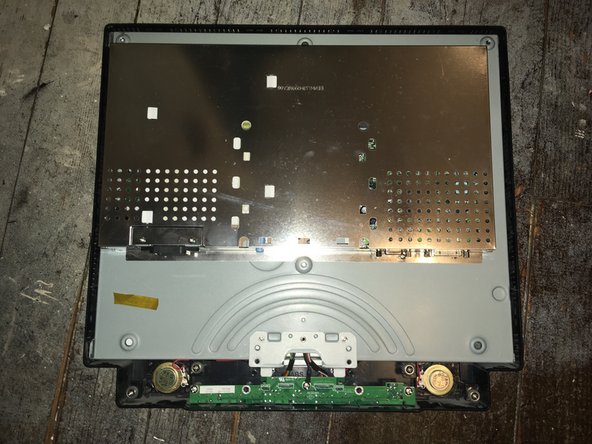
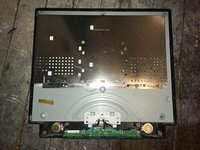
  3. Mitsubishi Diamondpoint NXM76LCD Motherboard Replacement, Remove the back panel: étape 3, image 1 de 3 Mitsubishi Diamondpoint NXM76LCD Motherboard Replacement, Remove the back panel: étape 3, image 2 de 3 Mitsubishi Diamondpoint NXM76LCD Motherboard Replacement, Remove the back panel: étape 3, image 3 de 3
    • Lift the back and pry the back off.

    • The panel is held in with clips on the side. It needs a lot of force the take it off.

  4. Mitsubishi Diamondpoint NXM76LCD Motherboard Replacement, Remove the four screws: étape 4, image 1 de 2 Mitsubishi Diamondpoint NXM76LCD Motherboard Replacement, Remove the four screws: étape 4, image 2 de 2
    • Remove the four 5mm nut screws.

  5. Mitsubishi Diamondpoint NXM76LCD Motherboard Replacement, Remove the 5 screws: étape 5, image 1 de 2 Mitsubishi Diamondpoint NXM76LCD Motherboard Replacement, Remove the 5 screws: étape 5, image 2 de 2
    • Remove the seven Phillips #1 screws.

  6. Mitsubishi Diamondpoint NXM76LCD Motherboard Replacement, Remove the cables: étape 6, image 1 de 3 Mitsubishi Diamondpoint NXM76LCD Motherboard Replacement, Remove the cables: étape 6, image 2 de 3 Mitsubishi Diamondpoint NXM76LCD Motherboard Replacement, Remove the cables: étape 6, image 3 de 3
    • Remove all the cables.

  7. Mitsubishi Diamondpoint NXM76LCD Motherboard Replacement, Remove the motherboard: étape 7, image 1 de 3 Mitsubishi Diamondpoint NXM76LCD Motherboard Replacement, Remove the motherboard: étape 7, image 2 de 3 Mitsubishi Diamondpoint NXM76LCD Motherboard Replacement, Remove the motherboard: étape 7, image 3 de 3
    • Remove the four screws.

    • Pull the motherboard up and off.

  8. Mitsubishi Diamondpoint NXM76LCD Motherboard Replacement: étape 8, image 1 de 1
    • Now you can replace it with a new one.

Conclusion

To reassemble your device, follow these instructions in reverse order.

Une autre personne a terminé cette réparation.

Padraic Hoselton

Membre depuis le 08/22/17

4 312 Réputation

12 tutoriels rédigés

0 commentaires de tutoriel

Ajouter un commentaire

Nombre de vues :

Dernières 24 heures : 0

7 derniers jours : 1

30 derniers jours : 7

Total : 217