Aller au contenu principal
Munchkin Mozart Magic Cube Sound Button Replacement

Munchkin Mozart Magic Cube Sound Button Replacement

Nikolas Soulandros

Nikolas Soulandros et 4 autres contributeurs

Dernière mise à jour le November 29, 2023

5 minutes
Modérée

The sound buttons are located on the face of your cube underneath the colored instrument pictures.

Ce dont vous avez besoin

Outils

Afficher plus…

iFixit touche une commission lorsque vous achetez par l'intermédiaire de ces liens.
  1. Munchkin Mozart Magic Cube Sound Button Replacement, Face plate: étape 1, image 1 de 2 Munchkin Mozart Magic Cube Sound Button Replacement, Face plate: étape 1, image 2 de 2
    • Remove two 6 mm Phillips #2 screws on either side of the On/Off Plate.

  2. Munchkin Mozart Magic Cube Sound Button Replacement: étape 2, image 1 de 1
    • Remove the On/Off switch plate and save the screws so you can use them later to put the plate back on.

  3. Munchkin Mozart Magic Cube Sound Button Replacement: étape 3, image 1 de 1
    • Gently pull out the battery cartridge and if needed, replace the batteries with 3 AA alkaline batteries.

  4. Munchkin Mozart Magic Cube Sound Button Replacement: étape 4, image 1 de 1
    • Starting with the yellow face, insert the metal spudger between the yellow face and the white frame, prying the frame apart.

  5. Munchkin Mozart Magic Cube Sound Button Replacement: étape 5, image 1 de 1
    • Insert the metal spudger in the space created by the plastic opening tool between the frame and face of the cube.

    • Pry the cube face from the frame.

  6. Munchkin Mozart Magic Cube Sound Button Replacement: étape 6, image 1 de 1
    • After removing the square plates, you can unscrew the screws underneath.

    • Remove four 6 mm Phillips #2 screws, located on the sides.

  7. Munchkin Mozart Magic Cube Sound Button Replacement: étape 7, image 1 de 1
    • Remove the rubber corners by simply pulling them off.

  8. Munchkin Mozart Magic Cube Sound Button Replacement, Sound Button: étape 8, image 1 de 1
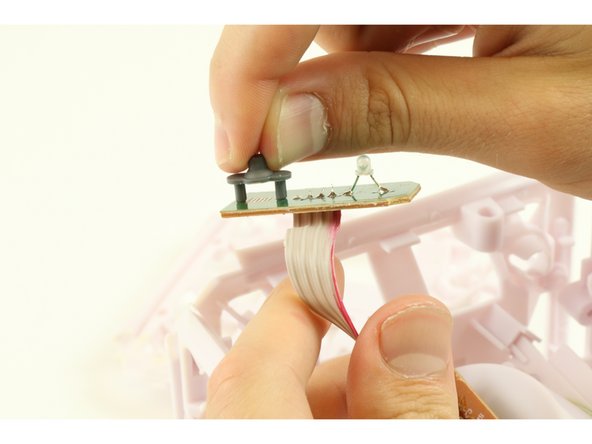
    • Flip the frame over so that green motherboard over so that the LED is face down and the brown side of the motherboard is face up using the Jimmy to remove the glue connecting the motherboard to the white frame.

  9. Munchkin Mozart Magic Cube Sound Button Replacement: étape 9, image 1 de 1
    • Slide the motherboard out of the frame.

  10. Munchkin Mozart Magic Cube Sound Button Replacement: étape 10, image 1 de 2 Munchkin Mozart Magic Cube Sound Button Replacement: étape 10, image 2 de 2
    • To remove the button use your fingers or forceps to remove the gray rubber button piece on the green side of the motherboard.

Conclusion

To reassemble your device, follow these instructions in reverse order.

Nikolas Soulandros

Membre depuis le 08/27/15

291 Réputation

2 tutoriels rédigés

Équipe

USF Tampa, Team 1-4, Sullivan Fall 2015 Membre de l'équipe USF Tampa, Team 1-4, Sullivan Fall 2015

USFT-SULLIVAN-F15S1G4

4 membres

14 tutoriels rédigés

0 commentaires de tutoriel

Ajouter un commentaire

Nombre de vues :

Dernières 24 heures : 0

7 derniers jours : 0

30 derniers jours : 4

Total : 708