
Nvidia Shield Pro Android TV Controller Thumbsticks Replacement
Introduction
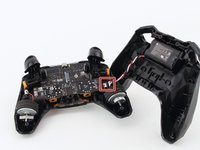
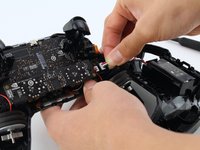
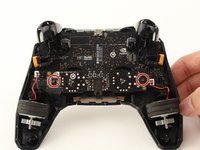
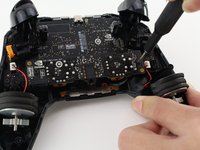
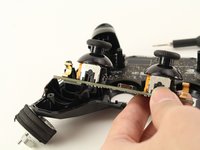
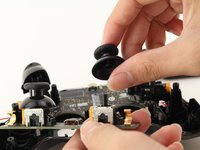
Passez à l'étape 1If the thumbsticks on your Nvidia Shield Pro Android TV controller are unresponsive or are behaving irregularly, use this guide to replace them. The tools you will need are a T6 Torx screwdriver and a plastic opening tool. The process is simple, but gently remove the thumbstick you intend to replace as to not damage the plastic.
Ce dont vous avez besoin


To reassemble your device, follow these instructions in reverse order.
To reassemble your device, follow these instructions in reverse order.
Annulation : je n'ai pas terminé ce tutoriel.
3 autres ont terminé cette réparation.
Équipe

Cal Poly, Team S18-G2, White Winter 2020 Membre de l'équipe Cal Poly, Team S18-G2, White Winter 2020
CPSU-WHITE-W20S18G2
4 membres
12 tutoriels rédigés
3 commentaires de tutoriel
Very good instructions that were very helpful. Do you have recommendations on which thumbsticks are the best since the shield seems to have wider and deeper ones? Thanks again for the guide.