
Oontz Angle 3 ULTRA 3.5mm Auxiliary Port Replacement
Introduction
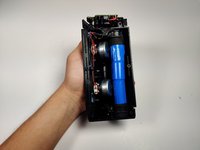
Passez à l'étape 1If your Oontz Angle 3 ULTRA speaker is playing faulty audio with a 3.5mm auxiliary cable, you may need to replace your speaker’s 3.5mm auxiliary port. This replacement guide will walk you through replacing the 3.5mm auxiliary port of your Oontz Angle 3 ULTRA Bluetooth speaker. For this guide, you will need a plastic spudger, a Soldering Iron, and Solder Wick or a Solder Sucker. Follow this guide to learn how to solder and de-solder connections.
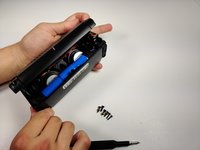
Warning: This guide is missing a crucial step between steps 4 and 5. The original author of this guide did not include the steps to remove the daughterboard from the device.
Ce dont vous avez besoin


-
Outil utilisé dans cette étape :Tweezers$4.99
-
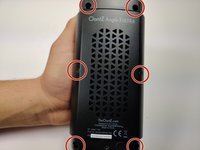
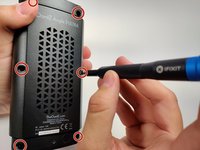
Remove the two black rubber sheaths around the edges of the speaker.
-
Under the symbol-marked sheath there is a white rubber covering for the buttons. Peel this away to reveal the panel underneath.
-
On two corners of its triangular face there is a small divot, which allows you to use your fingernails or a pair of tweezers to grip and peel away the covering.
-
-
-
Outil utilisé dans cette étape :Tweezers$4.99
-
With your solderwick and soldering iron, remove the solder at each point, and gently pull the 3.5mm port away from the motherboard with your tweezers.
-


To reassemble your device, follow these instructions in reverse order.
To reassemble your device, follow these instructions in reverse order.
Annulation : je n'ai pas terminé ce tutoriel.
Une autre personne a terminé cette réparation.
Équipe

Embry-Riddle Aeronautical University, Team S6-G9, Rauch Spring 2020 Membre de l'équipe Embry-Riddle Aeronautical University, Team S6-G9, Rauch Spring 2020
ERAU-RAUCH-S20S6G9
3 membres
6 tutoriels rédigés