Introduction
Passez à l'étape 1Oh the smell of brand new headphones, and the exciting of discover what's inside of this buddies.
Say no more, let's find out...
Ce dont vous avez besoin
Outils


Afficher plus…
-
-
Well we spected some confetti and ballons at time to opening this box but isn't that much.
-
In the box: A Micro USB Cable, Two pairs of gummies, Portable Case and Battery Charger and obviusly two pair of bluetooth Headphones :)
-
-
-
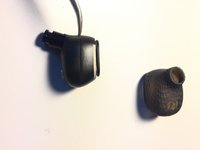
First remove the gummy parts like the "dust" cover.
-
Now time to work in this one (you can choose L or R Headphone) they're the same in the outside at least :)
-
-
-
-
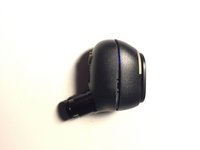
Using a Xacto or a Cutter horizontally press a little bit the the union of both plastics (Glued together).
-
Please be pathient cause it depends if your headphones conserves the "anti dust and waterproof" protection.
-
-
-
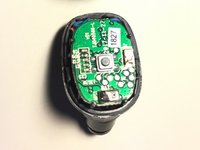
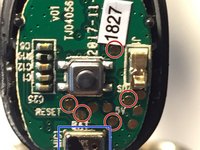
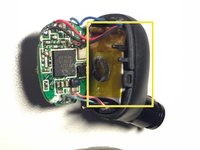
As you can see this is the 1.0 Version, how cute.
-
There are some test points to find out whats the problem: BATT (For to check the Battery votage is present and how much is it), 5V USB Power Supply, SDA & SCL Communication Points, and a RESET Piont (Maybe with a Pull Up push button resistor circuit).
-
An Elecetrolytic Microphone (Note: this one is into each bluetooth buddy).
-
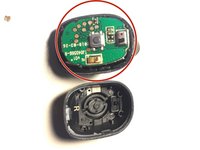
The brain is open: Airoha AB1524 Truly Wireless Bluetooth IC.
-
Battery Cables Positive, Negative, and Sense.
-
LP & LN Speaker Connection (those speakers are inside the tube) very small... and unpower.
-
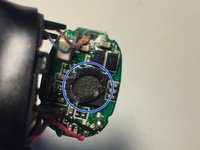
A very Small 55mAh LiPo Battery.
-
-
-
Now it's time to the Right Channel Buddie, same process, and alittle bit different PCB Main.
-
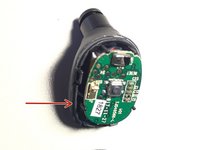
On the Top: An Electrolytic Microphone, Antenna Connection (is located on the borders glued and part of the case), an push button and test points with no info.
-
Upside down: Airoha AB1524 IC, Leds, Battery cables, RP & RN Speaker Connections and some passive electronic components.
-
Kola Loka (If you know you know)...
-
-
-
Apply a little bit of amount of Kola Loka (using the point of a needle) on the circumference of the earphone and glue them. apply force while it dry.
-