Aller au contenu principal
Shark Clean Sense HP102PET Fan Replacement

Shark Clean Sense HP102PET Fan Replacement

KyreseAguilar

KyreseAguilar et 3 autres contributeurs

Dernière mise à jour le January 2, 2025

15 - 25 minutes
Modérée

Use this guide to replace the fan in your Shark Clean Sense HP102PET. The fan is one of the most important parts of the device and it will need to be replaced if it is malfunctioning

Ce dont vous avez besoin

Outils

Afficher plus…

  1. Shark Clean Sense HP102PET Fan Replacement, Outer White Shell: étape 1, image 1 de 3 Shark Clean Sense HP102PET Fan Replacement, Outer White Shell: étape 1, image 2 de 3 Shark Clean Sense HP102PET Fan Replacement, Outer White Shell: étape 1, image 3 de 3
    • Turn off and unplug the air purifier before beginning.

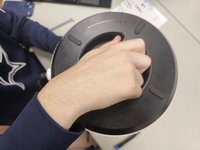
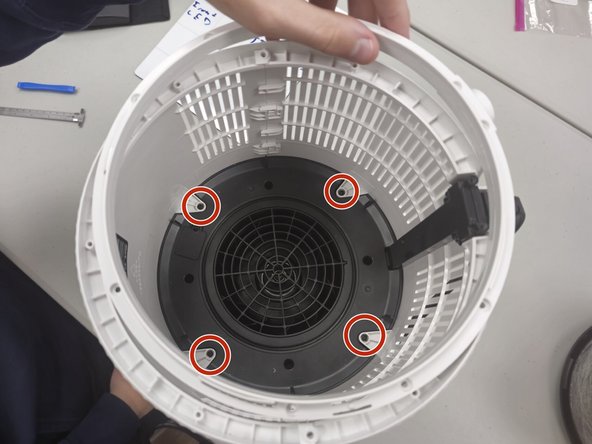
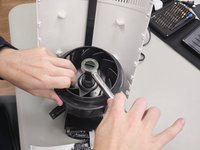
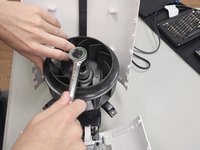
    • Unscrew the one 1.2 cm screw holding the grate at the top with a TR10 Torx screwdriver.

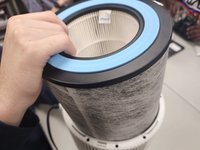
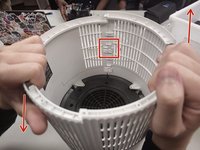
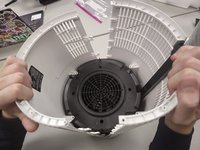
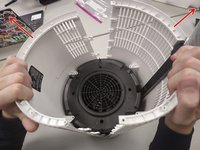
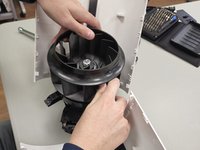
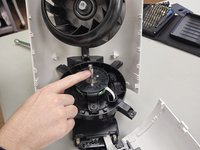
    • Use a prying tool to carefully pry along the outer edges to disengage the inner retaining clips.
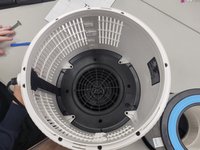
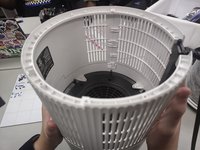
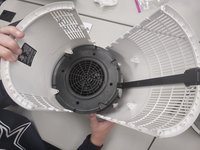
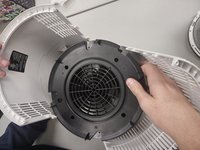
    • These retaining clips can be difficult to disengage, but releasing two clips on the same side should allow you to easily remove the grate.

    • Remove the grate.

  2. Shark Clean Sense HP102PET Fan Replacement: étape 2, image 1 de 1
    • Remove the two 1.2 cm screws with a TR10 Torx screwdriver.

    • Almost all screws are the same length (around 1 cm). The main difference is the bit that's used to remove them.

  3. Shark Clean Sense HP102PET Fan Replacement: étape 3, image 1 de 1
    • Use a Phillips #1 screwdriver to remove the four 1 cm.

    • This will make the fan holder slightly loose, but this will not be a problem until you open the case completely.

  4. Shark Clean Sense HP102PET Fan Replacement: étape 4, image 1 de 3 Shark Clean Sense HP102PET Fan Replacement: étape 4, image 2 de 3 Shark Clean Sense HP102PET Fan Replacement: étape 4, image 3 de 3
    • Flip the device over and unscrew the bottom by turning it clockwise.

    • Remove the filter.

  5. Shark Clean Sense HP102PET Fan Replacement: étape 5, image 1 de 2 Shark Clean Sense HP102PET Fan Replacement: étape 5, image 2 de 2
    • Remove the five 1 cm a Phillips screwdriver.

    • Unscrew the four 1.2 cm screws with a TR10 Torx screwdriver.

    • The ring will not be hard to remove, but be careful on reassembly. Make sure that the power connector is properly seated when putting the ring back on.

  6. Shark Clean Sense HP102PET Fan Replacement: étape 6, image 1 de 2 Shark Clean Sense HP102PET Fan Replacement: étape 6, image 2 de 2
    • Remove the four 1 cm screws that secure the fan housing.

  7. Shark Clean Sense HP102PET Fan Replacement: étape 7, image 1 de 3 Shark Clean Sense HP102PET Fan Replacement: étape 7, image 2 de 3 Shark Clean Sense HP102PET Fan Replacement: étape 7, image 3 de 3
    • Make sure that you are pulling up on the side that allows, as pictured in the red box.

    • Gently slide the cases up and down, or hold one and gently pull up on the opposite side (Down on the left, up on the right for this picture).

    • The whole case will start to separate and the black disc will come loose. This is normal.

  8. Shark Clean Sense HP102PET Fan Replacement: étape 8, image 1 de 3 Shark Clean Sense HP102PET Fan Replacement: étape 8, image 2 de 3 Shark Clean Sense HP102PET Fan Replacement: étape 8, image 3 de 3
    • Gently open the case outwards as there are fragile electronics inside.

    • Remove the fan housing.

  9. Shark Clean Sense HP102PET Fan Replacement, Fan: étape 9, image 1 de 2 Shark Clean Sense HP102PET Fan Replacement, Fan: étape 9, image 2 de 2
    • Use a 1/2 inch wrench unscrew the bolt in the middle of the fan.

    • Note: This process is much easier if one of the shell sides is laid flat.

  10. Shark Clean Sense HP102PET Fan Replacement: étape 10, image 1 de 2 Shark Clean Sense HP102PET Fan Replacement: étape 10, image 2 de 2
    • After removing the bolt, lift the fan up and out.

Conclusion

To reassemble your device, follow these instructions in reverse order.

KyreseAguilar

Membre depuis le 08/28/24

727 Réputation

5 tutoriels rédigés

Équipe

0 commentaires

Ajouter un commentaire

Nombre de vues :

Dernières 24 heures : 3

7 derniers jours : 7

30 derniers jours : 11

Total : 54