Shark ION Robot R75 Battery Replacement
Introduction
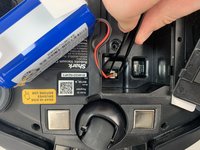
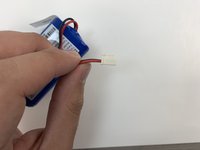
Passez à l'étape 1This guide will show the simple procedure of how to replace the battery on your Shark ION Robot R75. Before performing any maintenance or disassembly, ensure that the robot is turned off.
The battery supplies power to the vacuum while it is undocked and performing its cleaning functions throughout the desired area. While the robot should return to its dock at the end of its programmed path, it’s possible that the vacuum starts running out of battery before completing the program, especially as the device ages and the battery degrades. If your Shark Robot starts to die mid-cycle before reaching its charging dock, a battery replacement may restore your trusty vacuum to its former glory.
The part number for a replacement battery is RVBAT700 and can be purchased directly from Shark’s site.
Ce dont vous avez besoin
-
-
Flip the R75 over so that the underside is facing up.
-
Using a Phillips #1 screwdriver, remove the 4mm screw in the battery cover.
-
Remove the battery cover.
-
-
To reassemble your device, follow these instructions in reverse order.
To reassemble your device, follow these instructions in reverse order.
Annulation : je n'ai pas terminé ce tutoriel.
3 autres ont terminé cette réparation.
1 commentaire de tutoriel
After charging for several hours, my robotic shark stops after 10 minutes. I can push the start button and it will run for another 10 minutes. This has been repeated several times with out it docking itself. What are your thoughts on this?


