Aller au contenu principal

Sony Cyber-shot DSC-W290 casing Replacement

Ce dont vous avez besoin

  1. Sony Cyber-shot DSC-W290 casing Replacement, Battery: étape 1, image 1 de 1
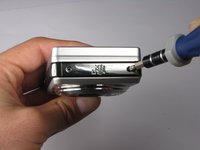
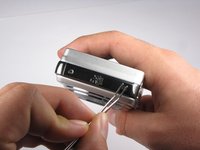
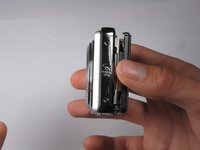
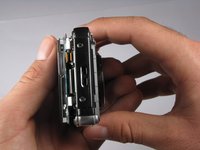
    • Find the hatch labeled "open" on the left side of the bottom of the camera.

    • Slide the hatch in the direction that the arrow is pointing. The hatch will open outward on its own.

  2. Sony Cyber-shot DSC-W290 casing Replacement: étape 2, image 1 de 1
    • Slide the blue locking tab to release the battery.

    • Slide the battery out of the camera.

  3. Sony Cyber-shot DSC-W290 casing Replacement, Outer Casing: étape 3, image 1 de 2 Sony Cyber-shot DSC-W290 casing Replacement, Outer Casing: étape 3, image 2 de 2
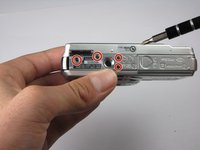
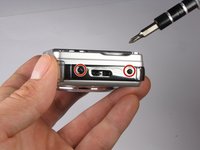
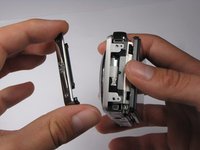
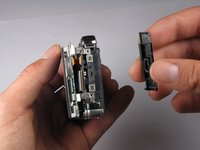
    • Replace hatch and rotate camera 180 degrees. You should still be looking at the bottom of the camera.

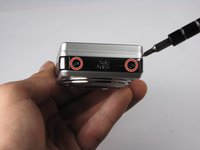
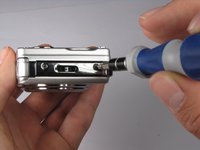
    • Remove the four 2.5mm Phillips #0 screws.

  4. Sony Cyber-shot DSC-W290 casing Replacement: étape 4, image 1 de 3 Sony Cyber-shot DSC-W290 casing Replacement: étape 4, image 2 de 3 Sony Cyber-shot DSC-W290 casing Replacement: étape 4, image 3 de 3
    • Turn the camera so the left side-panel reading "5x Optical Zoom" faces you.

    • Remove the two 2.5mm Phillips #0 screws.

    • You may have to remove the screws with a pair of tweezers when the screws are almost out.

  5. Sony Cyber-shot DSC-W290 casing Replacement: étape 5, image 1 de 3 Sony Cyber-shot DSC-W290 casing Replacement: étape 5, image 2 de 3 Sony Cyber-shot DSC-W290 casing Replacement: étape 5, image 3 de 3
    • Turn the camera so the right side faces you.

    • Remove the two 2.5mm Phillips #0 screws.

    • You may have to remove the screws with a pair of tweezers when the screws are almost out.

  6. Sony Cyber-shot DSC-W290 casing Replacement: étape 6, image 1 de 1
    • Rotate camera so that the back is facing you.

    • Pull the back casing directly away from the LCD screen.

  7. Sony Cyber-shot DSC-W290 casing Replacement: étape 7, image 1 de 2 Sony Cyber-shot DSC-W290 casing Replacement: étape 7, image 2 de 2
    • Turn the camera so that the left side is facing you.

    • Pull the left side-panel off of the camera.

  8. Sony Cyber-shot DSC-W290 casing Replacement: étape 8, image 1 de 2 Sony Cyber-shot DSC-W290 casing Replacement: étape 8, image 2 de 2
    • Turn camera so that the front of the camera is facing you.

    • Pull the front casing directly away from the camera.

    • The right side panel may fall off when you take the front panel off.

  9. Sony Cyber-shot DSC-W290 casing Replacement: étape 9, image 1 de 2 Sony Cyber-shot DSC-W290 casing Replacement: étape 9, image 2 de 2
    • Turn the camera so that the right side is facing you.

    • Pull the right side-panel away from the rest of the camera.

  10. Sony Cyber-shot DSC-W290 casing Replacement: étape 10, image 1 de 2 Sony Cyber-shot DSC-W290 casing Replacement: étape 10, image 2 de 2
    • This is what your camera should look like now that you have removed the casing from all sides.

Conclusion

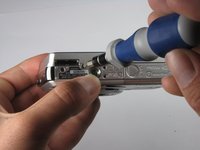
To reassemble your device, follow these instructions in reverse order.

Une autre personne a terminé cette réparation.

Evan Mayer

Membre depuis le 10/05/10

318 Réputation

5 tutoriels rédigés

Équipe

Cal Poly, Team 7-54, Amido Fall 2010 Membre de l'équipe Cal Poly, Team 7-54, Amido Fall 2010

CPSU-AMIDO-F10S7G54

4 membres

16 tutoriels rédigés

0 commentaires

Ajouter un commentaire

Nombre de vues :

Dernières 24 heures : 0

7 derniers jours : 0

30 derniers jours : 2

Total : 1,815