
Sony Vaio VGN-SZ120P Memory Replacement
Introduction
Passez à l'étape 1This is a detailed repair manual with visuals of how to properly replace the RAM modules in the Sony Vaio VGN-SZ120P.
Hazards
Keep out of reach of children and pets.
DO NOT attempt to teardown or repair your device under the influence of drugs or alcohol.
DO NOT ingest any parts of the system.
Use the correct tools as stated in the tools section.
DO NOT touch any gold connectors on interior or exterior of the system.
Make sure system is unplugged before performing any maintenance on the system.
Ce dont vous avez besoin


-
-
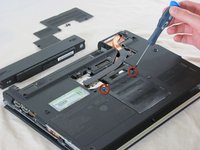
Set the computer display-side down.
-
Unlock the battery by sliding the port-side latch to the 'unlock' position.
-
-
-
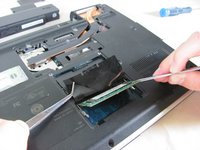
Outil utilisé dans cette étape :Tweezers$4.99
-
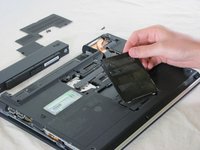
Lift the film covering to reveal the memory module with the tweezers.
-
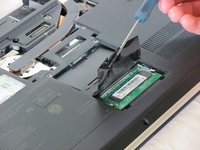
Pull the tabs on both sides of the RAM away from the module. The module will pop up.
-
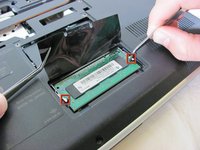
Repeat this step for the other RAM module located directly above the memory module just removed.
-


To reassemble your device, follow these instructions in reverse order.
To reassemble your device, follow these instructions in reverse order.
Annulation : je n'ai pas terminé ce tutoriel.
Une autre personne a terminé cette réparation.
Équipe

Cal Poly, Team 25-89, Amido Spring 2010 Membre de l'équipe Cal Poly, Team 25-89, Amido Spring 2010
CPSU-AMIDO-S10S25G89
4 membres
61 tutoriels rédigés