
Sony Xperia Z Ear Speaker Replacement
Introduction
Passez à l'étape 1This guide will lead you through the steps necessary to replace your ear speaker if it is not functioning properly.
Ce dont vous avez besoin
Pièces


Outils


Afficher plus…
-
-
Turn hair dryer to medium heat.
-
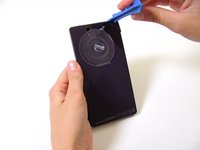
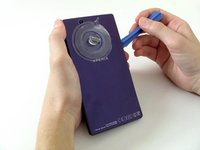
Slowly move the hair dryer along the seams on the back of the phone. Keep the dryer a few inches away from the case.
-
Circulate the dryer for a full minute to soften the adhesive binding the phone together.
-
-
-
-
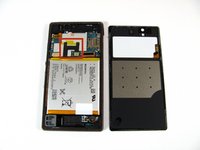
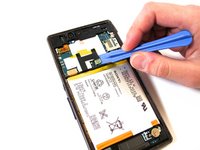
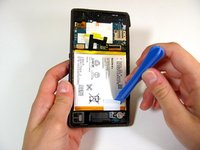
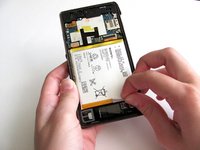
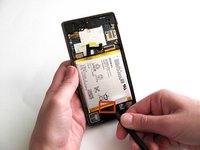
Slide the spudger firmly along the right side of the battery, loosening the adhesive between the casing and battery.
-
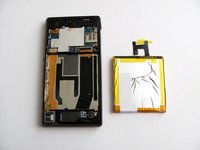
Insert the spudger in the bottom-center to further loosen the adhesive. Carefully separate the battery from the phone by sliding the spudger vertically underneath the battery and prying up. This may take some time and work as the adhesive is very strong.
-
-
-
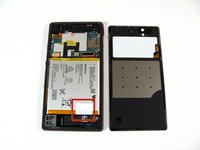
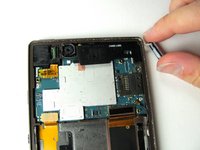
Remove the one 3 mm screw with the Phillips #000 screwdriver. The screw is located at the top right corner of the motherboard. The motherboard is the green/silver circuit board at the top of the phone.
-
-
-
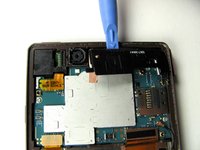
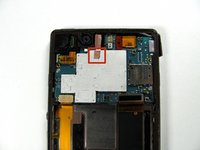
Using with the plastic opening tool, pry up firmly from the bottom and top of the plastic housing. The housing is black and located at the top right corner of the phone.
-
Release the charging cover, located on the right side of the phone at the top. This should cause the housing piece to pop out effortlessly.
-
-
-
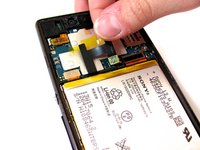
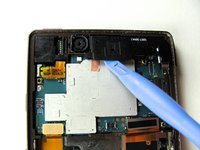
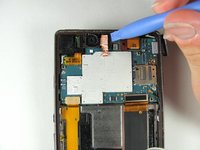
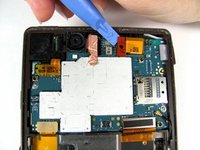
Release the copper tape located at the top middle of the phone with a plastic opening tool. This will take some force since the adhesive is rather strong.
-
With the plastic opening tool, release the pop connector, by lifting up to release it. The pop connector should still be attached to the copper tape.
-
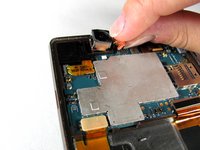
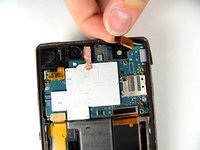
Pull up gently on the copper tape and pop connector to remove the back camera. It should pop out easily.
-
-
-
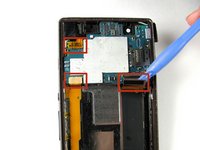
With the plastic opening tool, gently pry the red tape away from motherboard. This pop connector is located at the top right corner of the phone.
-
Using your fingers, gently pull up on the pop connector to remove the front camera. The front camera piece should lift out effortlessly.
-
-
-
The SIM card of the Xperia Z is located in the unlabeled slot above the power button.
-
Gently open the cover by pushing it to the left.
-
-
-
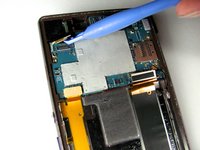
Remove the two 3mm Phillips #000 screws located at the middle left and lower right of motherboard.
-
-
-
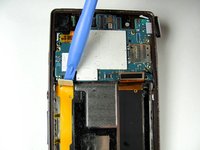
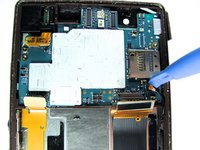
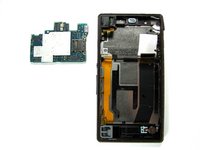
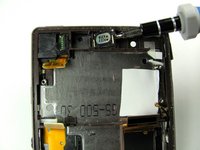
With the plastic opening tool, firmly pry the motherboard up out of the phone case. Pry from the right side of the motherboard where the back camera was previously located.
-
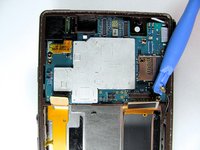
Firmly lift the section up where the silver part of the motherboard comes to the edge of the green base board.
-
-
-
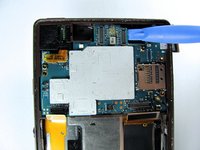
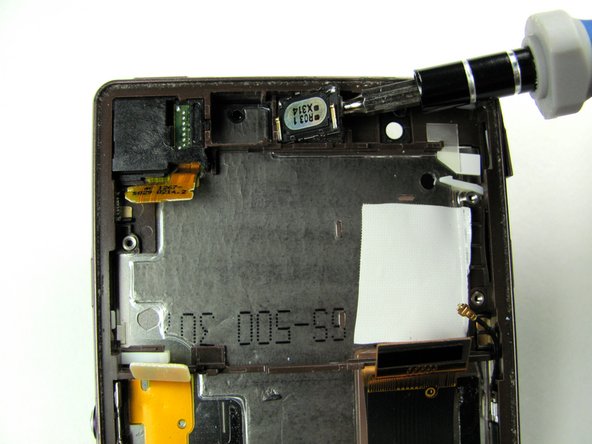
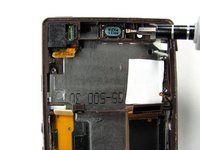
Gently pry the ear speaker out of its position, making sure to keep the tool beneath the adhesive attached to the ear speaker.
-


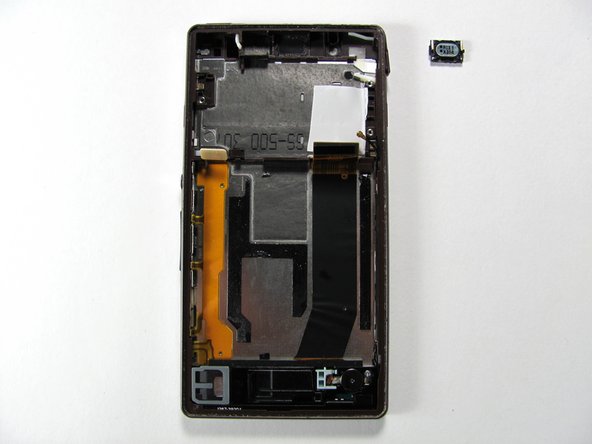

To reassemble your device, follow these instructions in reverse order.
To reassemble your device, follow these instructions in reverse order.
Annulation : je n'ai pas terminé ce tutoriel.
12 autres ont terminé cette réparation.
Équipe

Cal Poly, Team 2-7, Amido Winter 2014 Membre de l'équipe Cal Poly, Team 2-7, Amido Winter 2014
CPSU-AMIDO-W14S2G7
4 membres
25 tutoriels rédigés
6 commentaires
@cagnes06, when you say "the display is no longer working" do you mean the screen stopped working completely? Or do you mean that while you are making calls the display no longer works? Thank you for taking the time to read and reply.
Hi, I fixed the hear speaker without removing the battery or the rear facing camera (to retain the integrity of the copper strip) The camera just slides out of its housing when you lift out the motherboard. The other connectors just need folding back out of the way. Doing it minus all the other steps reduced the time significantly. I had everything pulled apart as necessary in about 5 minutes.
I fixed the speaker by pulling up the prongs that connect to the motherboard. My guess is that one of them was a little low, which affected the connection. Putting back together again was another 4 minutes or so, for a total of about 10 minutes. Hope that helps others avoid damaging the rear facing camera and bits under the battery.
Would it be possible to list steps that you performed (or alternatively - steps you skipped) ?
thanks for the comment. as you mentioned folding the ribbons was sufficient. no need of removing the battery and copper ribbon for camera. thanks!