
Sony Xperia Z3 Compact Main Flex Replacement
Introduction
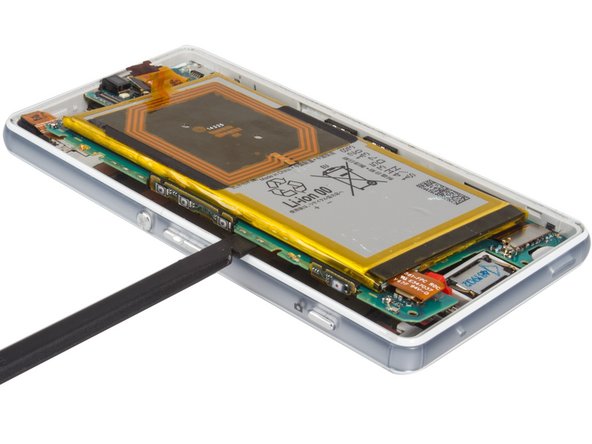
Passez à l'étape 1Remove the main flex cable from the Sony Xperia Z3 Compact motherboard. This includes the button cable.
Ce dont vous avez besoin


-
-
First, heat up.
-
And then place the suction cup and pull to open a gap. Insert into the guitar pick to cut the adhesive sticker under the back cover.
-
Finally, remove the back cover.
-
-


To reassemble your device, follow these instructions in reverse order.
To reassemble your device, follow these instructions in reverse order.
Annulation : je n'ai pas terminé ce tutoriel.
5 autres ont terminé cette réparation.
6 commentaires
hi dear
my mobile (sony xperia z3 mini ) it problem in screen, i changed screen but still not work always black how can i do to fixed my mobile ???? plz help me
BR
Swren
Sony's TFT LCD IPS Fuse exploded on Logic Board. Just solder it out. Use a Good Solder + Microscope.
Compact Z3: https://youtu.be/B3GHVfFs2hU?t=263
Logic BoardCHF 23.04 | 32GB Original Motherboard Für Sony Xperia Z3 MINI D5803 D5833 100% Entsperrt Mainboard Android OS Logic board Mit Chips ersetzen++https://a.aliexpress.com/_BUGwJ5++
TFT LCD IPSCHF 17.92 | Original 4.6 ''Für Sony Xperia Z3 compact z3 mini D5803 D5833 LCD Display Touchscreen Digitizer Montage mit rahmen ohne F++https://a.aliexpress.com/_B0hkDt++
Normal Big Z3: ++https://youtu.be/ZUm7n0tCZVM?t=45++
5803 = EU + USA
5833 = Australia + Asia
I can not loosen a screw, what can I do?
Hey Fixit, I will repair my Wifi, but I can not find the component parts on the mainboard on the Z3c
Have a description where is the wifi component similar to these video because on the Z3Compact?
is there label imei or meid in it ???