
Steam Deck Heatsink Sticker Removal

Introduction
Passez à l'étape 1Prerequisite-only guide! This guide is part of another procedure and is not meant to be used alone.
Use this guide to remove the heatsink sticker before beginning heatsink or cooling fan repairs on a Steam Deck.
Ce dont vous avez besoin


-
-
Power down your Steam Deck and unplug any cables.
-
-
Outil utilisé dans cette étape :FixMat$36.95
-
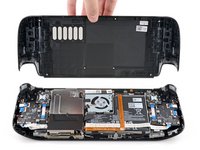
Use a Phillips driver to remove the eight screws securing the back cover:
-
Four coarse thread 9.5 mm-long screws
-
Four fine thread 5.8 mm-long screws
-
-
-
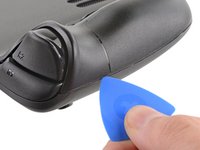
Insert an opening pick into the thin gap between the back cover and the front shell, along the edge of the right grip.
-
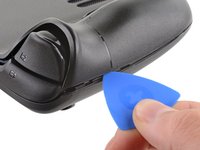
Pry up on the back cover to release it from the locking clips.
-
-
-
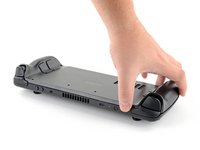
Grip the back cover at the opening you just created and pull it up and away from the device to unclip the long edges.
-
Remove the back cover.
-
-
Outil utilisé dans cette étape :Tweezers$4.99
-
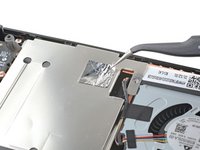
Use a pair of tweezers to remove the piece of foil tape covering the hidden screw on the board shield.
-
-
-
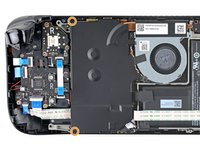
Use a Phillips driver to remove the three screws securing the board shield:
-
One 3.4 mm screw
-
Two 3.7 mm screws
-
-
-
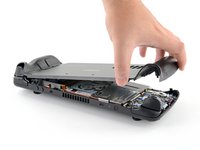
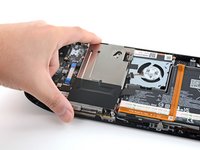
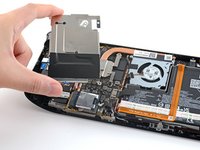
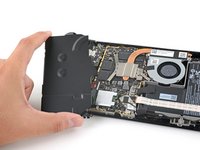
Grip the battery cable by its pull tab and pull it directly away from the motherboard to disconnect it.
-
-
Outil utilisé dans cette étape :Tweezers$4.99
-
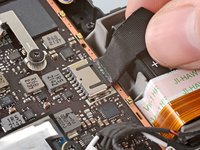
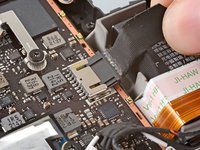
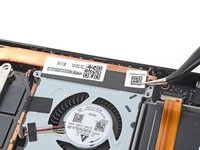
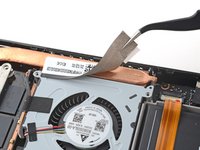
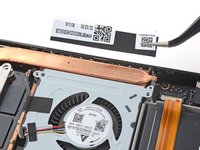
Use a pair of tweezers to remove the sticker from the top edge of the fan.
-


To reassemble your device, follow these instructions in reverse order.
To reassemble your device, follow these instructions in reverse order.

