
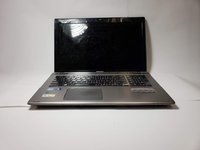
Toshiba Satellite p875 s7200 Speaker Replacement
Introduction
Passez à l'étape 1If you need to replace the speakers, follow this guide. The speaker can be accessed by removing the computer from its casing. To replace this part, you will need a Phillips 0 screw driver and a plastic opening tool.
Ce dont vous avez besoin


-
-
Remove the battery by sliding the tabs to the left.
-
Use the spudger to lift the battery out.
-
-
-
-
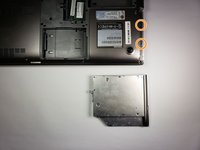
Remove the 6 mm screws around the edges with the Phillips head screw driver. Then remove the 6mm screw holding the disc drive into place. Mileage may vary: removal of two additional 6mm screws, left and right immediately above hard drive compartment, may be necessary to complete this part of the process.
-
Sliding out the disc drive will reveal the final two 4 mm screws on the bottom of the device.
-
-
-
Flip the laptop over to begin the process of removing the keyboard.
-
Use the spudger to pop the keyboard off. Start at the bottom of the keyboard and work your way around.
-
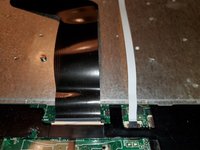
Pictured are a keyboard cable (partially loosened) and an optional cable for a lighted keyboard. These must be gently removed. Raise the keepers on opposite sides of keyboard cable and slide to remove. If applicable, there will be one solid keeper on the illumination cable - gently raise both sides and slide to remove the cable.
-
-
-
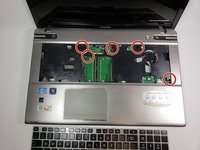
Use the Phillips head screw driver to remove the last 6mm screws holding the case together.
-
After removing the keyboard and the screws, use the spudger around the edges of the laptop to remove the face plate. Double-check for additional screws as noted in step 3.
-
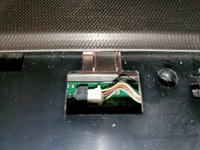
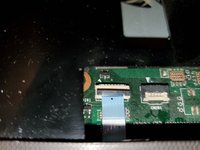
Two cables will need to be gently loosened before face plate can be fully removed. The small cable connection with wires (for fan?) will need to be gently wiggled out with the tip of a small flathead screwdriver. The other (likely touchpad) cable has a flipover keeper. As shown, just gently flip the keeper up to allow the cable to be removed
-


To reassemble your device, follow these instructions in reverse order.
To reassemble your device, follow these instructions in reverse order.
Annulation : je n'ai pas terminé ce tutoriel.
4 autres ont terminé cette réparation.
Équipe

Baylor, Team S1-G3, Williams Fall 2018 Membre de l'équipe Baylor, Team S1-G3, Williams Fall 2018
BU-WILLIAMS-F18S1G3
4 membres
5 tutoriels rédigés
Un commentaire
Good day, please I have been looking for a replacement speaker for my Toshiba P870, where do I get one?
Thanks.