Aller au contenu principal
UE BOOM 2 Speaker Replacement

UE BOOM 2 Speaker Replacement

Keegan Divine

Keegan Divine et 3 autres contributeurs

Dernière mise à jour le February 3, 2021

30 minutes - 1 heure
Difficile

This guide will show how the speaker of the UE Boom 2 is removed. This is an extensive and intrusive process which removes most components of the speaker.

Ce dont vous avez besoin

Outils

Afficher plus…

iFixit touche une commission lorsque vous achetez par l'intermédiaire de ces liens.
  1. UE BOOM 2 Speaker Replacement, Speaker: étape 1, image 1 de 3 UE BOOM 2 Speaker Replacement, Speaker: étape 1, image 2 de 3 UE BOOM 2 Speaker Replacement, Speaker: étape 1, image 3 de 3
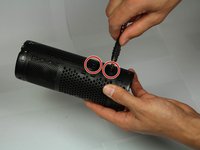
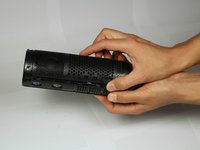
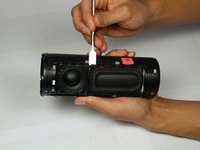
    • Remove the D-ring located at the bottom of the device, opposite end of the power button.

    • Remove by twisting in a counter-clockwise motion.

    • Removing the D-ring will allow you to be able to remove the rubber port cover revealing the headphone jack and charging port.

  2. UE BOOM 2 Speaker Replacement: étape 2, image 1 de 3 UE BOOM 2 Speaker Replacement: étape 2, image 2 de 3 UE BOOM 2 Speaker Replacement: étape 2, image 3 de 3
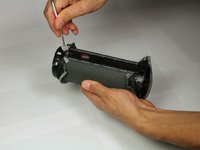
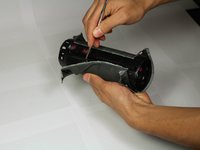
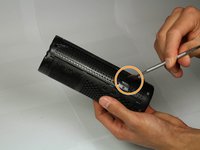
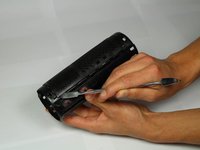
    • Remove the rubber stripping using a metal spudger.

    • Work around the edge of the rubber stripping slowly prying up the edge.

  3. UE BOOM 2 Speaker Replacement: étape 3, image 1 de 1
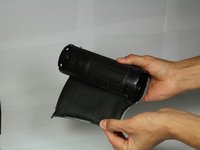
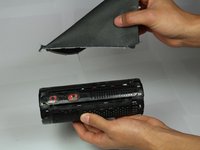
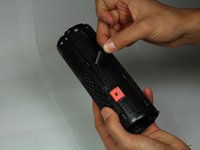
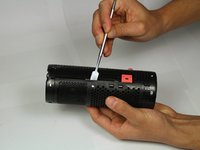
    • Continue removing the rubber stripping down the side.

  4. UE BOOM 2 Speaker Replacement: étape 4, image 1 de 3 UE BOOM 2 Speaker Replacement: étape 4, image 2 de 3 UE BOOM 2 Speaker Replacement: étape 4, image 3 de 3
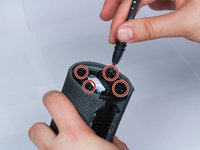
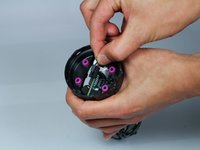
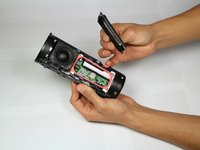
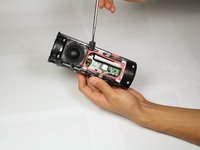
    • On the bottom, unscrew the four 15mm Phillips Head #2 screws, using the Phillips Head #2 screwdriver.

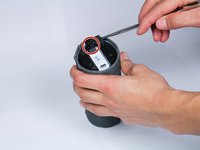
    • Pry up at the location marked, and remove the plastic end cap.

    • Repeat these steps on the top of the speaker.

  5. UE BOOM 2 Speaker Replacement: étape 5, image 1 de 3 UE BOOM 2 Speaker Replacement: étape 5, image 2 de 3 UE BOOM 2 Speaker Replacement: étape 5, image 3 de 3
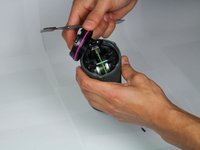
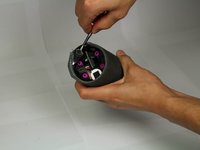
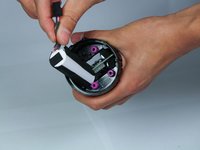
    • Carefully un-loop the cable and unplug from motherboard.

    • Pull out the battery, and handle with care.

  6. UE BOOM 2 Speaker Replacement: étape 6, image 1 de 3 UE BOOM 2 Speaker Replacement: étape 6, image 2 de 3 UE BOOM 2 Speaker Replacement: étape 6, image 3 de 3
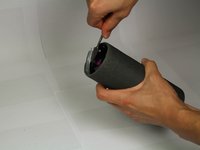
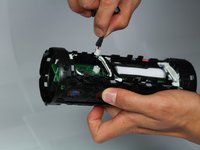
    • Using the metal spudger, pry up the plastic tab on the inside.

    • Pry up around the entire inside circumference.

    • Repeat on the other end.

  7. UE BOOM 2 Speaker Replacement: étape 7, image 1 de 3 UE BOOM 2 Speaker Replacement: étape 7, image 2 de 3 UE BOOM 2 Speaker Replacement: étape 7, image 3 de 3
    • Using the metal spudger tool, pry up the inside edge of the mesh lining.

    • Working down the strip on both sides. Careful as to not rip the mesh.

  8. UE BOOM 2 Speaker Replacement: étape 8, image 1 de 3 UE BOOM 2 Speaker Replacement: étape 8, image 2 de 3 UE BOOM 2 Speaker Replacement: étape 8, image 3 de 3
    • Unscrew the two 5mm Phillips Head #1 screws, using a Phillips Head #1 screwdriver.

    • Using the metal spudger, pry open the edge of the cover.

  9. UE BOOM 2 Speaker Replacement: étape 9, image 1 de 3 UE BOOM 2 Speaker Replacement: étape 9, image 2 de 3 UE BOOM 2 Speaker Replacement: étape 9, image 3 de 3
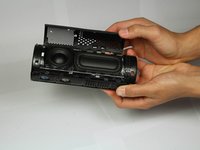
    • Using the metal spudger, pry the plastic casing up.

    • Repeat on the other side of the speaker.

  10. UE BOOM 2 Speaker Replacement: étape 10, image 1 de 2 UE BOOM 2 Speaker Replacement: étape 10, image 2 de 2
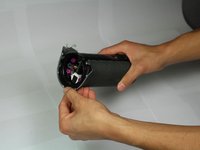
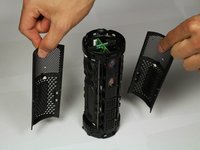
    • Pull each cover off.

  11. UE BOOM 2 Speaker Replacement: étape 11, image 1 de 3 UE BOOM 2 Speaker Replacement: étape 11, image 2 de 3 UE BOOM 2 Speaker Replacement: étape 11, image 3 de 3
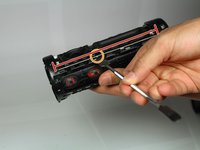
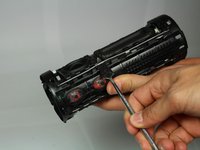
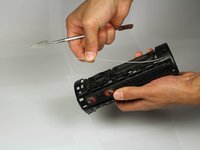
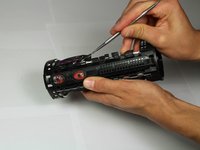
    • Using the metal spudger, specifically the pointy end, find the gap between the speaker and billow (the large speaker-like object next to the speaker).

    • Pry the metal wire up and out at exactly this gap, then slide down wire towards one end to pop it out completely.

    • Once one end is out, use fingers to gently pull off completely, so as not to bend the wire to aggressively.

  12. UE BOOM 2 Speaker Replacement: étape 12, image 1 de 1
    • Repeat previous process for other side of the speaker and billow.

  13. UE BOOM 2 Speaker Replacement: étape 13, image 1 de 2 UE BOOM 2 Speaker Replacement: étape 13, image 2 de 2
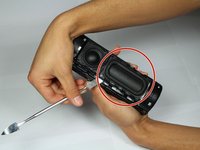
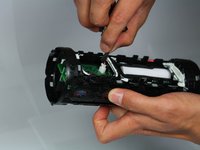
    • Using the metal spudger, work it under the billow (circled).

    • Work the billow up around all edges, and pull out of casing.

  14. UE BOOM 2 Speaker Replacement: étape 14, image 1 de 3 UE BOOM 2 Speaker Replacement: étape 14, image 2 de 3 UE BOOM 2 Speaker Replacement: étape 14, image 3 de 3
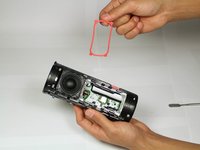
    • With the billow removed, pry up the pink rubber seal with the metal spudger, and remove.

    • Do not use excessive force with the metal spudger, doing so may damage the seal.

  15. UE BOOM 2 Speaker Replacement: étape 15, image 1 de 3 UE BOOM 2 Speaker Replacement: étape 15, image 2 de 3 UE BOOM 2 Speaker Replacement: étape 15, image 3 de 3
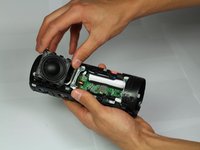
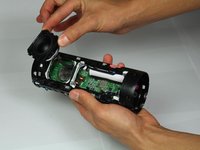
    • Now, begin to use the same technique for the speaker.

    • Be sure to remove the speaker slowly, as there is a cable attaching the speaker to the motherboard.

  16. UE BOOM 2 Speaker Replacement: étape 16, image 1 de 2 UE BOOM 2 Speaker Replacement: étape 16, image 2 de 2
    • Once speaker is detached from casing, remove cable from motherboard.

    • Connect new speaker by attaching the cable to the same place where the old speaker was just taken out of.

    • If both speakers are blown out, repeat steps 14-16 on the other side.

Conclusion

To reassemble your device, follow these instructions in reverse order.

14 autres ont terminé cette réparation.

Keegan Divine

Membre depuis le 01/18/18

649 Réputation

1 tutoriel rédigé

Équipe

Cal Poly, Team S12-G5, Banghart Winter 2018 Membre de l'équipe Cal Poly, Team S12-G5, Banghart Winter 2018

CPSU-BANGHART-W18S12G5

2 membres

15 tutoriels rédigés

10 commentaires de tutoriel

Hi, very good tutorial, you got your 30 points ! ;)

But the main question remains to me : where to get a new speaker as UE doen’t sell spare parts and I don’t find any replacement on internet … any help more than welcome …

Cheers!

Francois ORSERO - Réponse

did you managed to source a replacement speaker? im having the same problem

marleybetteridge -

Still did not find replacement … what about you guys ?

Francois ORSERO -

Check my update you may not have to buy a replacement

Kyle White -

Check with a multimeter if the speakers are actually faulty. Mine were fine, turns out another component broke off and so I soldered it back on. Now it works fine.

Stig -

Ajouter un commentaire

Nombre de vues :

Dernières 24 heures : 3

7 derniers jours : 24

30 derniers jours : 109

Total : 16,694