Aller au contenu principal
Universal Ceiling Fan Remote Replacement

Universal Ceiling Fan Remote Replacement

Chris Mathe

Chris Mathe et 2 autres contributeurs

Dernière mise à jour le December 14, 2020

1 heure
Modérée

As homeowners, we are all familiar with appliances and devices that quit working due to accidents or old age. Ceiling fan remotes are no exception, and when these devices quit working, we immediately find ourselves at the hardware store looking for a replacement.

Unfortunately, universal ceiling fan remotes come in kits that require an installation of a wireless receiver at the base of a ceiling fan.  Working with electrical fixtures can be intimidating for beginners, and this instruction guide was created to show how to replace the wireless receiver in a ceiling fan controlled by one wall switch.

Before using this guide, make sure the following conditions are met:

  • Confirm your ceiling fan is compatible with a universal remote kit. Ceiling fans with built-in integrated remote controls are not compatible.
  • Confirm the base of your ceiling fan has a minimum diameter of 16 cm.
  • Confirm your ceiling fan is supplied with AC 110\120V, 60Hz.

This instruction guide also assumes you are familiar with turning off the electricity at your breaker box and know how to test voltage with a multimeter.

  1. Universal Ceiling Fan Remote Replacement, Universal Ceiling Fan Remote: étape 1, image 1 de 3 Universal Ceiling Fan Remote Replacement, Universal Ceiling Fan Remote: étape 1, image 2 de 3 Universal Ceiling Fan Remote Replacement, Universal Ceiling Fan Remote: étape 1, image 3 de 3
    • Turn off the ceiling fan switch.

    • Turn off the electricity for the fan at the breaker box.

  2. Universal Ceiling Fan Remote Replacement: étape 2, image 1 de 3 Universal Ceiling Fan Remote Replacement: étape 2, image 2 de 3 Universal Ceiling Fan Remote Replacement: étape 2, image 3 de 3
    • Unscrew and remove the ceiling fan blades.

    • Unscrew and remove the ceiling fan canopy from the ceiling bracket.

    • Lower the canopy and rest it on the ceiling fan motor.

    • Gently remove the receiver from the ceiling bracket.

    • Be careful not to snag or rip any wires, as the receiver will still be wired in to the fan's electronics.

  3. Universal Ceiling Fan Remote Replacement: étape 3, image 1 de 3 Universal Ceiling Fan Remote Replacement: étape 3, image 2 de 3 Universal Ceiling Fan Remote Replacement: étape 3, image 3 de 3
    • Before disconnecting any wires, pull apart the black (hot/power) supply wire away from the white (neutral) supply wire.

    • Supply wires are fed directly from the ceiling junction box. If two or more (hot/power) supply wires are connected to your fan, consult a qualified electrician. Multiple supply wires indicate more than one wall switch controls your ceiling fan and complicate the wiring. This guide does not support wire configurations with multiple wall switches.

    • Carefully disconnect each wire connector from the supply wires of the old receiver.

  4. Universal Ceiling Fan Remote Replacement: étape 4, image 1 de 2 Universal Ceiling Fan Remote Replacement: étape 4, image 2 de 2
    • Set your digital multimeter to detect AC voltage.

    • If your multimeter has advanced options, ensure the dial is turned to a minimum ACV 200 setting. If you are unsure how to use a multimeter, consult the manufacturer's instructions or read this guide.

    • Test the black (hot/power) and white (neutral) supply wires for voltage and verify no electricity is detected from the ceiling outlet.

  5. Universal Ceiling Fan Remote Replacement: étape 5, image 1 de 3 Universal Ceiling Fan Remote Replacement: étape 5, image 2 de 3 Universal Ceiling Fan Remote Replacement: étape 5, image 3 de 3
    • Disconnect any remaining wires from the old receiver.

    • Inspect each wire for damaged or frayed ends.

    • If any wires are damaged, proceed to Step 6. Otherwise, skip to Step 7.

  6. Universal Ceiling Fan Remote Replacement: étape 6, image 1 de 3 Universal Ceiling Fan Remote Replacement: étape 6, image 2 de 3 Universal Ceiling Fan Remote Replacement: étape 6, image 3 de 3
    • Cut the end of the damaged wire with a pair of wire cutters.

    • Use a pair of wire strippers to remove 2 cm of the wire casing.

    • Repeat this step as needed until all damaged wires are repaired.

  7. Universal Ceiling Fan Remote Replacement: étape 7, image 1 de 3 Universal Ceiling Fan Remote Replacement: étape 7, image 2 de 3 Universal Ceiling Fan Remote Replacement: étape 7, image 3 de 3
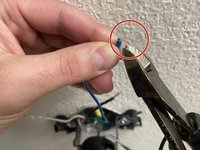
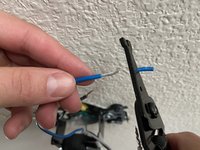
    • Use the following color-coded wires to connect the ceiling fan to the replacement wireless receiver:

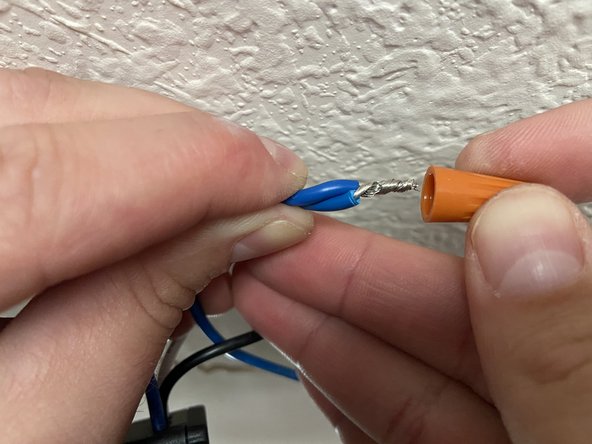
    • Connect the blue wire labeled lighting from the receiver to the blue ceiling fan wire.

    • Connect the black wire labeled motor/L from the receiver to the black ceiling fan wire.

    • Connect the white wire labeled motor/N from the receiver to the white ceiling fan wire.

    • Gently tug each wire connection and make sure it's properly terminated with the twist on connectors.

    • Cut a 15 cm piece of electrical tape and wrap it around the end of each wire.

    • Attach electrical tape at the base of each wire first. Then finish wrapping tape around the wire connector. This will ensure wires do not come loose when they are tucked into the junction box.

  8. Universal Ceiling Fan Remote Replacement: étape 8, image 1 de 1
    • Connect the black wire labeled AC_IN L from the receiver to the black (hot/power) supply wire from the ceiling junction box.

    • Connect the white wire labeled AC_IN N from the receiver to the white (neutral) supply wire from the ceiling junction box.

    • Gently tug each wire to make sure the connection is properly terminated.

    • Wrap each wire connection with 15 cm of electrical tape.

  9. Universal Ceiling Fan Remote Replacement: étape 9, image 1 de 2 Universal Ceiling Fan Remote Replacement: étape 9, image 2 de 2
    • Firmly tuck in the black (hot/power) and white (neutral) supply wires into the ceiling junction box.

    • Gently slide in the receiver while tucking in the blue, white, and black ceiling fan wires above the receiver.

    • While pushing in the receiver, be careful not to damage the antenna.

  10. Universal Ceiling Fan Remote Replacement: étape 10, image 1 de 2 Universal Ceiling Fan Remote Replacement: étape 10, image 2 de 2
    • Reattach the ceiling fan canopy base.

    • Reattach the ceiling fan blades.

    • Turn on the electricity at the breaker box.

Conclusion

Your new ceiling fan remote should be fully functional!

Chris Mathe

Membre depuis le 09/30/20

181 Réputation

1 tutoriel rédigé

Équipe

Un commentaire

Many times the remote control itself has stopped working. It is an easy fix.

1. Check the battery and replace if it tests weak. That may fix the problem.

2 If the rubber buttons don't respond well, the remote needs a simple cleaning. All you need is a medium size phillips screwdriver and a smudge tool to pry apart the remote.

3. Remove the battery and the single (or more) screw, then carefully pry apart the remote.

4. Once apart, the pc board is held with 2-3 small screws to be removed.

5. Lift up and remove the molded rubber button sheet.

6. Using denatured alcohol and cotton ball or soft cloth, carefully clean the contacts on the underside of the buttons, and the pc board contacts. Blow off any particles with canned air.

7. Reassemble in reverse order. Use a new battery and you are good to go.

Note, this works with most all remotes, including tv, cable and games. They all use a rubber button sheet and contacts on a pc board.

Richard Rauth - Réponse

Ajouter un commentaire

Nombre de vues :

Dernières 24 heures : 5

7 derniers jours : 14

30 derniers jours : 56

Total : 8,214