
iPad 3 4G Front Panel Replacement
Introduction
Passez à l'étape 1Note: this is a complete guide for replacing a plain front panel (including glass + digitizer). If you have a Front Panel Assembly replacement part, stop before removing the home button from your old front panel, and reverse the steps to install your new front panel assembly.
Ce dont vous avez besoin
Kit de réparation
Ce kit contient toutes les pièces et tous les outils nécessaires à la réalisation de ce tutoriel.

Pièces

Outils


Afficher plus…
Vidéo d'introduction
-
-
Fill a pot or pan with enough water to fully submerge an iOpener.
-
Heat the water to a boil. Turn off the heat.
-
Place an iOpener into the hot water for 2-3 minutes. Make sure the iOpener is fully submerged in the water.
-
Use tongs to extract the heated iOpener from the hot water.
-
Thoroughly dry the iOpener with a towel.
-
Your iOpener is ready for use! If you need to reheat the iOpener, heat the water to a boil, turn off the heat, and place the iOpener in the water for 2-3 minutes.
-
-
-
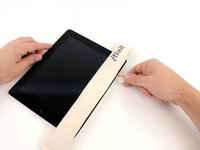
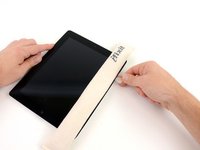
If your display glass is cracked, keep further breakage contained and prevent bodily harm during your repair by taping the glass.
-
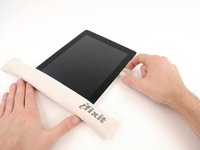
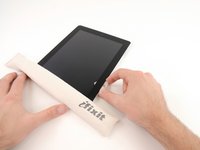
Lay overlapping strips of clear packing tape over the iPad's display until the whole face is covered.
-
Do your best to follow the rest of the guide as described. However, once the glass is broken, it will likely continue to crack as you work, and you may need to use a metal prying tool to scoop the glass out.
-
-
Outil utilisé dans cette étape :Safety Glasses$3.19
-
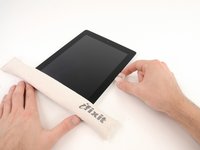
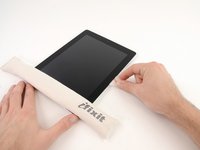
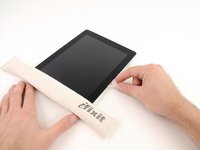
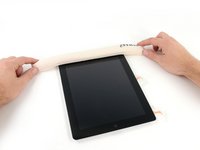
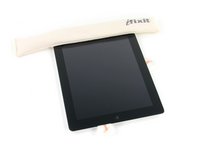
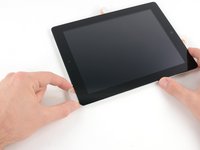
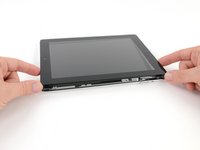
Lay the iOpener flat on the right edge of the iPad, smoothing it out so that there is good contact between the surface of the iPad and the iOpener.
-
Let the bag sit on the iPad for approximately 90 seconds before attempting to open the front panel.
-
-
-
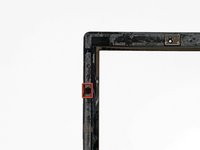
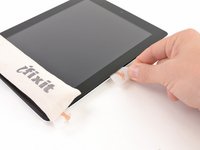
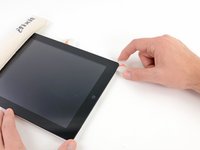
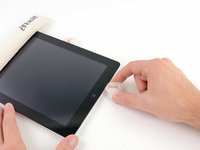
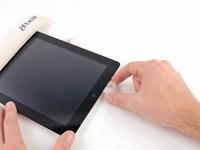
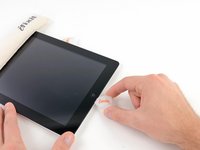
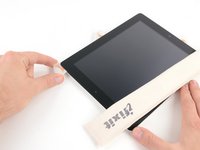
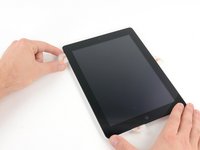
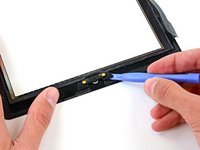
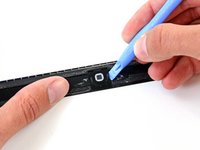
There is a small gap in the iPad's adhesive ring in the upper right corner of the iPad, approximately 2.0 inches (~5 cm) from the top of the iPad. You are going to exploit this weakness.
-
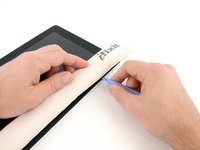
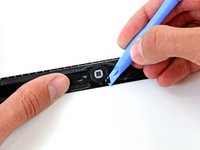
Align the tool with the mute button. Insert the tip of a plastic opening tool into the gap between the front glass and the plastic bezel. Just insert the very tip of the opening tool, just enough to widen the crack.
-
-
-
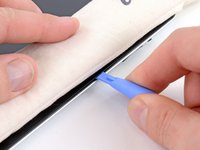
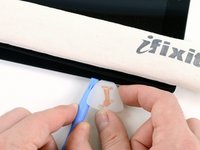
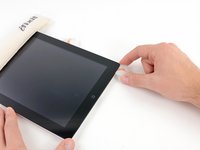
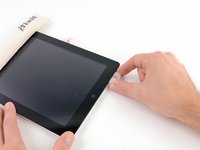
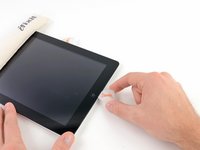
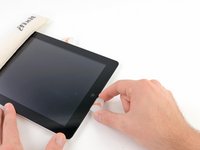
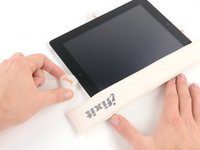
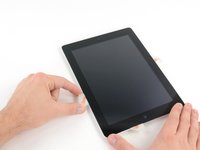
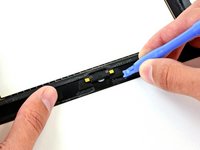
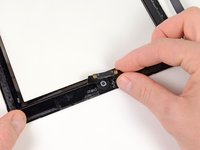
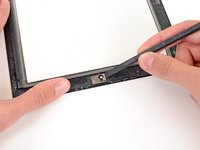
Once you have moved past the Wi-FI antenna (approximately 3" (75 mm) from the right edge, or right next to the home button) re-insert the opening pick to its full depth.
-
Slide the pick to the right, releasing the adhesive securing the Wi-Fi antenna to the front glass.
-
The antenna is attached to the bottom of the iPad via screws and a cable. This step detaches the antenna from the front panel, ensuring that when you remove the panel, the antenna will not be damaged.
-
-
-
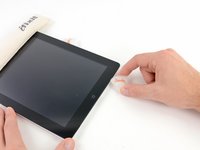
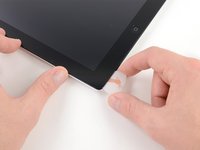
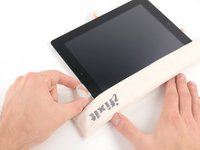
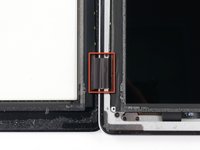
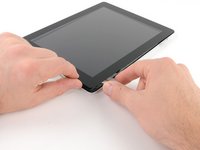
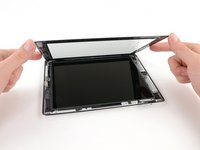
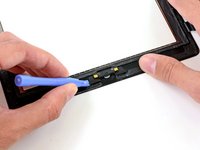
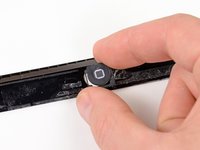
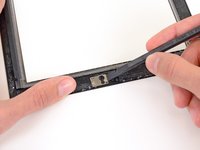
Slide the opening pick along the top edge of the iPad, pulling it out slightly to go around the front-facing camera bracket.
-
The adhesive along this section is very thick, and a fair amount of force may be required. Work carefully and slowly, making sure to not slip and damage yourself or your iPad.
-
-
-
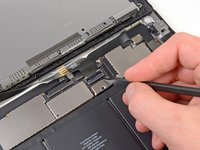
Remove the four 2 mm Phillips #00 screws securing the LCD to the aluminum frame.
-
-
-
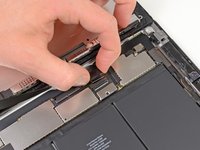
Using the tip of a spudger, peel back the piece of tape covering the LCD ribbon cable connector.
-
-
-
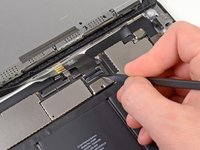
Using the tip of a spudger, peel back the piece of tape that secures the touchscreen ribbon cable to the logic board.
-
-
-
Place the iOpener in the microwave and microwave it for thirty seconds on the highest power setting.
-
Place the iOpener over the home button on the front edge of the display.
-
-
-
Follow the iOpener heating instructions described in the iOpener heating section at the beginning of this guide.
-


To reassemble your device, follow these instructions in reverse order.
To reassemble your device, follow these instructions in reverse order.
Annulation : je n'ai pas terminé ce tutoriel.
131 autres ont terminé cette réparation.

6 commentaires
This guide and the iFixit toolkit was everything I needed to replace the glass on my iPad 3. They are right, it is diffficult, but doable with care.
Great Guide. Removing the display was less difficult than I thought after initially reading the guide. As others pointed out, DO tape the screen. This is even a good idea it's not yet cracked. Mine broke at one point and if it does, it's a mess. I had a screen protector on my display which caught all the little pieces.
Also while it might be possible to save the wifi antenna, i wasn't able to. I recommend buying the new wifi antenna together with the screen replacement right away to not get stuck waiting for parts should it break during screen removal.
I was going to add the button comment as a comment for the part but realized there's no place to do that. Now I can't edit the comment so here is some more:
A note on the bezel: You will notice dents on the bezel after the operation. Not sure if it's just my lack of skills but I doubt one can manage to jam the opener between bezel and glass without producing dents in the bezel.
Also a few remarks on the spare parts. The home button that comes included with the fully assembled replacement screen is rather flimsy. It more or less fully lacks the usual click when you press it. Hopefully it will last a while. I only noticed after I reassembled everything but using the original button might be much better. Also the replacement adhesive seems much less strong.
Success but it took me more like 3 hours, in part because I had a lot of broken glass. Do tape the glass and do wear safety glasses -- I've never done a repair where glass was flying so much. I did not break the Wi-Fi cable but I completely tore the digitizer cable in the lower left edge. Fortunately I had purchased the full assembly (IF116-018-3) that includes a new digitizer cable. Not necessarily a fun repair but who can argue with a $35 repair cost? The metal spudger (IF145-012-1) worked best for prying up the glass panel. Be sure to read the comments in step 30 to prevent damage to the ZIF connector.
The guide is excellent, and the parts provided first-rate. I do not know if the adhesive used on the digitizer plate is the same as in the original iPad. I found that the adhesive strips were not as strong as I would have liked, and although I was very careful to throughly clean the surfaces being attached , I found that the digitizer would still flex slightly when pressed.
I used a strong contact adhesive to secure the plate, and settles on Goop. I used it on the corners and also around the area of the home button, that needs to be seated very securely in order to make a good contact with the two pins it connects to. I followed the adhesive instructions carefully (thin bead on both surfaces, let it air dry for a couple min before contact), and then tightly secured the digitizer to the frame and bezel with scotch tape to keep things pressed down. The next morning the plate was on as tightly as when the iPad was new. I don’t know if this precludes future removal of the screen, however.