Aller au contenu principal

Canon PowerShot SD750 LCD Screen Replacement

Info : Vous modifiez un tutoriel prérequis. Toutes les modifications apportées affecteront les 3 tutoriels qui comprennent cette étape.

Anglais
Français

Traduction de l’étape 4

Étape 4
Canon PowerShot SD750 LCD Screen Replacement: étape 0, image 1 de 2 Canon PowerShot SD750 LCD Screen Replacement: étape 0, image 2 de 2
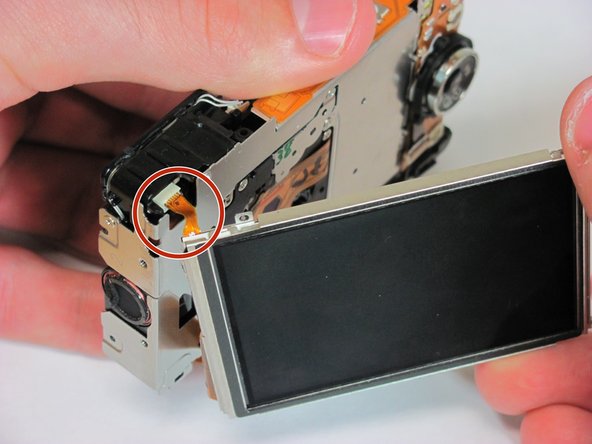
  • Locate the two ribbons connected to the camera and the LCD screen. (One is red and small and the other is wide and orange)

  • Remove the top left red ribbon by gripping the connector on the camera and sliding it straight out.

  • Remove the side orange ribbon by gripping the connector on the camera and sliding it straight out.

  • Note: It may be helpful to use tweezers when removing the connectors. (Pay close attention to how the ribbons are disconnected as this will help in replacing the screen later)

  • Note: When reassembling, use tweezers to reconnect the small red connector on the top left of the screen.

Insérez ici votre traduction

Insérez ici votre traduction

Insérez ici votre traduction

Insérez ici votre traduction

Insérez ici votre traduction

Vos contributions sont faites dans le cadre de la licence open source Creative Commons.