Aller au contenu principal

Nintendo 3DS XL 2015マザーボードの交換

Info : Vous modifiez un tutoriel prérequis. Toutes les modifications apportées affecteront les 8 tutoriels qui comprennent cette étape.

Anglais
Japonais

Traduction de l’étape 3

Étape 3
Nintendo 3DS XL 2015 Motherboard Replacement: étape 0, image 1 de 3 Nintendo 3DS XL 2015 Motherboard Replacement: étape 0, image 2 de 3 Nintendo 3DS XL 2015 Motherboard Replacement: étape 0, image 3 de 3
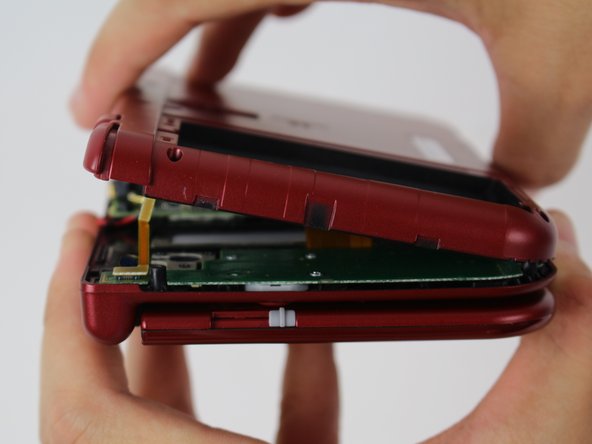
  • To separate the cover, carefully lift it up and away from the hinges (in order to clear the headphone port), then pivot it towards the hinges to expose the circuit boards.

  • Don't fully remove the cover yet, or you may damage the delicate ribbon cable that still connects it to the motherboard.

カバーを外すには、慎重にヒンジから持ち上げて取り外します。(ヘッドホンポートを外すため)それから、ヒンジ側に向けてカバーをテコのように持ち上げて、回路基板を露出させます。

まだカバーを外さないでください。デリケートなリボンケーブルがマザーボードに繋がった状態です。

Vos contributions sont faites dans le cadre de la licence open source Creative Commons.