
Acer Aspire ES1-512-C80E Hard Drive Replacement
Introduction
Passez à l'étape 1You may need to replace the hard drive in your Acer Aspire ES1-512-C80E if you experience problems regarding the device’s storage. To do this, you will need Phillip’s #00/#000 screwdrivers, and a spudger. Additionally, you will need a replacement hard drive. To access the hard drive, the back cover of the device will need to be removed. The process of replacing the battery should take between 15-25 minutes.
Ce dont vous avez besoin
Kit de réparation
Ce kit contient toutes les pièces et tous les outils nécessaires à la réalisation de ce tutoriel.

Pièces

Outils


Afficher plus…
-
-
Place the device upside down on a flat surface.
-
Using a Phillips #00 screwdriver, remove all nineteen 1.2mm screws that secure the bottom cover of the device.
-
-
-
-
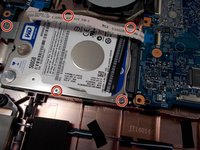
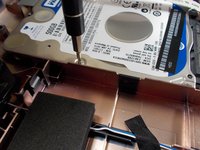
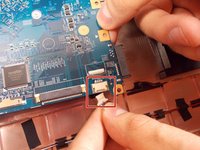
Using a Phillips #000 screwdriver, remove the five 1.2mm screws that hold the hard drive in place.
Only the screw on the opposite end of the port of the hard drive needs to be removed. Then the hard drive will slide away from the Motherboard while still in the plastic case. Once slid out all the way, it lifts out separately with ease.
-
-
-
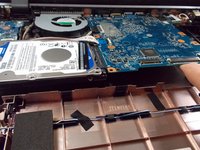
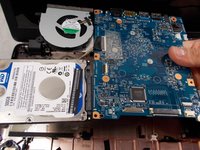
Lift the hard drive, fan, motherboard, and wireless LAN card out of the device.
-
These components are still connected with wires. Remove all plugs that may be attached to other components in order to isolate the group of components.
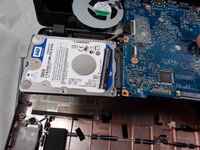
The CD drive may still be connected prior to lifting out of the case. The CD drive will slide away from the motherboard and be removed from the opening on the case.
-
-
-
Once the four components are out of the device, the hard drive is ready to be removed.
-
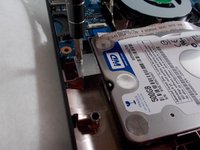
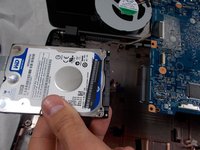
To remove the hard drive, unplug it from the motherboard.
Attention The hard drive does not lift out of the computer CONNECTED to the motherboard. It can damage connection of hard drive on motherboard.
In step 8, Only the screw on the opposite end of the port of the hard drive needs to be removed. Then the hard drive will slide away from the Motherboard while still in the plastic case. Once slid out all the way, it lifts out separately with ease.
-


To reassemble your device, follow these instructions in reverse order.
To reassemble your device, follow these instructions in reverse order.
Équipe

UMass Dartmouth, Team S2-G8, Barthe Fall 2019 Membre de l'équipe UMass Dartmouth, Team S2-G8, Barthe Fall 2019
UMASSD-BARTHE-F19S2G8
3 membres
7 tutoriels rédigés
1 commentaire de tutoriel
Not the best instructions, YouTube worked better for this laptop.
This wasn’t that difficult for me, you of course don’t need to replace the keyboard, or take out the motherboard.
After unscrewing the base and prying open the case, the keyboard side can be lifted out (Two cables need to disconnected). After unscrewing the 1 screw at the back of the HDD, I was able to slide it slowly out.
After removing the bracket from the HDD to my new SSD I slid the new drive in, screwed the bracket back down and closed up.
This should be a 4 step guide and down as moderate