Aller au contenu principal

Acer Aspire Switch 10 SW5-012-18MY Motherboard Replacement

Ce dont vous avez besoin

  1. Acer Aspire Switch 10 SW5-012-18MY Motherboard Replacement, Battery: étape 1, image 1 de 2 Acer Aspire Switch 10 SW5-012-18MY Motherboard Replacement, Battery: étape 1, image 2 de 2
    • Remove the tablet from the keyboard.

    • You will not be needing the keyboard for this guide.

  2. Acer Aspire Switch 10 SW5-012-18MY Motherboard Replacement: étape 2, image 1 de 3 Acer Aspire Switch 10 SW5-012-18MY Motherboard Replacement: étape 2, image 2 de 3 Acer Aspire Switch 10 SW5-012-18MY Motherboard Replacement: étape 2, image 3 de 3
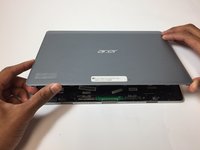
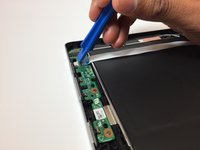
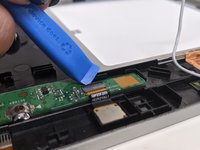
    • Use the opening tool to open the back cover. The opening tool should fit under the cover if you place it above the power button.

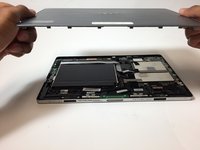
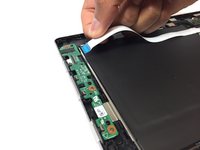
    • Lift this side of the back cover once the opening tool is inside the device.

    • Use the opening tool and your hands to gradually work around the edges of the cover.

  3. Acer Aspire Switch 10 SW5-012-18MY Motherboard Replacement: étape 3, image 1 de 2 Acer Aspire Switch 10 SW5-012-18MY Motherboard Replacement: étape 3, image 2 de 2
    • Lift the back cover off of the device with your hands.

    • You will need to use some force to pull off the back cover.

  4. Acer Aspire Switch 10 SW5-012-18MY Motherboard Replacement: étape 4, image 1 de 2 Acer Aspire Switch 10 SW5-012-18MY Motherboard Replacement: étape 4, image 2 de 2
    • Remove the piece of black, thin tape that is attached to the circuit board closest to the power button.

  5. Acer Aspire Switch 10 SW5-012-18MY Motherboard Replacement: étape 5, image 1 de 3 Acer Aspire Switch 10 SW5-012-18MY Motherboard Replacement: étape 5, image 2 de 3 Acer Aspire Switch 10 SW5-012-18MY Motherboard Replacement: étape 5, image 3 de 3
    • Use the opening tool to lift the ZIF connector holding the ribbon cable in place on the circuit board.

    • Pull out the ribbon cable from the circuit board. This cable should have the word "Audio" on it.

  6. Acer Aspire Switch 10 SW5-012-18MY Motherboard Replacement: étape 6, image 1 de 3 Acer Aspire Switch 10 SW5-012-18MY Motherboard Replacement: étape 6, image 2 de 3 Acer Aspire Switch 10 SW5-012-18MY Motherboard Replacement: étape 6, image 3 de 3
    • Remove the piece of thin, black tape that is attached to the circuit board on the other side of the battery.

    • Use the opening tool to lift the black ZIF connector holding the ribbon cable in place.

    • Pull out the ribbon cable from the circuit board.

  7. Acer Aspire Switch 10 SW5-012-18MY Motherboard Replacement: étape 7, image 1 de 2 Acer Aspire Switch 10 SW5-012-18MY Motherboard Replacement: étape 7, image 2 de 2
    • Partially remove the piece of black tape that is holding the bundled cable connector to the battery in place.

    • Pull on the battery's bundled cable connector to unplug it from the circuit board.

  8. Acer Aspire Switch 10 SW5-012-18MY Motherboard Replacement: étape 8, image 1 de 1
    • Using the Phillips #000 screwdriver, remove the 3 mm screw that is holding the battery in place.

  9. Acer Aspire Switch 10 SW5-012-18MY Motherboard Replacement: étape 9, image 1 de 1
    • Gently remove the ribbon cable from the battery.

  10. Acer Aspire Switch 10 SW5-012-18MY Motherboard Replacement: étape 10, image 1 de 2 Acer Aspire Switch 10 SW5-012-18MY Motherboard Replacement: étape 10, image 2 de 2
    • Carefully remove the battery from the device by lifting it up.

  11. Acer Aspire Switch 10 SW5-012-18MY Motherboard Replacement, Motherboard: étape 11, image 1 de 1
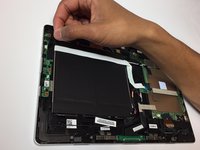
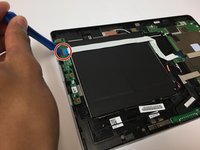
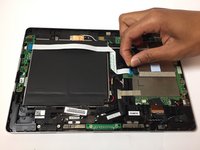
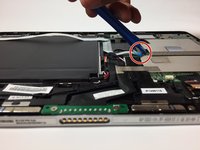
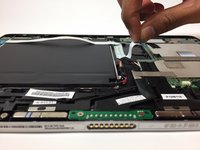
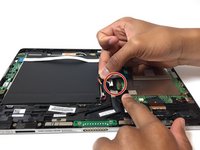
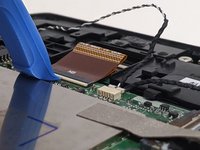
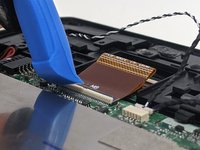
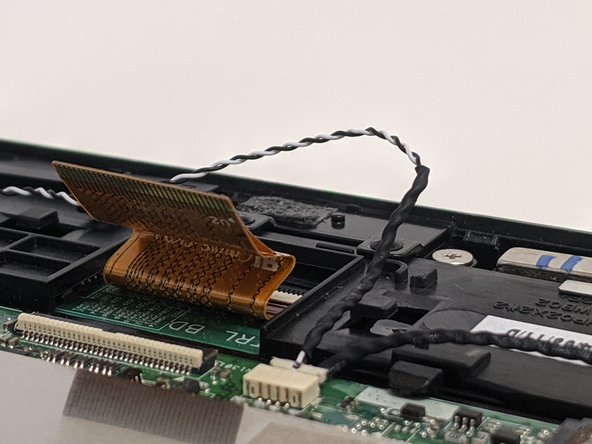
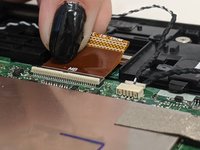
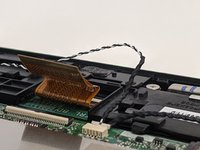
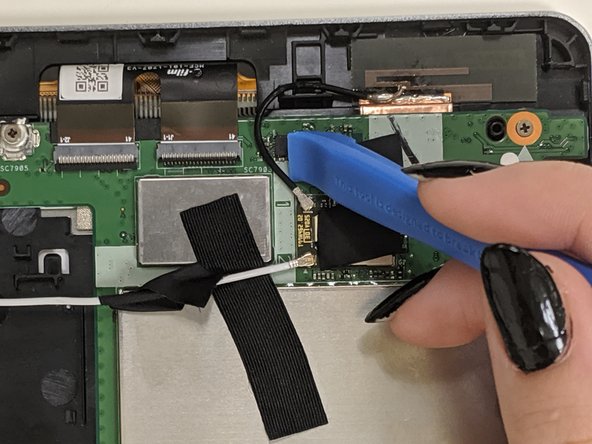
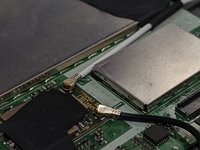
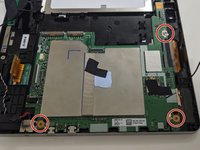
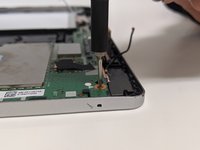
    • Now that the battery is removed, it is time to remove the remaining ribbon cables and connectors (marked in red) from the motherboard.

  12. Acer Aspire Switch 10 SW5-012-18MY Motherboard Replacement: étape 12, image 1 de 2 Acer Aspire Switch 10 SW5-012-18MY Motherboard Replacement: étape 12, image 2 de 2
    • Remove motherboard ribbon cable and slide the opening tool under the cable lock.

    • Flip the cable lock up.

  13. Acer Aspire Switch 10 SW5-012-18MY Motherboard Replacement: étape 13, image 1 de 2 Acer Aspire Switch 10 SW5-012-18MY Motherboard Replacement: étape 13, image 2 de 2
    • Pinch the ribbon cable and slowly remove it from the port.

  14. Acer Aspire Switch 10 SW5-012-18MY Motherboard Replacement: étape 14, image 1 de 1
    • Remove the charging port cable from the motherboard using the opening tool. Remove them in the same fashion you removed the other cables.

  15. Acer Aspire Switch 10 SW5-012-18MY Motherboard Replacement: étape 15, image 1 de 2 Acer Aspire Switch 10 SW5-012-18MY Motherboard Replacement: étape 15, image 2 de 2
    • Remove the Wifi cables.

    • Slide the opening tool under the cables and pop them out of their connectors.

  16. Acer Aspire Switch 10 SW5-012-18MY Motherboard Replacement: étape 16, image 1 de 2 Acer Aspire Switch 10 SW5-012-18MY Motherboard Replacement: étape 16, image 2 de 2
    • Remove the webcam ribbon cable.

    • Slide the opening tool underneath the port lock and pop it upward.

    • Remove the webcam, if possible, putting it safely aside.

  17. Acer Aspire Switch 10 SW5-012-18MY Motherboard Replacement: étape 17, image 1 de 2 Acer Aspire Switch 10 SW5-012-18MY Motherboard Replacement: étape 17, image 2 de 2
    • Using the Phillips #000 screwdriver remove the three 3 mm screws, circled in red, on the motherboard.

  18. Acer Aspire Switch 10 SW5-012-18MY Motherboard Replacement: étape 18, image 1 de 1
    • With all screws and ribbon cables removed, it is now possible to remove the motherboard from the tray.

    • Slide the opening tool under the motherboard.

    • Lift up to remove.

  19. Acer Aspire Switch 10 SW5-012-18MY Motherboard Replacement: étape 19, image 1 de 1
    • You have removed the motherboard from the laptop.

Conclusion

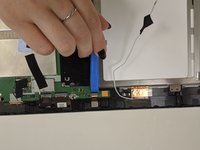
To reassemble your device, follow these instructions in reverse order.

William Oyen

Membre depuis le 09/19/19

460 Réputation

3 tutoriels rédigés

Équipe

0 commentaires

Ajouter un commentaire

Nombre de vues :

Dernières 24 heures : 1

7 derniers jours : 5

30 derniers jours : 34

Total : 2,799