Aller au contenu principal
Anbernic RG35XX Screen Replacement

Anbernic RG35XX Screen Replacement

Muhammad Mustafa Asim

Muhammad Mustafa Asim et 2 autres contributeurs

Dernière mise à jour le December 30, 2024

30 minutes
Modérée

The screen in the Anbernic RG35xx is responsible for displaying games/software. If your screen isn't functioning properly, this guide demonstrates how to replace your screen.

Ce dont vous avez besoin

Outils

Afficher plus…

iFixit touche une commission lorsque vous achetez par l'intermédiaire de ces liens.
  1. Anbernic RG35XX Screen Replacement, Rear Case: étape 1, image 1 de 2 Anbernic RG35XX Screen Replacement, Rear Case: étape 1, image 2 de 2
    • Remove the SD card located on the right side of the device by pushing into the SD card slot and pulling the card out.

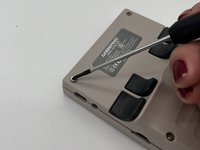
    • Remove the six 1.2 mm screws that secure the back case with a 2.5 Hex Bit screwdriver.

  2. Anbernic RG35XX Screen Replacement: étape 2, image 1 de 1
    • Insert an opening tool into the MicroSD card slot and twist it clockwise to begin releasing the rear case.

    • You'll hear "clicks" as the retaining clips release.

    • Pry around the entire perimeter until the rear case fully releases.

    • Remove the rear case.

  3. Anbernic RG35XX Screen Replacement, Anbernic RG35XX Battery Disconnection: étape 3, image 1 de 2 Anbernic RG35XX Screen Replacement, Anbernic RG35XX Battery Disconnection: étape 3, image 2 de 2
    • Use your fingernails or tweezers to gently remove the battery connector from its socket.

  4. Anbernic RG35XX Screen Replacement, Motherboard: étape 4, image 1 de 1
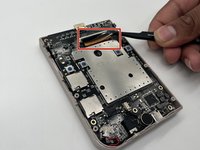
    • Disconnect the red audio cable from its motherboard port by carefully pulling the connector with your index finger and thumb or with fine tip tweezers.

  5. Anbernic RG35XX Screen Replacement: étape 5, image 1 de 1
    • Remove the six 1 mm Phillips screws that secure the motherboard to the case.

  6. Anbernic RG35XX Screen Replacement: étape 6, image 1 de 3 Anbernic RG35XX Screen Replacement: étape 6, image 2 de 3 Anbernic RG35XX Screen Replacement: étape 6, image 3 de 3
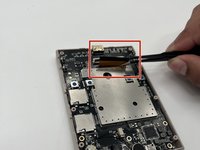
    • Flip up the black ZIF locking flap that secures the bronze ribbon cable.

    • Gently disconnect the bronze ribbon cable.

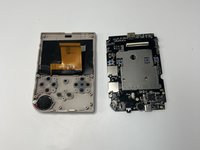
    • Lift the motherboard up and out the chassis.

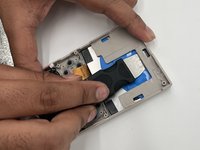
  7. Anbernic RG35XX Screen Replacement, Screen: étape 7, image 1 de 1
    • The wire is not part of the sticker.

    • Remove the black sticker on the back of the screen.

  8. Anbernic RG35XX Screen Replacement: étape 8, image 1 de 3 Anbernic RG35XX Screen Replacement: étape 8, image 2 de 3 Anbernic RG35XX Screen Replacement: étape 8, image 3 de 3
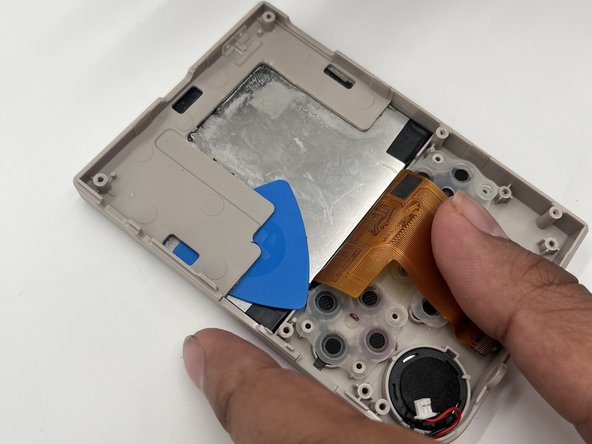
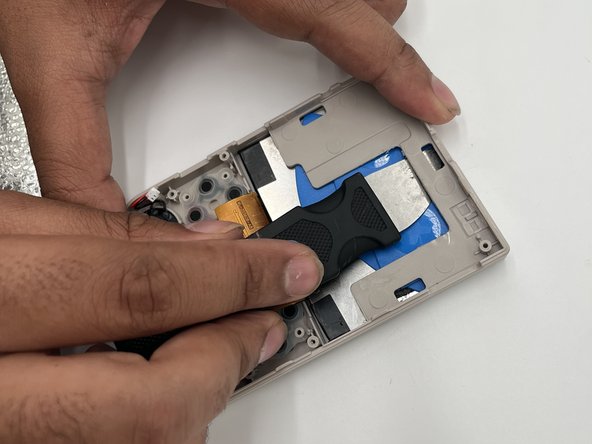
    • The screen is attached with adhesive.

    • Do not heat the device too much, stop at regular intervals and insure that no pieces are being affected badly.

    • Use a hair dryer to gently heat the rear of the screen until it's almost too hot to touch.

    • Insert a jimmy between the screen and plastic bracket. Once a slim gap is opened, insert an opening pick between the plastic bracket and rear screen.

    • Reheat the screen as needed.

    • Continue to insert opening picks around the entire perimeter of the screen as you pry to avoid the adhesive from reengaging.

    • Once the screen fully releases, remove it.

Conclusion

To reassemble your device, follow the above steps in reverse order.
Take your e-waste to an R2 or e-Stewards certified recycler.
Repair didn’t go as planned? Try some basic troubleshooting or ask our Answers community for help.

Équipe

0 commentaires de tutoriel

Ajouter un commentaire

Nombre de vues :

Dernières 24 heures : 11

7 derniers jours : 45

30 derniers jours : 170

Total : 706