Aller au contenu principal
Asus Transformer Flip Book TP200S WiFi Card Replacement

Asus Transformer Flip Book TP200S WiFi Card Replacement

Alejandro Lopez

Alejandro Lopez et 4 autres contributeurs

Dernière mise à jour le May 7, 2024

10 minutes
Modérée

Are you unable to connect to any WiFi connection? If so, then you might be experiencing a faulty WiFi card. This guide will take you through all the steps required to replace your Asus Flip Book WiFi card.

Ce dont vous avez besoin

Outils

Afficher plus…

  1. Asus Transformer Flip Book TP200S WiFi Card Replacement, Battery: étape 1, image 1 de 2 Asus Transformer Flip Book TP200S WiFi Card Replacement, Battery: étape 1, image 2 de 2
    • Remove the back 6mm and 8mm screws with a J000 screwdriver.

  2. Asus Transformer Flip Book TP200S WiFi Card Replacement: étape 2, image 1 de 1
    • Remove the back cover of the flip book by gently using a metal spudger.

  3. Asus Transformer Flip Book TP200S WiFi Card Replacement: étape 3, image 1 de 1
    • Unscrew the battery from the motherboard using a J000 screwdriver on the 3mm screws.

  4. Asus Transformer Flip Book TP200S WiFi Card Replacement: étape 4, image 1 de 2 Asus Transformer Flip Book TP200S WiFi Card Replacement: étape 4, image 2 de 2
    Outil utilisé dans cette étape :
    Tweezers
    $4.99
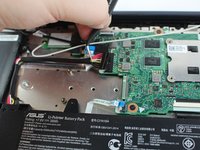
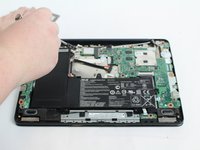
    • The battery comes attached to the motherboard and needs to be disconnected before you can remove it.

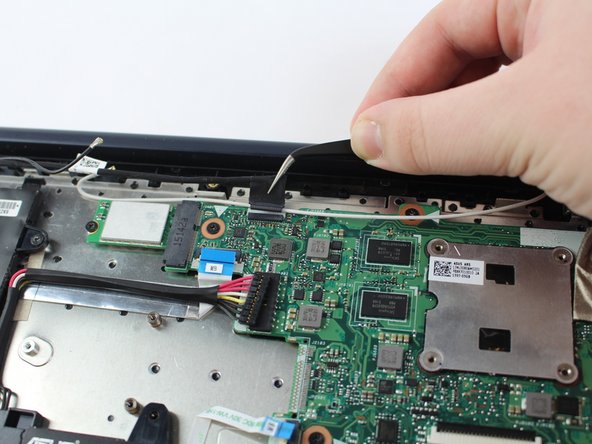
    • Disconnect the battery from the motherboard by gently pulling out the connection with tweezers.

    • Gently remove the Wifi cables hooked to the rim of the battery
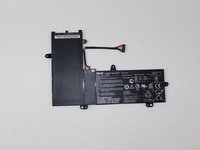
    • Remove the battery

  5. Asus Transformer Flip Book TP200S WiFi Card Replacement, WiFi Card: étape 5, image 1 de 1
    • The WiFi card will be covered by tape and attached to the motherboard.

    • Remove the tape from the WiFi card.

  6. Asus Transformer Flip Book TP200S WiFi Card Replacement: étape 6, image 1 de 3 Asus Transformer Flip Book TP200S WiFi Card Replacement: étape 6, image 2 de 3 Asus Transformer Flip Book TP200S WiFi Card Replacement: étape 6, image 3 de 3
    Outil utilisé dans cette étape :
    Tweezers
    $4.99
    • Unscrew the WiFi card with a JIS #000 screwdriver.

    • Remove the motherboard connection from the WiFi card with tweezers.

    • Pull out the WiFi card.

Conclusion

To reassemble your device, follow these instructions in reverse order.

Une autre personne a terminé cette réparation.

Alejandro Lopez

Membre depuis le 02/15/18

662 Réputation

5 tutoriels rédigés

Équipe

USF Tampa, Team S17-G2, Boczar Spring 2018 Membre de l'équipe USF Tampa, Team S17-G2, Boczar Spring 2018

USFT-BOCZAR-S18S17G2

3 membres

6 tutoriels rédigés

0 commentaires de tutoriel

Ajouter un commentaire

Nombre de vues :

Dernières 24 heures : 0

7 derniers jours : 3

30 derniers jours : 9

Total : 861