
Asus U50F-RBBAG05 Keyboard Replacement
Introduction
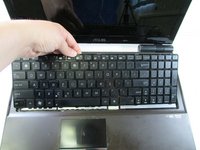
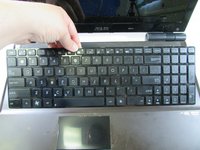
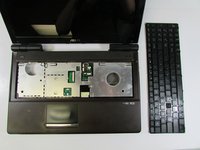
Passez à l'étape 1This guide will teach you how to remove and replace the keyboard on your Asus U50F-RBBAG05 Series laptop. When done correctly, the keyboard should easily lift out as one solid piece.
This replacement can help if some keys are sticking or not working at all, as well as let you see if there is any debris under the keyboard that may need to be cleared out. This also helps if you need to replace any keys, as it would be best to do so when the keyboard is not attached to the laptop.
BE CAREFUL as the keyboard is delicate and must be lifted out carefully to avoid any damage.
Ce dont vous avez besoin


-
-
Turn the laptop over so the bottom is facing up.
-
Slide the two tabs on the bottom of the laptop toward the edges of laptop.
-
Slide the left tab to the left to lock it into the unlocked position. The red showing next to the tab signifies that it's unlocked.
-
-
-
-
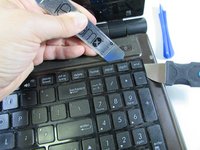
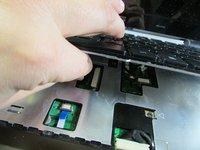
Insert one of the pry tools under a top corner and the other tool under the side of the same corner. Make sure to get under the metal of the keyboard, not just the first layer of plastic. Then pry the corner down and out from under the little overhang its sitting under.
-
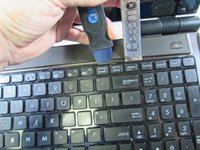
Next, slide the pry tool on the top over to the next overhang and insert the second tool on the other side. Push down and pry out the keyboard.
-
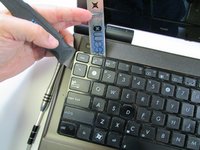
Repeat the same process all the way down to the opposite corner.
-


To reassemble your device, follow these instructions in reverse order.
To reassemble your device, follow these instructions in reverse order.
Équipe

University of Illinois Urbana-Champaign, Team 1-1, Scrogum Spring 2017 Membre de l'équipe University of Illinois Urbana-Champaign, Team 1-1, Scrogum Spring 2017
UICU-SCROGUM-S17S1G1
3 membres
19 tutoriels rédigés