Aller au contenu principal
Asus X200MA Trackpad Replacement

Asus X200MA Trackpad Replacement

Vanessa Garcia

Vanessa Garcia et 6 autres contributeurs

Dernière mise à jour le May 7, 2024

Aucune estimation
Modérée

Use this guide to replace the trackpad on your Asus X200MA.

Ce dont vous avez besoin

Outils

Afficher plus…

  1. Asus X200MA Trackpad Replacement, Back Panel: étape 1, image 1 de 1
    • Remove the following six screws:

    • Six 4 mm screws using a Phillips #0 screwdriver.

    • Remove the following one screw:

    • One 14 mm screw using a Phillips #0 screwdriver.

    • The 14mm screw goes in the center.

  2. Asus X200MA Trackpad Replacement: étape 2, image 1 de 1
    • Take two rubber caps off the back side of the laptop.

    • Use a Phillips #0 screwdriver to remove the two 14 mm screws under the rubber caps.

  3. Asus X200MA Trackpad Replacement: étape 3, image 1 de 1
    • Use a plastic or metal spudger to separate the keyboard from the back panel and lift the keyboard out of place.

  4. Asus X200MA Trackpad Replacement, Trackpad: étape 4, image 1 de 2 Asus X200MA Trackpad Replacement, Trackpad: étape 4, image 2 de 2
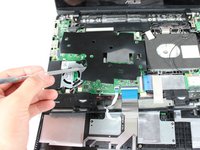
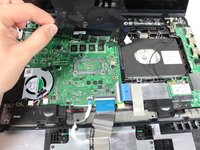
    • Use the spudger to lift up and remove the black plastic covering.

  5. Asus X200MA Trackpad Replacement: étape 5, image 1 de 1
    Outil utilisé dans cette étape :
    Tweezers
    $4.99
    • Remove thinner white strip by first flipping up black piece at the top of the strip with the tweezers and then pulling it out.

  6. Asus X200MA Trackpad Replacement, Mouse: étape 6, image 1 de 1
    • Remove wider blue strip with tweezers.

  7. Asus X200MA Trackpad Replacement: étape 7, image 1 de 1
    • Remove the following eight screws:

    • Eight 3 mm screws using Phillips #0 screwdriver.

  8. Asus X200MA Trackpad Replacement: étape 8, image 1 de 1
    • Remove the following two screws after lifting metal plate off:

    • Two 2 mmm screws using a Phillips #0 screwdriver.

  9. Asus X200MA Trackpad Replacement: étape 9, image 1 de 2 Asus X200MA Trackpad Replacement: étape 9, image 2 de 2
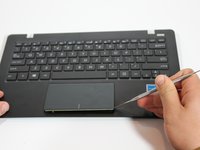
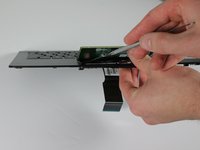
    • Use metal spudger to get in between mouse pad and keyboard and lift off.

Conclusion

To reassemble your device, follow these instructions in reverse order.

Une autre personne a terminé cette réparation.

Vanessa Garcia

Membre depuis le 01/22/15

1 796 Réputation

6 tutoriels rédigés

Équipe

Cal Poly, Team 21-24, Maness Winter 2015 Membre de l'équipe Cal Poly, Team 21-24, Maness Winter 2015

CPSU-MANESS-W15S21G24

4 membres

8 tutoriels rédigés

0Commentaires sur le guide

Ajouter un commentaire

Nombre de vues :

Dernières 24 heures : 1

7 derniers jours : 1

30 derniers jours : 5

Total : 2,147