Aller au contenu principal
Charge 3 Battery Replacement

Charge 3 Battery Replacement

Supper Simon

Supper Simon et un autre contributeur

Dernière mise à jour le January 25, 2024

30 minutes - 1 heure
Modérée
Puces !
Tutoriel réalisé par la communauté
Meilleure introduction

This repair helps fix bad battery life which could cause the device to reboot at random

Ce dont vous avez besoin

Pièces

Outils

Afficher plus…

iFixit touche une commission lorsque vous achetez par l'intermédiaire de ces liens.
  1. Charge 3 Battery Replacement, Battery: étape 1, image 1 de 3 Charge 3 Battery Replacement, Battery: étape 1, image 2 de 3 Charge 3 Battery Replacement, Battery: étape 1, image 3 de 3
    • It is recommended to let the battery discharge before starting. It's a precaution to prevent the battery from lighting on fire if punctured.

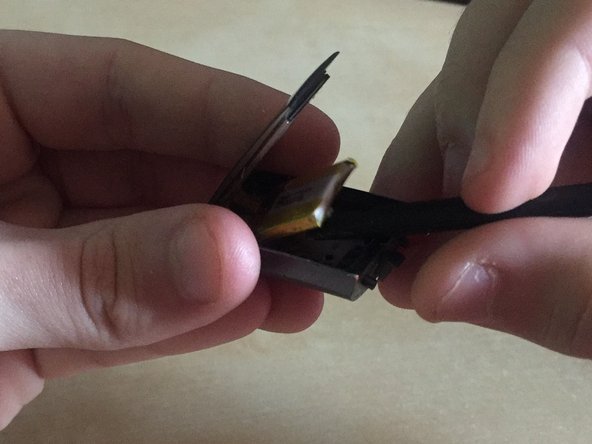
    • Remove both T2 screws

    • Slide off the plastic piece by lifting out and then up

    • Slide plastic and spring assembly off the rail

    • Watch out for the spring on in the band release

  2. Charge 3 Battery Replacement: étape 2, image 1 de 3 Charge 3 Battery Replacement: étape 2, image 2 de 3 Charge 3 Battery Replacement: étape 2, image 3 de 3
    • Heat the glass screen with a blowdryer to soften the adhesives

    • Start the next step on the opposite side of the Fitbit wording below the glass. This is due to the display cables being located there

    • Insert a razor blade between the glass and the body

    • Keep going around the rim of the display until loose

  3. Charge 3 Battery Replacement: étape 3, image 1 de 1
    • This is how close those cables get to the edge underneath the Fitbit wording so be careful

  4. Charge 3 Battery Replacement: étape 4, image 1 de 3 Charge 3 Battery Replacement: étape 4, image 2 de 3 Charge 3 Battery Replacement: étape 4, image 3 de 3
    • Lift the display then battery up gently

    • The battery is attached with a little bit of adhesive so lift it gently

    • Remove battery connector

  5. Charge 3 Battery Replacement: étape 5, image 1 de 2 Charge 3 Battery Replacement: étape 5, image 2 de 2
    • Connect new battery connector

    • Peel the plastic layer off the adhesive backing

    • Put the battery back in place

  6. Charge 3 Battery Replacement: étape 6, image 1 de 1
    • Add a thin layer of E-6000 glue around the casing

    • Make sure to cover the entire surface that makes contact with the screen to keep the device waterproof

  7. Charge 3 Battery Replacement: étape 7, image 1 de 2 Charge 3 Battery Replacement: étape 7, image 2 de 2
    • Flip down the screen and remove any extra glue that squeezes out

    • Take a rubber band and wrap it around the device, this will ensure the display stays in place until the glue cures

    • With the rubber bands on go to step 1 and reverse the steps to reinstall the band release

    • The glue will take between 24 and 72 hours to fully cure

    • When the glue is fully cured remove the rubber bands

    • After all is done you will need to calibrate the battery to do this charge it to 100% then leave it charging for an extra 2 hours use the device until it dies of low power and finally charge it to 100% and it should be good to go

    • And walla you now have a repaired Fitbit Charge 3

Conclusion

Thanks to ShellingRook27's Original Dissasembly I Was Able to Make this Guide And Bring a new life to my old device.

2 autres ont terminé cette réparation.

Supper Simon

Membre depuis le 03/18/23

464 Réputation

2 tutoriels rédigés

4 commentaires

Fantastic - thanks for sharing!

K80 - Réponse

No problem anything to make the world a more fixable place

Supper Simon -

Hi! My fitbit charge 4 is taken apart now but now that I've lifted the battery what I see is completely different from what's shown in the photo. If I haven't already destroyed my Fitbit, how about a version for the Fitbit 4? Or a video would be even better. In the meantime, I'm stuck. I bought the battery from you.

Regi

Regina Merwin - Réponse

I don't have a charge 4 so I'm only going off the internet here, but you can follow some of the steps here to replace the battery https://www.youtube.com/watch?v=2C1DiVXj... and if you need any further guidance please let me know

Supper Simon -

Ajouter un commentaire

Nombre de vues :

Dernières 24 heures : 3

7 derniers jours : 19

30 derniers jours : 94

Total : 2,210