
Dell Inspiron 15-5567 CPU Fan Replacement

Introduction
Passez à l'étape 1An effective CPU fan will prevent the laptop from overheating. It is placed over the processor as it’s the most thing that gets hot. If you’re having overheating problems, it is probably because you have too many programs running at the same time, or maybe one heavy program, or a game that requires high processing capabilities. To fix it, please visit our troubleshooting page and scroll down to “Laptop is Overheating“. If that didn’t help, you might need to take the fan off, clean it, or replace it. A fan replacement is a relatively easy task. In the Dell Inspiron 15-5567, the fan replacement will require a Philips #0 screwdriver and a plastic opening tool for opening the back cover.
Ce dont vous avez besoin


-
-
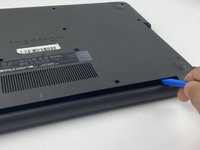
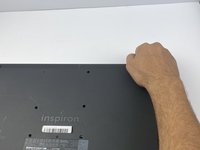
Orient the laptop with the back cover facing upward and the INSPIRON engraving reads legible (not flipped).
-
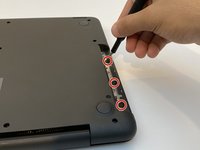
Remove 13 M2.5x8mm screws using a Philips #0 screwdriver.
-
Remove two M2x4mm screws using the same screwdriver.
-
-
-
-
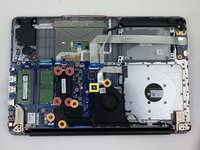
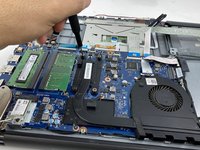
Remove four M2.5x5mm screws from the fan using a Philips #0 screwdriver.
-
Remove the other four M2x3mm screws using a Philips #0 screwdriver.
-
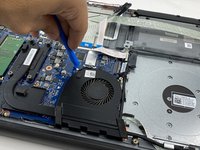
Gently disconnect the fan cable from the motherboard using the blue plastic opening tool.
-


To reassemble your device, follow these instructions in reverse order.
To reassemble your device, follow these instructions in reverse order.
Annulation : je n'ai pas terminé ce tutoriel.
4 autres ont terminé cette réparation.

Équipe

Embry-Riddle Aeronautical University, Team S16-G1, Branham Spring 2020 Membre de l'équipe Embry-Riddle Aeronautical University, Team S16-G1, Branham Spring 2020
ERAU-BRANHAM-S20S16G1
3 membres
6 tutoriels rédigés
Un commentaire
Warning, under the fan, a thin cable going to the CD drive was stuck with tape. I was able to remove it, but the connector did pull out of the motherboard, which took a bit of fiddling to get connected again.