Aller au contenu principal
Dell Inspiron 3148 Back Panel Replacement

Dell Inspiron 3148 Back Panel Replacement

Christopher Gravelle

Christopher Gravelle et 2 autres contributeurs

Dernière mise à jour le December 18, 2018

4 - 5 minutes
Très facile
Photos d’action

Use this guide to remove the back panel in order to access internal components or replace the panel.

Ce dont vous avez besoin

Outils

  1. Dell Inspiron 3148 Back Panel Replacement, Back Panel: étape 1, image 1 de 2 Dell Inspiron 3148 Back Panel Replacement, Back Panel: étape 1, image 2 de 2
    • Ensure the device is powered off and unplugged. Close the device and orient it face up, with the hinges further away from you.

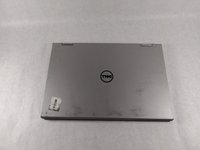
    • Flip the device over so the backside is facing you.

  2. Dell Inspiron 3148 Back Panel Replacement: étape 2, image 1 de 1
    • Using the Phillips #1 screwdriver, remove all nine 7mm screws.

  3. Dell Inspiron 3148 Back Panel Replacement: étape 3, image 1 de 2 Dell Inspiron 3148 Back Panel Replacement: étape 3, image 2 de 2
    • Using the plastic opening tool, pull the back panel upward. Move the opening tool along the edge of the device and lift the panel off of your device.

    • Be aware, the back panel is kept in place by magnetic clips. They will offer some resistance, but continue to gently leverage upwards.

Conclusion

To reassemble your device, follow these instructions in reverse order.

2 autres ont terminé cette réparation.

Christopher Gravelle

Membre depuis le 10/23/18

837 Réputation

7 tutoriels rédigés

Équipe

UMass Dartmouth, Team S1-G2, Simcock Fall 2018 Membre de l'équipe UMass Dartmouth, Team S1-G2, Simcock Fall 2018

UMASSD-SIMCOCK-F18S1G2

3 membres

7 tutoriels rédigés

0 commentaires

Ajouter un commentaire

Nombre de vues :

Dernières 24 heures : 2

7 derniers jours : 10

30 derniers jours : 12

Total : 289