
Dell Inspiron 7586 2-in-1 SSD Replacement
Introduction
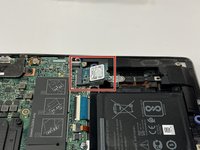
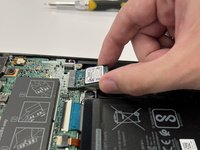
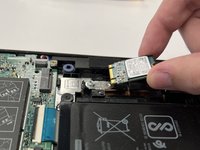
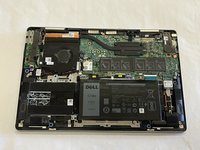
Passez à l'étape 1This guide is designed to help you replace or upgrade the NVMe SSD in your Dell Inspirion 7586 2 in 1 laptop.
CPU: Intel Core i7-8565U 1.80 GHz
Chipset: Whiskey Lake
RAM: DDR4-16GB-2666MHz
SSD: SK hynix PCIe NVMe 512GB
GPU: NVIDIA GeForce MX150
OS: Windows 10 Pro
Before you begin this repair, turn off your laptop and unplug it from the charger.
Ce dont vous avez besoin
Pièces
Outils


Afficher plus…
-
-
Flip the laptop over so the bottom is facing up.
-
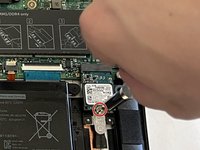
Use a Phillips #00 screwdriver to remove nine screws from the back case.
-
Insert an opening tool or spudger in the seam between the back case and the body of the laptop.
-
Work your way around the perimeter of the laptop and release the clips that secure the back case.
-
Remove the back case.
-
-


To reassemble your device, follow these instructions in reverse order.
To reassemble your device, follow these instructions in reverse order.
Annulation : je n'ai pas terminé ce tutoriel.
2 autres ont terminé cette réparation.
Équipe

CSU Los Angeles, Team 7-1, Grodsky Spring 2024 Membre de l'équipe CSU Los Angeles, Team 7-1, Grodsky Spring 2024
CSULA-GRODSKY-S24S7G1
2 membres
1 tutoriel rédigé